Book your free consultation Today

Brow Lamination Aftercare Instructions That Work

A fresh brow lamination gives you that polished, brushed-up look without filling in every sparse area each morning. But the first day matters. Following the right brow lamination aftercare instructions helps the brow hairs set in their new direction, keeps them conditioned, and protects the smooth, lifted finish you came in for.

At The Permanent Makeup Studio, we want your brows to look beautiful well beyond your appointment. Here is what to do, what to skip, and how to keep your results looking soft rather than stiff.

The first 24 hours: Let your brows set

For the first 24 hours after brow lamination, keep your brows completely dry. That means no washing your face around the brow area, steamy showers, swimming, sweat-heavy workouts, saunas, or hot yoga. Moisture and steam can interrupt the setting process before the hairs have had time to settle.

Try not to touch, rub, brush aggressively, or sleep face-down on your brows during this window. It can be tempting to keep checking the shape in the mirror, especially when you love the instant lift, but your brows need a little space to hold their new direction.

If you accidentally get them wet, gently blot the area with a clean tissue. Do not scrub or try to restyle them repeatedly. One small splash does not automatically ruin your treatment, but soaking them too soon can reduce the longevity of the lift.

What to avoid for 24 to 48 hours

Brow lamination works by softening the hair structure, guiding hairs into a flattering shape, then setting them. Your brows may look sleek immediately after treatment, but they are still more vulnerable to dryness and disruption in the first couple of days.

Avoid applying brow makeup, concealer, foundation, self-tanner, facial oils, retinol, exfoliating acids, or strong skincare directly on or close to the brows for at least 24 hours. If your regular routine includes glycolic acid, salicylic acid, tretinoin, or benzoyl peroxide, give the brow area extra room. These products can be drying and may affect the condition of the hairs.

Also postpone facials, chemical peels, microneedling, waxing, threading, and facial massage around the brow area for 48 hours unless your artist gives you different guidance. Heat, friction, and active ingredients are not ideal while your brows are freshly treated.

For Florida clients, the biggest aftercare challenge is often humidity and outdoor plans. A beach day, pool party, long walk in the heat, or intense workout can wait until the next day. Giving your brows one quiet day can make a visible difference in how polished they look afterward.

How to cleanse your face after brow lamination

Once the first 24 hours have passed, you can return to cleansing your face. Use a gentle cleanser and lukewarm water, then pat dry with a clean towel. Avoid scrubbing the brow area with a washcloth, cleansing brush, or exfoliating pad.

Oil-based cleansers and heavy balms are not always off-limits, but they can leave residue that weighs brow hairs down. If your brows tend to become oily, a light, gentle cleanser is usually the better choice. The goal is clean, comfortable skin without overworking the hairs.

When removing eye makeup, take care around the brow line. Press and lift rather than rubbing back and forth. This is especially helpful if you wear full glam makeup for events, work, or weekends out in Tampa Bay.

Can you shower after brow lamination?

Yes, after 24 hours. Keep the water comfortably warm rather than very hot, and avoid directing strong shower pressure straight at your brows. Steam is most concerning during the initial setting period, so save the long, hot shower for another day.

Condition your brows without overdoing it

After lamination, brow hairs benefit from hydration. Your artist may recommend a brow conditioning serum or nourishing treatment to support softness and shine. Begin only when instructed, usually after the initial 24-hour dry period.

Use a small amount. More product does not create better brows. Too much oil or conditioner can make hairs look separated, heavy, or greasy instead of airy and lifted. Apply it lightly with a clean spoolie, brushing in the direction your artist styled.

Not every brow needs the same amount of conditioning. Naturally coarse, dry, curly, or color-treated brow hairs may appreciate regular hydration. Fine or naturally oily brows may need less. If your brows begin to look flat, reduce the amount of product and focus on gentle brushing instead.

Styling laminated brows at home

One of the best parts of brow lamination is how little makeup it requires. In the morning, brush your brows upward and slightly outward using a clean spoolie. Follow the natural arch your artist created rather than forcing every hair straight up. A soft, feathery shape usually looks more luxurious and natural than an overly vertical brow.

You may use a clear brow gel after the first 24 hours if you want extra hold, but choose a flexible formula and remove it gently at night. If you use pencil or powder, fill only where you need definition. Lamination gives the appearance of fuller brows, so a lighter hand often creates the most refined result.

Do not trim your brows at home right after lamination. The lifted position can make longer hairs look more noticeable than they did before. Wait until you can assess your natural regrowth, or let your brow artist handle shaping at your next appointment.

How long does brow lamination last?

Most brow laminations last about six to eight weeks, though results vary with your hair growth cycle, skin type, home care, and hair texture. Coarse brows may relax a little sooner, while fine hairs may hold their lifted appearance longer.

Daily habits matter too. Frequent swimming, strong skincare, exfoliation around the brow line, and heavy rubbing can shorten the life of your results. That does not mean you need to avoid your normal routine for weeks. It simply means gentle care helps your investment last.

Timing is also personal. Rebooking too early can overprocess the brow hairs, especially if they are naturally dry or fragile. Your artist can recommend the right maintenance schedule based on how your brows respond and the look you want to maintain.

Signs your brows need a little extra care

A slight change in texture during the first few days can be normal, particularly if your brow hairs are naturally coarse. However, your brows should not feel brittle, overly frizzy, or uncomfortable. If they look dry, use the conditioning product recommended by your artist and avoid adding more chemical treatments at home.

Reach out to your artist if you notice prolonged redness, itching, swelling, burning, peeling skin, or significant hair breakage. Mild, short-lived skin sensitivity can happen, but persistent irritation deserves professional guidance. Do not apply random creams, acids, or essential oils to the area in an attempt to fix it.

Brow lamination aftercare instructions for tinted brows

If your appointment included a brow tint, the same first-day rules apply, with extra attention to cleansing and exfoliation. Avoid strong cleansers and rubbing the area, as both can fade tint faster. Sun exposure, chlorine, and oil-based products may also soften the color over time.

Tint typically fades before the lamination does, so it is normal for your brows to remain lifted even as the color becomes more subtle. A tint refresh can restore definition without changing the beautiful shape of your laminated brows.

Before your next appointment

Arrive with brows free of heavy makeup whenever possible, and tell your artist about any new skincare, prescriptions, or reactions you experienced after your last visit. If you started using retinoids, acne treatments, or exfoliating products, that information helps your artist customize your service safely.

Your brows should make getting ready feel easier, not create another complicated routine. Treat them gently for the first day, keep your skincare thoughtful around the area, and let the lift do what it was designed to do: give you effortless, confidence-boosting definition from your first coffee to your last photo of the day.
Lash Lift and Tint for Effortless Everyday Eyes

Mascara can look beautiful, but it is not always practical for Gulf Coast mornings, gym sessions, pool days, or a packed calendar. A lash lift and tint gives your own lashes a polished, eye-opening curl and richer color, so you can wake up looking more refreshed without reaching for an eyelash curler or multiple coats of mascara.

This is not about changing your features or creating a look that feels too dramatic for everyday life. It is a customized beauty service designed to enhance what you already have. The right lift makes natural lashes appear longer and more visible, while the tint gives light or faded lashes the definition that mascara normally provides.

What Is a Lash Lift and Tint?

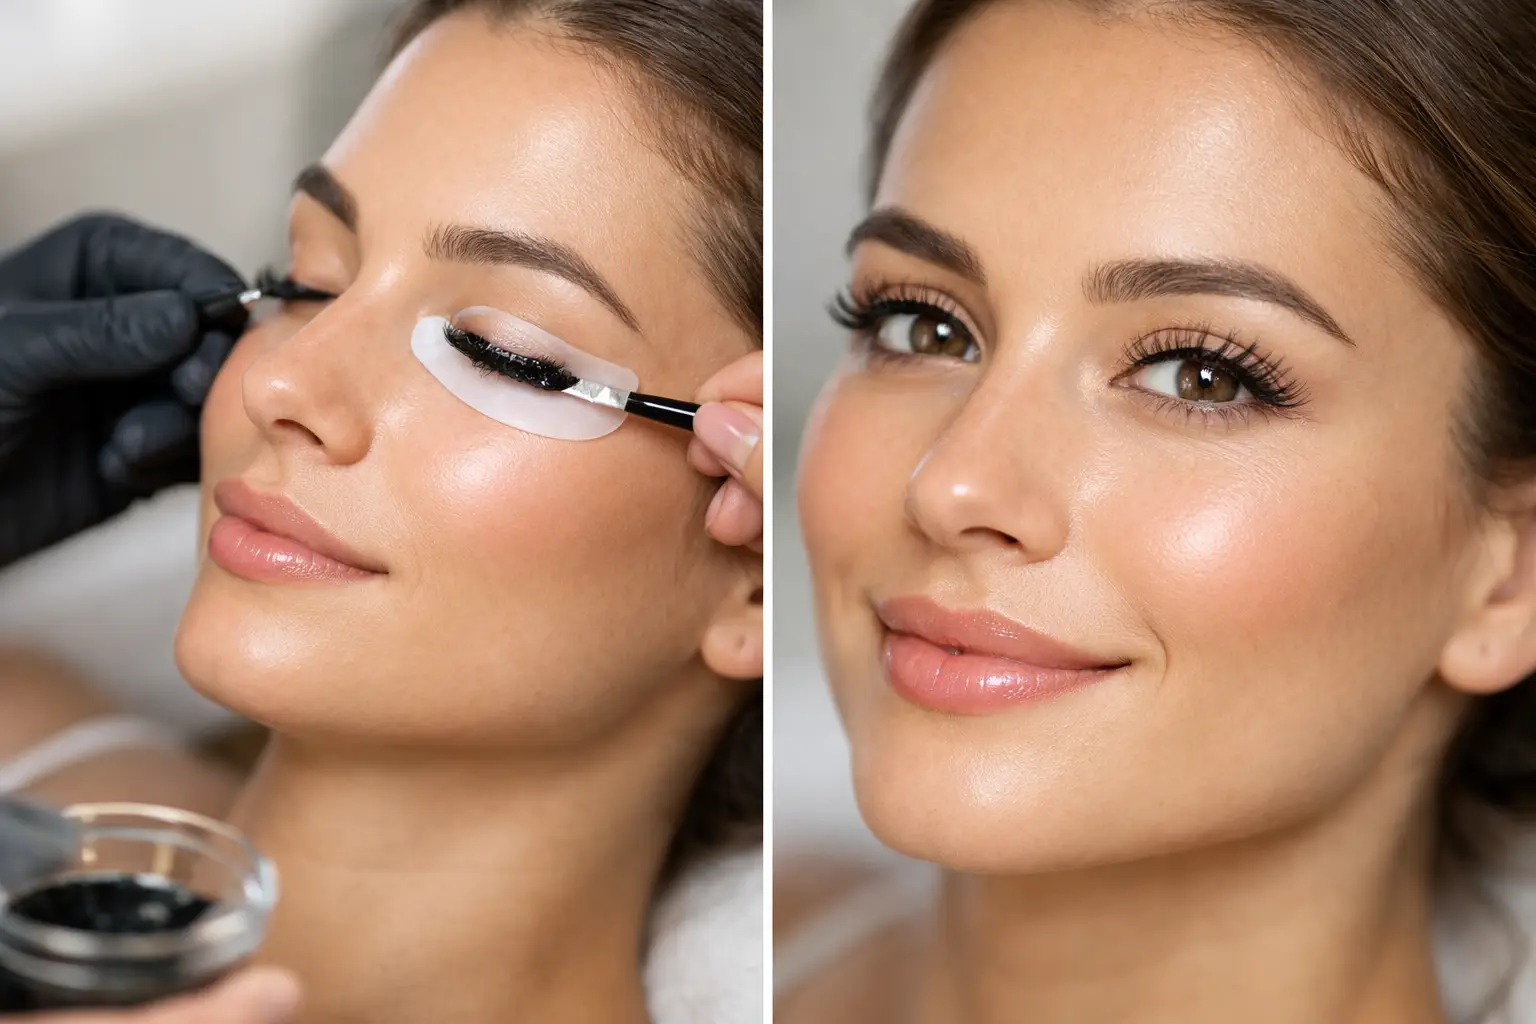
A lash lift is a professional treatment that reshapes your natural lashes from the base upward. Rather than adding fibers to each lash, your artist uses a gentle lifting system and a curved silicone shield to set your lashes into a flattering curl. The result is a more open, awake-looking eye area that still looks entirely like you.

A tint is then applied to darken the lashes, commonly in a deep black or soft black tone chosen to complement your coloring and desired finish. It can make the lighter tips of natural lashes easier to see, which is why many clients feel their lashes look fuller after the service.

Together, the treatment offers an elegant middle ground between bare lashes and lash extensions. You keep the ease of your natural lashes, but with a more finished appearance that stays in place through humidity, errands, workdays, and special plans.

Lash Lift and Tint vs. Lash Extensions

Both services can create beautiful eyes, but they serve different beauty routines. Lash extensions involve attaching individual extensions to your natural lashes for added density, length, and a more customizable level of drama. They are a wonderful choice when you want a fuller lash line or a glam, camera-ready effect, and they require regular fills as your natural lashes shed.

A lash lift and tint works only with the lashes you naturally have. There is no added length and no added volume, so the result depends on your current lash length, density, and growth pattern. If your lashes are naturally long but point straight down or are very light, a lift and tint can be especially transformative. If your lashes are short, sparse, or you want a bold strip-lash look every day, extensions may be the better fit.

Many clients choose a lift because it feels beautifully low maintenance. There is no need for fill appointments every few weeks, and once the initial 24-hour care window has passed, you can usually return to your usual skincare, workouts, and daily routine. You will still need to book future lifts as your lashes naturally cycle and grow out.

What to Expect at Your Appointment

Your appointment begins with a conversation about your goals. Do you want a soft, natural curl for everyday polish, or do you want the most noticeable lift your lashes can comfortably hold? Your artist will consider your lash length, direction, eyelid shape, and the condition of your natural lashes before selecting the appropriate shield size and treatment timing.

With your eyes closed, your lower lashes are protected and your upper lashes are carefully placed over the selected shield. The lifting and setting solutions are applied with precision, followed by the tint. The service is relaxing for many clients, and there should be no pulling, pinching, or rushing.

A professional lash artist does more than create a curl. They protect the health of your natural lashes by using the correct timing for your lash type and by avoiding an overly dramatic curl that may not suit your lashes or eye shape. Luxury results should look refined, not overprocessed.

How Long Does a Lash Lift and Tint Last?

Most lash lift results last about six to eight weeks, although timing varies because every client has a different natural lash cycle. The tint often looks richest during the first few weeks, then gradually softens as lashes shed and new lashes grow in.

Your lifestyle can influence how long the effect appears to last. Frequent exposure to sun, chlorine, saltwater, oil-based products, and heavy eye makeup removal may make the tint fade sooner. That does not mean you need to avoid beach days or your favorite skincare forever. It simply means gentle cleansing and thoughtful aftercare help preserve a fresh, polished look.

For many clients, scheduling a maintenance appointment every six to eight weeks keeps their lashes consistently lifted and defined. Your artist can recommend a timeline based on how your lashes grow and how subtle or visible you want your results to be.

Aftercare That Protects Your Results

The first day is when your lashes need the most attention. Keep them dry and avoid steam, swimming, saunas, hot yoga, and sweaty workouts for 24 hours. Skip mascara, eye makeup, lash serums, and oily products around the eyes during that time as well. This gives the lift and tint time to settle properly.

After the first 24 hours, treat your lashes gently. Cleanse around the eye area without aggressive rubbing, and avoid waterproof mascara when possible because removal can be harsh on freshly lifted lashes. If you wear mascara, choose a formula that removes easily and use a soft touch.

A clean spoolie can help you brush lashes into place in the morning. Some clients also enjoy a conditioning lash serum, but it is best to ask your artist which formulas work well with your treatment and when to begin using one. Professional aftercare is not complicated, but it does make a difference in how healthy and polished your lashes look between appointments.

Who Should Wait Before Booking?

A lash lift and tint is a popular service, but the right timing matters. If you have an active eye infection, irritation, sunburn near the eyes, recent eye surgery, or a known sensitivity to lash treatment products, postpone your appointment and speak with an appropriate medical professional if needed.

Pregnancy, hormonal changes, medications, and certain skin or eye conditions can also affect how a lift takes or how long it lasts. Results are never one-size-fits-all. Be open with your artist about allergies, recent procedures, lash growth products, and any concerns so your treatment can be tailored with care.

If you are new to lash services or have especially sensitive eyes, a patch test may be a smart choice. It is a simple extra step that supports a more confident appointment experience.

Getting the Most Beautiful, Natural Result

Come to your appointment with clean lashes and no eye makeup, mascara, or strip-lash adhesive. Avoid curling your lashes right before your visit, and let your artist know if you recently used waterproof mascara or a strong eye makeup remover. These details help the treatment process work as intended.

The most flattering lash lift is not always the tightest curl. A gentle, balanced lift can make the eyes look brighter and more lifted while keeping the lash line soft and sophisticated. Your artist should guide the design, but your preferences matter. Bring up whether you normally wear glasses, love a minimal makeup look, or want extra definition for an upcoming vacation, wedding, or event.

At The Permanent Makeup Studio, lash services are approached as part of your full beauty picture. A lifted, tinted lash can pair beautifully with shaped brows, a fresh spray tan, or the confidence of knowing your everyday look is already polished before you leave home.

When your schedule is full and Florida humidity is doing the most, small beauty details can carry a lot of confidence. Choose a lash look that feels comfortable, suits your natural features, and lets your eyes make an impression without asking for extra time every morning.

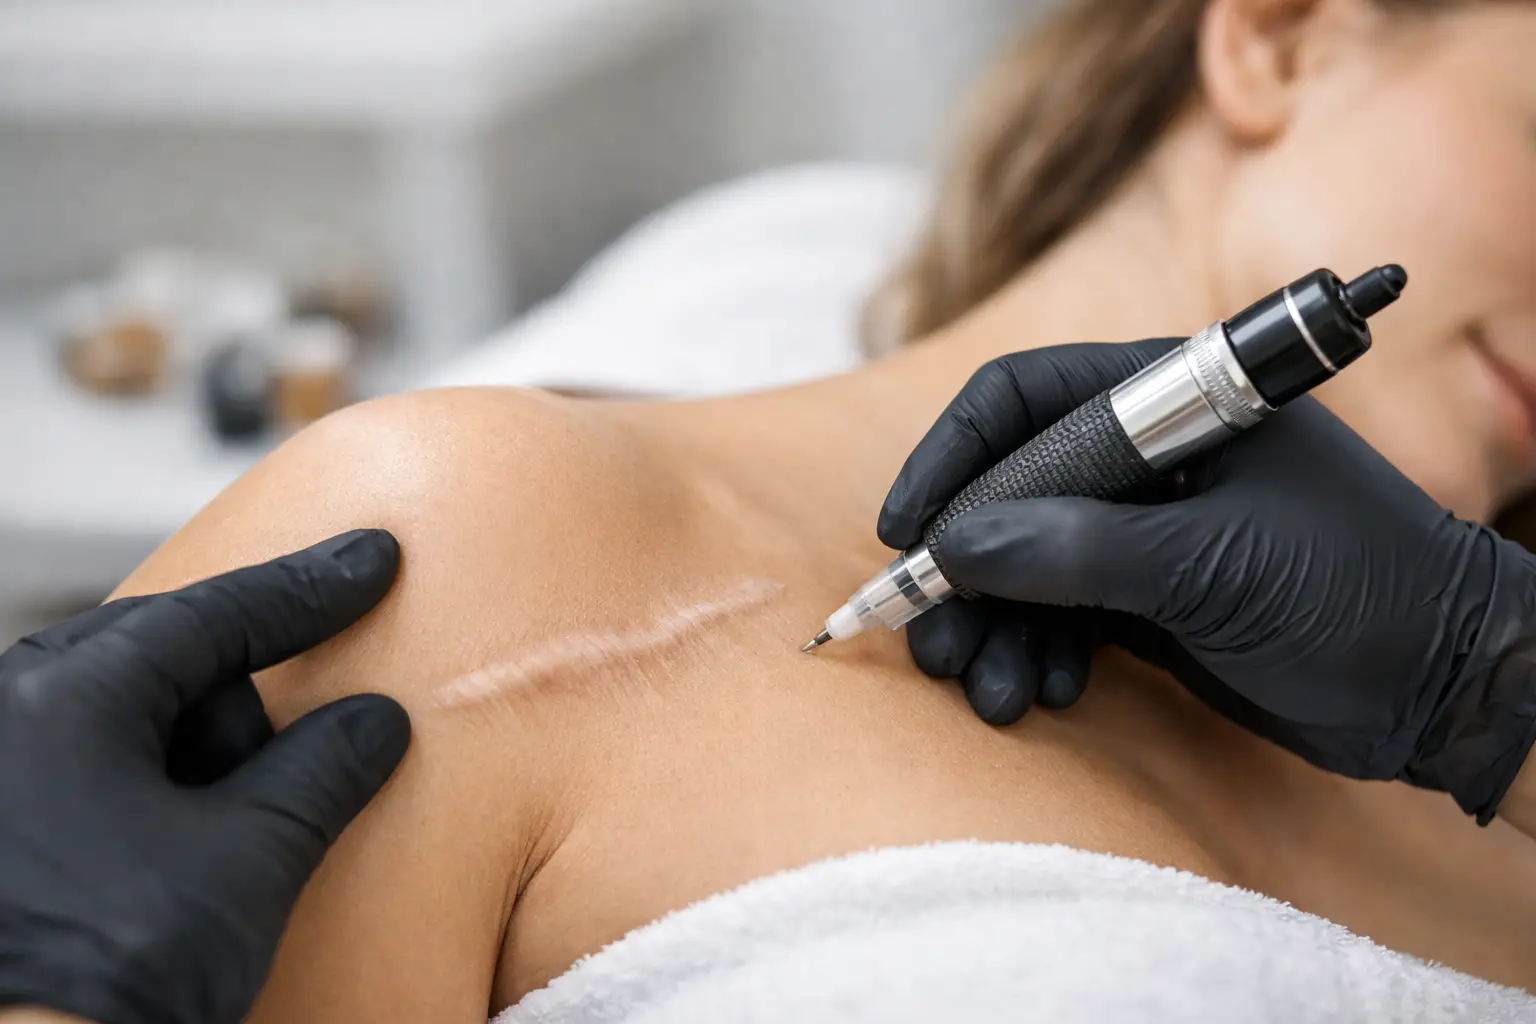
Scar Camouflage Tattoo Treatment Explained

A scar can hold more attention than you want it to – especially when it sits somewhere visible in a swimsuit, sleeveless dress, workout set, or everyday mirror glance. Scar camouflage tattoo treatment is a specialized form of paramedical pigmentation designed to soften the contrast between a healed scar and the surrounding skin. It does not erase a scar or change its texture, but thoughtful color work can make it far less noticeable and help you feel more at ease in your skin.

What scar camouflage tattoo treatment can do

Scar camouflage uses custom-blended pigment to visually match the skin around a scar. An artist implants that pigment carefully into the scar tissue, layering color over one or more sessions to reduce the difference in tone. The goal is refinement, not a one-size-fits-all cover-up. Every scar has its own color, shape, depth, and response to pigment.

This treatment is often considered for scars from surgery, injuries, burns, breast procedures, tummy tucks, C-sections, body contouring, or other fully healed procedures. It may also help some stretch marks when the surrounding skin and tissue are appropriate for treatment. For many clients, the benefit is practical as well as emotional: less time covering an area with makeup, less hesitation at the beach, and more freedom to wear what feels like you.

The realistic expectation matters. Pigment can reduce visual contrast, but it cannot flatten raised tissue, fill an indentation, remove a scar line, or restore skin to its exact pre-scar appearance. A beautifully performed treatment aims for a softer, more blended result that looks natural at a normal conversational distance.

Is your scar ready for camouflage?

Timing is one of the most important parts of a successful result. Scars should be fully healed, stable, and typically at least 12 months old before they are evaluated for camouflage. Some scars need longer, especially after major surgery, a burn, or a procedure with prolonged healing. Fresh scars are still changing in color and structure, which makes pigment selection unpredictable.

A suitable scar is usually flat or mostly flat, no longer red or inflamed, and similar in temperature and sensitivity to the surrounding skin. It should not be actively itchy, painful, open, or changing. Mature scars often appear pale, white, or lighter than nearby skin, though some may retain darker discoloration.

Raised, thick, or keloid scars require extra caution and may not be candidates for tattooing. The same is true for scars with an active skin condition, infection, unexplained irritation, or a history of poor healing. If there is any question about medical readiness, your physician or surgeon should be part of the conversation before booking.

A consultation should be personal, not rushed

A quality consultation is where the artistry begins. Your artist should assess the scar’s age, texture, color, placement, and size, along with your natural skin tone and undertone. They should also ask about your health history, medications, prior tattooing, sun exposure, and any history of hypertrophic or keloid scarring.

This is also the right time to discuss expectations. A pale scar on medium or deep skin, for example, may need a different strategy than a light scar on fair skin. Areas that tan frequently can be more challenging because your natural skin color changes throughout the year. A conservative plan, patch test when appropriate, and planned follow-up session are signs of a careful treatment approach.

Why color matching is the true art

Choosing a pigment that looks close in the bottle is not enough. Skin has warmth, coolness, translucency, and subtle shifts that vary across the body. The artist must account for the scar’s lack of melanin, the surrounding skin’s undertone, and the way pigment may heal after the skin recovers.

Scar tissue can retain pigment differently from healthy skin. One section may hold color beautifully while another needs additional layering. This is why a single session can be enough for a small, responsive area, while larger or more complex scars may need two or more appointments. It is not a flaw in the process – it is the nature of working with altered tissue.

Season also plays a role in color planning. If you are very tan during a Florida summer but much lighter in winter, a match created at your deepest tan may not look as blended year-round. Many clients get the most versatile result by matching their more natural, untanned skin tone. Your artist can help you decide which match best suits your lifestyle.

What happens during the appointment

Your appointment begins with a review of your treatment plan and the area being worked on. The skin is cleansed and prepared, and a custom pigment blend is created. Depending on the scar and your sensitivity, a topical numbing option may be discussed. Most clients describe the sensation as manageable, though scar tissue can feel different from one area to another.

The pigment is placed with controlled, light passes rather than heavy saturation. This protects the integrity of the tissue and allows the artist to watch how the skin responds. The appointment length depends on the size and complexity of the area. A small surgical scar may be relatively quick, while a larger area may require a longer session or a series of appointments.

Immediately afterward, the color may appear stronger or warmer than the final healed result. Mild redness, tenderness, or swelling can occur. That initial appearance is not the finished color. As the skin heals, pigment settles and the area becomes more natural-looking.

Healing and aftercare protect your investment

Aftercare is not an optional extra. The way you care for the area affects comfort, healing, and pigment retention. Your artist will provide instructions tailored to the treatment area and your skin, but the general focus is simple: keep the area clean, avoid friction, and let the skin heal without picking or exfoliating.

For the first stage of healing, you may need to avoid soaking in pools, hot tubs, baths, and the ocean. Skip saunas, intense sweating, and direct sun exposure until you are cleared. Tight clothing, harsh body products, scrubs, retinoids, and self-tanner can also interfere with recovery. If the area flakes or peels, resist the urge to help it along. Let it shed naturally.

Once healed, daily sun protection is especially valuable. UV exposure can change the appearance of both your natural skin and the pigment over time, making a previously close match look less balanced. A high-quality SPF and thoughtful sun habits help preserve your result.

How long does scar camouflage last?

Scar camouflage is often described as long-lasting, but it is not completely maintenance-free. Pigment may soften over time due to sun exposure, skincare products, skin turnover, lifestyle, and the unique behavior of scar tissue. A touch-up can refresh the blend when needed.

How long a result lasts depends on the area treated and how your skin retains pigment. No ethical artist should promise that every scar will hold color identically or that camouflage will be invisible in every lighting situation. The better promise is a personalized treatment plan, honest guidance, and artistry focused on making the scar less of the first thing you see.

When camouflage may not be the first step

If a scar is deeply indented, raised, tight, red, or uneven in texture, you may benefit from a different approach before pigmentation. Medical scar management, microneedling, laser treatments, silicone therapy, steroid injections, or a surgeon’s recommendation may be more appropriate depending on the concern. Camouflage works best when it is chosen for the right reason: correcting color contrast on healthy, stable tissue.

It is also wise to postpone treatment if you are pregnant or nursing, currently healing from surgery, taking medications that affect healing, or experiencing an active skin flare-up. Full disclosure during your consultation helps protect both your safety and your outcome.

A scar is part of your story, but it does not have to define how you feel when you get dressed, step into the sun, or see yourself up close. At The Permanent Makeup Studio, scar camouflage is approached with the same care, customization, and confidence-building artistry as every luxury beauty service – because feeling comfortable in your skin is always worth a thoughtful plan.

Scalp Micropigmentation for Thinning Hair

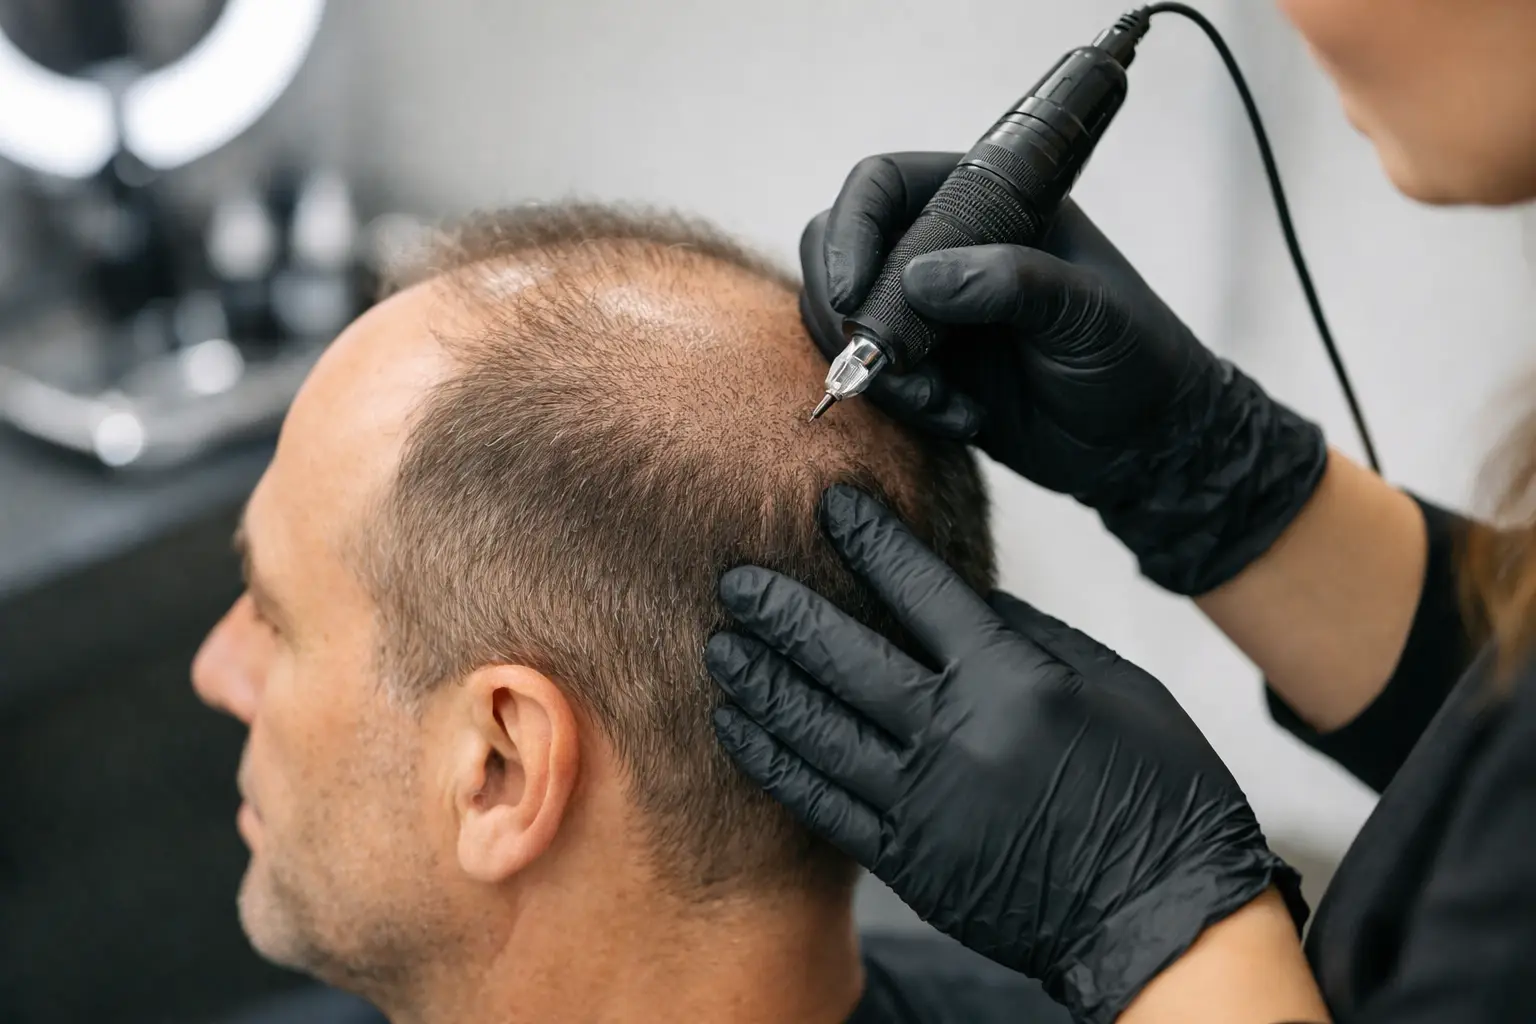
A widening part, a more visible crown, or a hairline that no longer frames your face the way it once did can change how you feel before you have even finished getting ready. When clients search for scalp micropigmentation thinning hair, they are usually looking for more than a cosmetic fix. They want a believable, low-maintenance way to restore the appearance of density and feel comfortable in photos, at the beach, after a workout, and in everyday life.

Scalp micropigmentation, often called SMP, uses carefully placed pigment impressions to replicate the look of natural hair follicles. It does not grow new hair or change the biology of hair loss. What it can do beautifully is reduce the contrast between the scalp and existing hair, creating the visual impression of a fuller, more defined style.

How Scalp Micropigmentation Makes Thinning Hair Look Fuller

With thinning hair, the challenge is often not simply the number of hairs present. It is the scalp showing through. Light reflects off exposed skin differently than it does through a dense head of hair, making areas such as the part line, temples, and crown appear more sparse.

SMP softens that contrast. A trained artist deposits tiny layers of custom-blended pigment into the upper scalp to create a soft shadow beneath your natural hair. On a closely shaved style, it can create the look of a freshly buzzed hairline. On longer hair, it can give the appearance of more density in the areas where the scalp has become visible.

The effect should never look like a flat block of color or a traditional tattoo. Luxury scalp micropigmentation is built gradually, with varied follicle sizes, placement, and tones. This is where artistry matters. Your natural hair color, skin tone, degree of thinning, hairstyle, and future hair-loss pattern should all shape the plan.

Who Is a Good Candidate for Scalp Micropigmentation?

Scalp micropigmentation can be an excellent confidence-building option for both men and women, but the best approach depends on how and where the hair is thinning. Clients with diffuse thinning often love the added density it creates around the part and crown. Those with receding hairlines may choose SMP to bring structure back to the front of the face, especially if they keep their hair short.

It can also complement hair restoration journeys. Some clients use it to camouflage the appearance of transplant scars, while others pair it with their existing hair-growth routine to make their hair look fuller during the process. SMP is a visual enhancement, not a replacement for medical care, so anyone experiencing sudden or unexplained shedding should speak with a qualified healthcare professional first.

The strongest candidates generally have realistic expectations and are willing to follow the healing instructions. If you have active scalp irritation, open skin, a severe skin condition in the treatment area, a history of pigment-related allergies, or are pregnant or nursing, a consultation is the right place to discuss whether treatment should be postponed or avoided.

Longer Hair Versus a Shaved Style

SMP is often associated with the crisp, closely shaved look seen on men with hair loss, but it is not limited to that style. For clients with longer hair, pigment can be placed between existing strands to reduce scalp visibility. This is especially helpful for a broadening part, thinning at the crown, or diffuse loss through the top of the head.

There is a trade-off. The longer the hair, the more the result depends on how you part and style it. If your hair is wet, pulled tightly back, or separated in a new direction, some scalp visibility may still be present. A realistic, thoughtfully designed density treatment enhances your hair rather than promising a completely covered scalp in every circumstance.

What Happens During Your Appointment

A quality SMP experience starts with consultation, not a pigment machine. Your artist should assess your scalp, ask about your hair goals, discuss your normal styling habits, and explain what is realistically achievable. Together, you can decide whether the focus should be hairline restoration, crown density, scar camouflage, or a more complete treatment.

The first session usually establishes a light foundation. The pigment is intentionally subtle at this stage because natural-looking results are created in layers. Later sessions add depth and dimension while allowing the artist to evaluate how your skin retains the pigment.

Most clients need two to four sessions, spaced apart for proper healing. The exact number depends on the treatment area, scalp condition, skin type, desired density, and whether you are blending SMP with existing hair. A conservative first session is a sign of care, not a lack of results. It gives you room to refine the outcome instead of committing to an overly dark or sharp look too quickly.

Discomfort is often described as manageable, though every client has a different sensitivity level. Sessions can vary in length based on coverage. Your artist will also provide clear pre-care and aftercare guidance so you know how to prepare and protect your investment.

Healing and Aftercare Matter in Florida

The days after treatment are part of the service. Fresh pigment needs time to settle, and your scalp needs a chance to heal without unnecessary friction, moisture, or sun exposure. Your provider will give you personal instructions, but clients are commonly asked to avoid washing the scalp, heavy sweating, swimming, steam rooms, and direct sunlight for a short period after each session.

That is particularly worth planning around on the Gulf Coast. Beach days, boat weekends, outdoor workouts, and Florida heat are all part of life in Clearwater and Tampa Bay, but they can complicate early healing. Schedule thoughtfully if you have a vacation, wedding, or major event coming up.

Once healed, daily care is refreshingly simple. Sun protection is still essential because UV exposure can fade pigment over time and can affect the look of your skin overall. A hat and scalp-safe SPF are smart choices when you will be outdoors. Avoid harsh exfoliants directly on the treated area unless your provider advises otherwise.

How Long Does SMP Last?

Scalp micropigmentation is considered long-lasting, but it is not always permanent in the way a traditional body tattoo may be. The pigment softens gradually, and many clients choose a refresh appointment after several years to maintain a polished, natural appearance.

Longevity varies. Sun exposure, skin type, immune response, skincare products, lifestyle, and the depth and color of the initial work can all affect fading. This is another reason a soft, realistic result is preferable to an overly saturated one. As the pigment ages, subtle density tends to remain believable and easier to refresh.

Your natural hair loss may also change with time. A treatment that looks perfect with today’s hair pattern may need adjustment if thinning progresses. A skilled artist considers that possibility from the start, avoiding a hairline or density pattern that could look artificial later.

Choosing an Artist Is Part of the Result

SMP is not a one-size-fits-all beauty service. The difference between a convincing result and an obvious one can come down to pigment selection, dot placement, hairline design, sanitation, and the patience to build density in stages.

Before booking, look for healed results rather than only fresh photos. Ask whether the artist has experience with your hair texture, skin tone, and type of thinning. You should also feel comfortable asking about the number of sessions, pricing, maintenance expectations, pre-care, and healing restrictions. Clear answers are part of a luxury experience.

At The Permanent Makeup Studio, a personalized consultation creates the space to discuss your goals privately, review your options, and design a treatment that feels like you. Whether you want a subtle enhancement beneath longer hair or a more defined short-style transformation, the goal is the same: refined results that support your confidence without adding another complicated step to your routine.

Thinning hair does not have to dictate how visible your scalp feels or how much time you spend trying to disguise it. The most beautiful SMP results are not about looking like someone else. They are about looking in the mirror and seeing a more confident version of yourself, with a plan that fits your lifestyle and your natural features.

Lip Blushing Healing Time and What to Expect

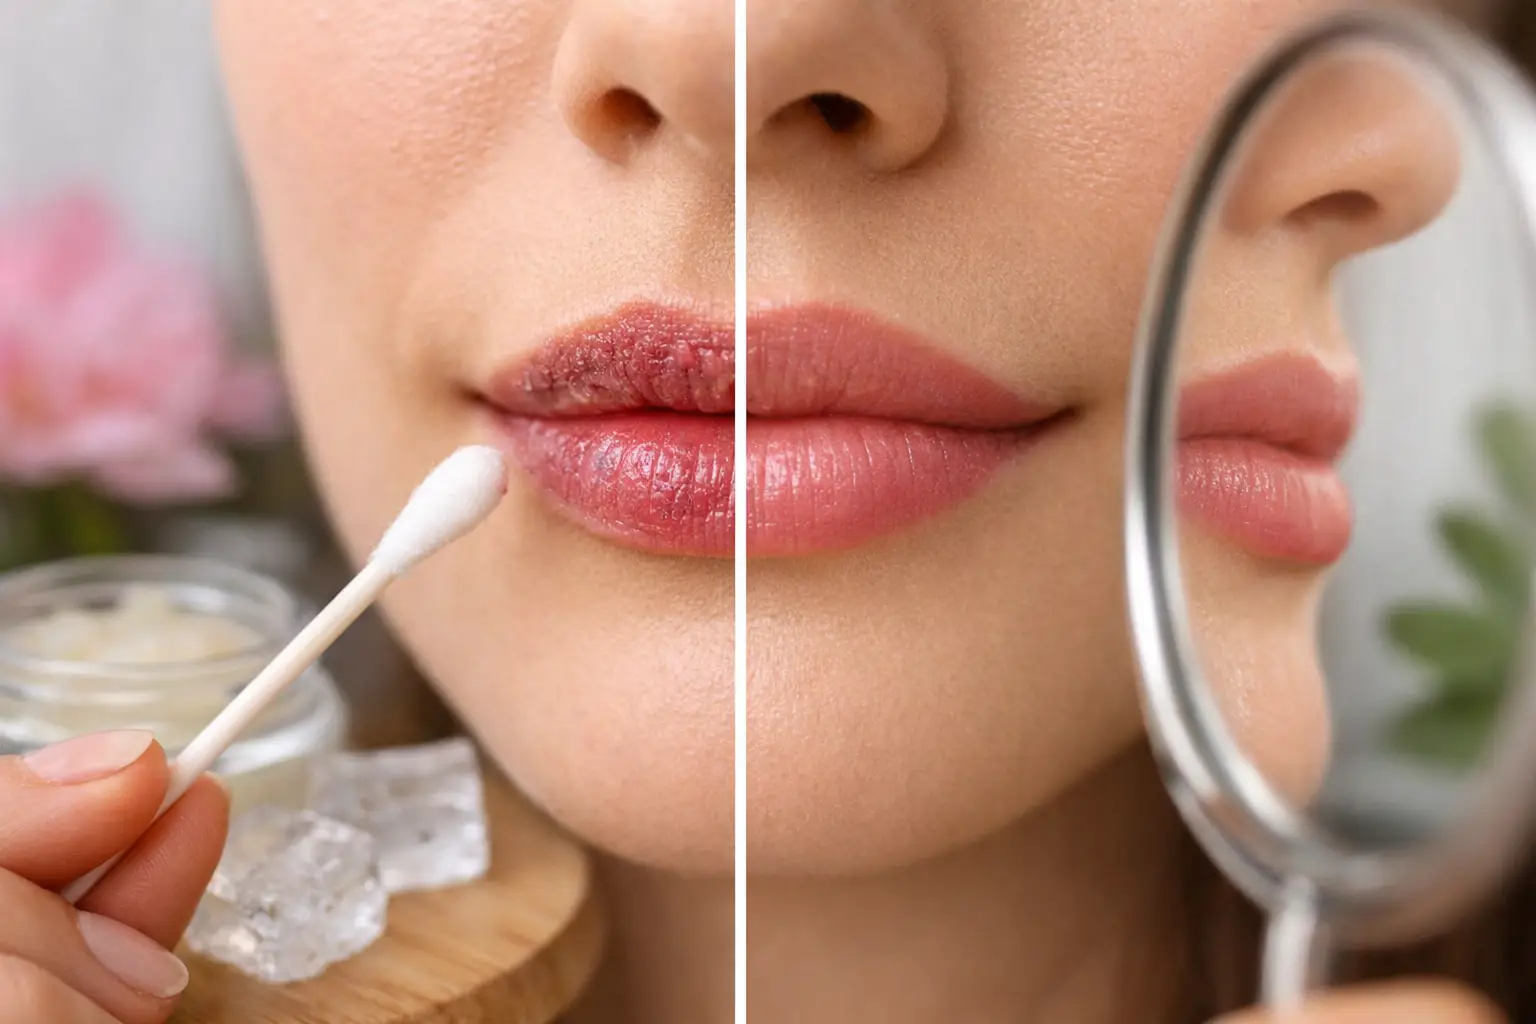
Freshly blushed lips can look beautifully defined right away, but the first color you see is not your final result. Lip blushing healing time generally lasts four to six weeks, with the most noticeable changes happening during the first 10 days. Knowing what is normal helps you plan confidently, protect your investment, and enjoy the soft, polished color waiting beneath the healing skin.

How Long Does Lip Blushing Take to Heal?

Most clients are socially presentable within about a week, though lips may still be lightly dry or peeling. Full internal healing takes longer. Your pigment needs time to settle beneath the skin, and the color often appears lighter or uneven before it blooms into its intended tone.

For many clients, the timeline looks like this: initial healing takes five to 10 days, surface texture settles over the next few weeks, and the most accurate color appears around weeks four through six. A perfecting session is commonly scheduled after the lips have fully healed, since it allows your artist to assess pigment retention and make thoughtful adjustments.

Healing can take a little longer if your lips are especially dry, if you are prone to cold sores, if you have a stronger exfoliation cycle, or if your natural lip tone needs more neutralization. Every lip holds pigment differently. That is why luxury permanent makeup should always be personalized rather than rushed.

Lip Blushing Healing Time: Day-by-Day Changes

Days 1-2: Bright, swollen, and freshly enhanced

Immediately after your appointment, your lips may look more vivid, warmer, and slightly fuller than expected. Mild swelling and tenderness are normal, particularly on the first day. The bright color is partly the fresh pigment at the surface and partly the natural response of newly treated skin.

This is not the moment to judge your final shade. A soft rose, nude, berry, or neutral pink can initially look more intense than the finish you selected. By the next day, swelling typically begins to ease.

Days 3-5: Dryness and light flaking begin

Your lips may feel tight, dry, or chapped as the skin begins to renew itself. Fine flakes are common. Resist the urge to pick, rub, scrub, or pull at them, even if a small edge is tempting. Removing healing skin too soon can pull pigment with it and create uneven retention.

Follow the aftercare instructions from your artist closely, including use of the recommended healing balm. A thin, clean layer is usually better than overapplying product. Your lips should be protected, not smothered.

Days 5-10: The color may look very light

Once flaking settles, many clients experience the “ghosting” phase. The lips can look lighter than they did before the appointment, and some areas may seem as though they lost color altogether. This can feel alarming, but it is a standard part of the process.

The pigment has not necessarily disappeared. It is settling beneath fresh layers of skin, where it may be temporarily muted. Give your lips time before deciding how the result is developing.

Weeks 2-4: Color returns gradually

As your lips continue healing, the color begins to reappear. It may return unevenly at first, then become softer and more balanced. This is when the treatment starts to look like the effortless everyday enhancement clients love: not heavy lipstick, but a refreshed, healthy-looking lip tone with better definition.

Weeks 4-6: Your healed color comes into view

By this point, the pigment has had time to settle. Your artist can better evaluate whether your lips retained evenly and whether you would benefit from a touch-up for added saturation, shape refinement, or warmth correction. The healed result is always softer than the first-day color.

What Can Affect Your Healing Result?

Lip blushing is a refined cosmetic tattoo, and beautiful results depend on both precise artistry and thoughtful aftercare. Skin type, hydration, lifestyle, medications, sun exposure, and your body’s natural healing response can all affect how the pigment heals.

Florida clients have one extra consideration: heat and sun. A day at the beach, poolside lounging, or intense outdoor workouts can be hard on freshly treated lips. Sweat, UV exposure, and prolonged heat can irritate healing skin and may affect pigment retention. Plan your appointment around vacations, pool days, and major events whenever possible.

If you have a history of cold sores, tell your provider before booking. Lip procedures can trigger an outbreak in susceptible clients, and a medical professional may recommend preventive antiviral medication. This is a conversation to have before your service, not after your lips are already healing.

It also helps to be realistic about the finish you want. Lip blushing enhances your natural lip color and shape, but it is not designed to mimic opaque matte lipstick every morning. If you prefer a bolder look for an event, you can still add your favorite gloss or lipstick once your lips are completely healed.

Lip Blushing Aftercare That Protects Your Color

The first week requires a little restraint, but it is temporary. Treat your lips gently and keep your routine simple. Use only the aftercare product your artist recommends, apply it with clean hands or a clean applicator, and avoid touching your lips unnecessarily.

During initial healing, avoid soaking the area in pools, hot tubs, or the ocean. Skip saunas, steam rooms, and high-heat workouts that create heavy sweating. Avoid direct water pressure on your lips in the shower, and do not use exfoliants, retinol, acids, whitening products, or active skincare around the mouth until your artist clears you.

Be careful with meals and drinks for the first few days. Spicy, salty, acidic, or very hot foods can cause discomfort and irritation. A straw can be helpful when drinking, especially with coffee or other beverages that may stain. Keep the lip area clean after eating, then reapply the approved balm as instructed.

For long-lasting color, sun protection matters after healing too. Once your artist confirms it is safe, use an SPF lip product to help reduce premature fading. This is one of the easiest ways to protect a polished result through Tampa Bay sunshine, outdoor brunches, beach weekends, and everyday errands.

When Should You Contact Your Artist?

Some dryness, tenderness, light swelling, and flaking are expected. Signs that deserve prompt attention include worsening pain, significant swelling that does not improve, spreading redness, unusual discharge, fever, or an allergic reaction. Contact your artist for guidance and seek medical care when symptoms suggest infection or another health concern.

For cosmetic questions, patience is often the answer during the first few weeks. Do not try to correct fading with lip liner, exfoliation, extra balm, or at-home treatments while the area is still healing. Wait for your scheduled follow-up so your artist can assess the settled pigment accurately.

At The Permanent Makeup Studio, lip blushing is designed to give your features a softly polished finish without asking you to reach for lipstick every morning. Give the healing process the same care you give the appointment itself, and let your final color reveal itself on its own schedule.

Waarom Lizaro Casino de beste keuze is voor online gokkers

De unieke speelervaring van Lizaro Casino

Lizaro Casino heeft zich gepositioneerd als een aantrekkelijk online casino met een westernthema, dat niet alleen bekend staat om zijn uitgebreide spellenaanbod, maar ook om zijn boeiende speelomgeving. Met meer dan 13.000 spellen, waaronder gokkasten, jackpotspellen en meer dan 600 live casinospellen, biedt het platform een dynamische ervaring voor zowel nieuwe als ervaren spelers. De navigatie op de site is gebruiksvriendelijk en leidt spelers snel naar hun favoriete games of categorieën.

Fantastische welkomstbonussen en promoties

Een van de grootste aantrekkingskrachten van Lizaro Casino is het welkomstpakket dat spelers ontvangen bij hun eerste vier stortingen. Dit pakket biedt een enorme bonus van 350% tot €16.000, plus 350 gratis spins. Deze aantrekkelijke aanbiedingen maken het voor nieuwe deelnemers interessant om zich aan te melden en hun geluk te beproeven. De voorwaarden voor het rondspelen zijn redelijk; de bonus moet 20x worden ingezet, terwijl winsten uit gratis spins 40x moeten worden rondgespeeld.

Premium VIP-club en extra voordelen

Lizaro biedt niet alleen reguliere bonussen, maar ook speciale programma’s zoals de VIP-club, waar trouwe spelers kunnen genieten van extra voordelen zoals cashback, exclusieve promoties en persoonlijke ondersteuning. Het gamified aspect van de website zorgt ervoor dat spelers betrokken blijven door middel van uitdagingen, toernooien en een beloningswinkel waar ze verschillende prijzen kunnen winnen.

Spelaanbod: variëteit voor elke gokker

Het spelaanbod bij Lizaro Casino is indrukwekkend en houdt rekening met de voorkeuren van verschillende spelers. Hier zijn enkele categorieën van games die je kunt verwachten:

  • Gokkasten
  • Jackpotspellen
  • Tafelspellen zoals poker en blackjack
  • Live casino-spellen met echte dealers
  • Sportweddenschappen voor sportliefhebbers

Bovendien biedt Lizaro Casino regelmatig nieuwe spellen aan die geïnspireerd zijn door trending thema’s of populaire films en series. Dit zorgt ervoor dat er altijd iets nieuws te ontdekken valt voor de spelers. Het platform werkt samen met gerenommeerde spelontwikkelaars zoals NetEnt, Microgaming en Evolution Gaming om ervoor te zorgen dat spelers alleen toegang hebben tot spellen van hoge kwaliteit.

Betaalmogelijkheden: eenvoudig storten en opnemen

Lizaro Casino biedt verschillende betaalmethoden om het storten en opnemen van geld gemakkelijk te maken. Spelers kunnen kiezen uit traditionele opties zoals bankoverschrijvingen en creditcards, evenals moderne cryptovaluta. Dit laatste maakt het platform aantrekkelijk voor spelers die waarde hechten aan snelheid en privacy bij hun transacties.

Bovendien zorgt het casino voor snelle verwerkingstijden bij uitbetalingen, zodat spelers niet onnodig hoeven te wachten op hun gewonnen bedragen. Dit verhoogt de algehele tevredenheid van de speler en draagt bij aan een positieve spelervaring.

Bruikbaarheid op mobiele apparaten

Een ander belangrijk aspect van Lizaro Casino is de mobiliteit; de site is geoptimaliseerd voor gebruik op smartphones en tablets met zowel Android als iOS-systemen. Dit betekent dat je altijd kunt gokken waar je ook bent, zonder in te boeten op kwaliteit of speelervaring.

De mobiele versie van het casino bevat bijna alle dezelfde functies als de desktopversie, waaronder toegang tot bonusaanbiedingen, klantenservice en zelfs live casino-spellen. Spelers kunnen gemakkelijk profiteren van deze mogelijkheden, inclusief lizaro, wat het spelen onderweg zowel praktisch als plezierig maakt.

Klantondersteuning en gebruiksgemak

Lizaro Casino hecht veel waarde aan klanttevredenheid. Daarom hebben ze een uitgebreid ondersteuningsteam opgezet dat bereikbaar is via meerdere kanalen. Of je nu vragen hebt over spelregels of hulp nodig hebt bij financiële transacties, er is altijd iemand beschikbaar om je te helpen.

Bovendien zijn er FAQ-secties beschikbaar die veelvoorkomende vragen beantwoorden en tips geven over hoe je het meeste uit je speelsessies kunt halen. Hiermee wordt geprobeerd de noodzaak voor directe ondersteuning te verminderen door proactief informatie aan te bieden.

“Lizaro Casino biedt een rijkdom aan spellen en bonussen die elke speler zal aanspreken.”

Iemand die op zoek is naar een gevarieerde speelomgeving met tal van mogelijkheden om te winnen, zou zeker moeten overwegen om te spelen bij Lizaro Casino. Dankzij de vele unieke kenmerken en aantrekkelijke bonussen staat Lizaro bekend als een toonaangevend platform binnen de online gamingwereld. Vergeet niet om alle voorwaarden goed door te nemen voordat je begint met spelen; dit voorkomt eventuele verrassingen later.

Veiligheid en verantwoord gokken

Lizaro Casino neemt veiligheidsmaatregelen zeer serieus, wat essentieel is in de wereld van online gokken. Het casino maakt gebruik van geavanceerde encryptietechnologieën om persoonlijke gegevens en financiële transacties te beschermen tegen derden. Bovendien beschikt Lizaro over licenties van gerenommeerde gokautoriteiten die ervoor zorgen dat alle spellen eerlijk verlopen.

Bovendien bevordert het casino verantwoord gokken door middel van tools die spelers helpen hun speelgedrag in toom te houden. Spelers kunnen limieten instellen op hun stortingen, verliezen of speeltijd om ervoor te zorgen dat ze binnen hun budget blijven wanneer ze gokken.

Met al deze voordelen is het duidelijk dat Lizaro Casino meer is dan alleen een plek om te gokken — het is een complete speelervaring die volop kansen biedt voor plezier en winst.

Voor meer informatie over dit dynamische platform kun je zeker kijken naar .

Example Post for WordPress

This is a sample post created to test the basic formatting features of the WordPress CMS.

Subheading Level 2

You can use bold text, italic text, and combine both styles.

  1. Step one
  2. Step two
  3. Step three

This content is only for demonstration purposes. Feel free to edit or delete it.

Example Post for WordPress

This is a sample post created to test the basic formatting features of the WordPress CMS.

Subheading Level 2

You can use bold text, italic text, and combine both styles.

  1. Step one
  2. Step two
  3. Step three

This content is only for demonstration purposes. Feel free to edit or delete it.

Example Post for WordPress

This is a sample post created to test the basic formatting features of the WordPress CMS.

Subheading Level 2

You can use bold text, italic text, and combine both styles.

  1. Step one
  2. Step two
  3. Step three

This content is only for demonstration purposes. Feel free to edit or delete it.

Casino Bonus Comparison: Insights from a Live Dealer’s Perspective

Ever wondered how the bonuses you claim at online casinos actually translate to your play, especially from the viewpoint of those who deal the cards in live games? It’s easy to get dazzled by the shiny numbers—100% match, 250 free spins—but what does that mean in practice, and how do live dealer games fit into this landscape? Let me pull back the curtain a bit.

First, bonuses come in many shapes and sizes, and not all are created equal. While slots bonuses are often straightforward, live dealer promotions have nuances that can impact your potential value and playing experience. Understanding these differences will save you time and bankroll—and maybe even some frustration.

Here’s a fact: live dealer games generally contribute far less toward wagering requirements than slot games, sometimes as low as 5%. That dramatically affects how quickly you can clear a bonus and withdraw your winnings. But there’s more beneath this surface.

Live dealer interacting with players during a roulette game

Breaking Down Casino Bonuses: Slot vs. Live Dealer Contributions

Let’s get real. Many players assume that a €100 bonus with 40× wagering is equally attainable whether you play slots or live dealer games. That’s not the case. Slots typically contribute 100% to wagering requirements, meaning that every euro wagered counts fully toward clearing the bonus. However, live dealer games—blackjack, baccarat, roulette with a human dealer—usually count for between 5% and 20%. What’s the effect?

Take this example: you claim a €100 bonus with 40× wagering (meaning you need to wager €4,000 before withdrawing). If you only play blackjack with 10% contribution, you’d have to wager an eye-watering €40,000 to meet the same wagering requirement. That’s a huge difference.

Now, imagine being a live dealer who sees players chasing that elusive threshold, spinning wheels or playing hands hoping to beat these odds. It’s a mental game on both sides of the table. Dealers often observe how bonuses impact bet sizing and session length. Many players unknowingly waste time and money chasing bonuses in live games with poor wagering weight.

Why Do Live Dealer Games Have Lower Bonus Contributions?

The short answer: house edge and bonus abuse risk. Live dealer games tend to have a lower house edge than slots. Blackjack, for instance, can have an RTP (Return to Player) of around 99.4%, while slots hover around 96%. Casinos limit bonus contributions on these games to manage risk and prevent exploitation via low-risk strategies like card counting or minimal variance betting.

From the dealer’s perspective, this also means some players adopt very cautious or erratic betting patterns when playing on bonus money, which affects the game’s flow and the dealer’s experience. It’s a subtle dynamic that doesn’t show up in the bonus terms but shapes real play.

Comparison Table: Bonus Wagering Contributions by Game Type

Game Type Typical Wagering Contribution House Edge (Approx.) Ideal For Bonus Play?
Slots 100% 3% – 5% Yes, best for clearing bonuses
Live Blackjack 5% – 10% 0.5% – 1% Not ideal for bonus wagering
Live Roulette 10% – 20% 2.7% (European) Moderate
Video Poker 20% – 50% 0.5% – 2% Good depending on variant

Finding the Right Casino Bonus: A Live Dealer’s Insider Tips

Given these dynamics, it’s smart to evaluate casino bonuses not just by headline numbers but by how their terms interact with the games you prefer. For example, if you enjoy live dealer games, a bonus with a 40× wagering requirement and low contribution games will likely extend your playtime—but also increase the amount you need to bet to cash out.

One practical approach is to split your play: use your bonus primarily on slots with 100% wagering contribution to clear the bonus efficiently, then enjoy live dealer games with real money that’s already cleared wagering. This approach minimizes unnecessary risk and frustration.

Moreover, some casinos tailor their bonuses for live dealer games, offering lower wagering requirements or specific cashback on losses. If you’re looking for such offers, platforms like cobracasino provide clear bonus terms and diverse promotions that cater to both slots and live dealer enthusiasts. Their transparent terms and user-friendly interface make it easier to pick bonuses fitting your gameplay style.

Quick Checklist: What to Look for in Casino Bonuses?

  • Check wagering requirements (WR) and game contribution percentages.
  • Verify if the bonus applies to your preferred game types.
  • Understand max bet limits during wagering.
  • Review time limits for clearing the bonus.
  • Look for exclusions—some games might not count at all.
  • Assess withdrawal limits linked to bonuses.

Common Mistakes and How to Avoid Them

  • Chasing bonuses on low contribution games: Leads to long wagering cycles and burnout.
  • Ignoring max bet limits: Could void winnings or cause bonus forfeiture.
  • Overlooking expiry dates: Bonuses often have short validity periods.
  • Playing excluded games: No credit towards wagering, wasting time and money.
  • Depositing via disallowed methods: Some payment methods void bonus eligibility.

Mini-FAQ

Why do live dealer games have lower bonus wagering contributions?

Because live games generally have a lower house edge, casinos limit bonus contributions to reduce risk and prevent abuse through low-variance play strategies.

Can I clear a bonus by playing only live dealer games?

Technically yes, but it’s often inefficient. Low contribution percentages mean you must wager much more to meet requirements.

Are there casinos that offer bonuses optimized for live dealer players?

Yes, some casinos provide lower wagering requirements or cashback specifically for live casino games; researching platforms like cobracasino can help find such offers.

What’s the risk of ignoring max bet limits during bonus play?

Exceeding max bet limits can result in bonus cancellation and the forfeiture of winnings from bonus funds.

Does playing with a bonus affect game fairness?

No, all licensed online casinos use certified RNGs for slots and verified live dealer software, ensuring fairness regardless of bonuses.

To be clear, gambling should always be approached with discipline. Set deposit and loss limits, use session timers, and never chase losses. Remember, most provinces in Canada require players to be 19+, so ensure you comply with local regulations.

Bonuses can enhance your playtime and enjoyment, but understanding their mechanics—especially how they interact with live dealer games—prevents disappointment and wasted funds.

For a balanced mix of quality slots and live dealer offerings with transparent bonus terms, cobracasino stands out as an option worth exploring, meeting both Canadian regulatory expectations and player preferences.

Sources

  • Canadian Gaming Association – Online Gambling Regulations (2024 Update)
  • Gaming Laboratories International (GLI) – RNG and Game Fairness Certification Processes
  • SoftSwiss Technical Whitepaper – Live Dealer Integration and Bonus Management (2023)
  • Ontario Lottery & Gaming Corporation – Responsible Gambling Toolkit (2023)

About the Author

Alexei Morozov is an iGaming expert with over 8 years of experience navigating online casino platforms and game mechanics. His practical knowledge blends technical insights and player psychology, aimed at helping beginners make informed decisions and enjoy responsible gaming.

18+ | Please gamble responsibly. For help with problem gambling, visit https://www.problemgambling.ca. All players should verify local regulations before participation.