Book your free consultation Today

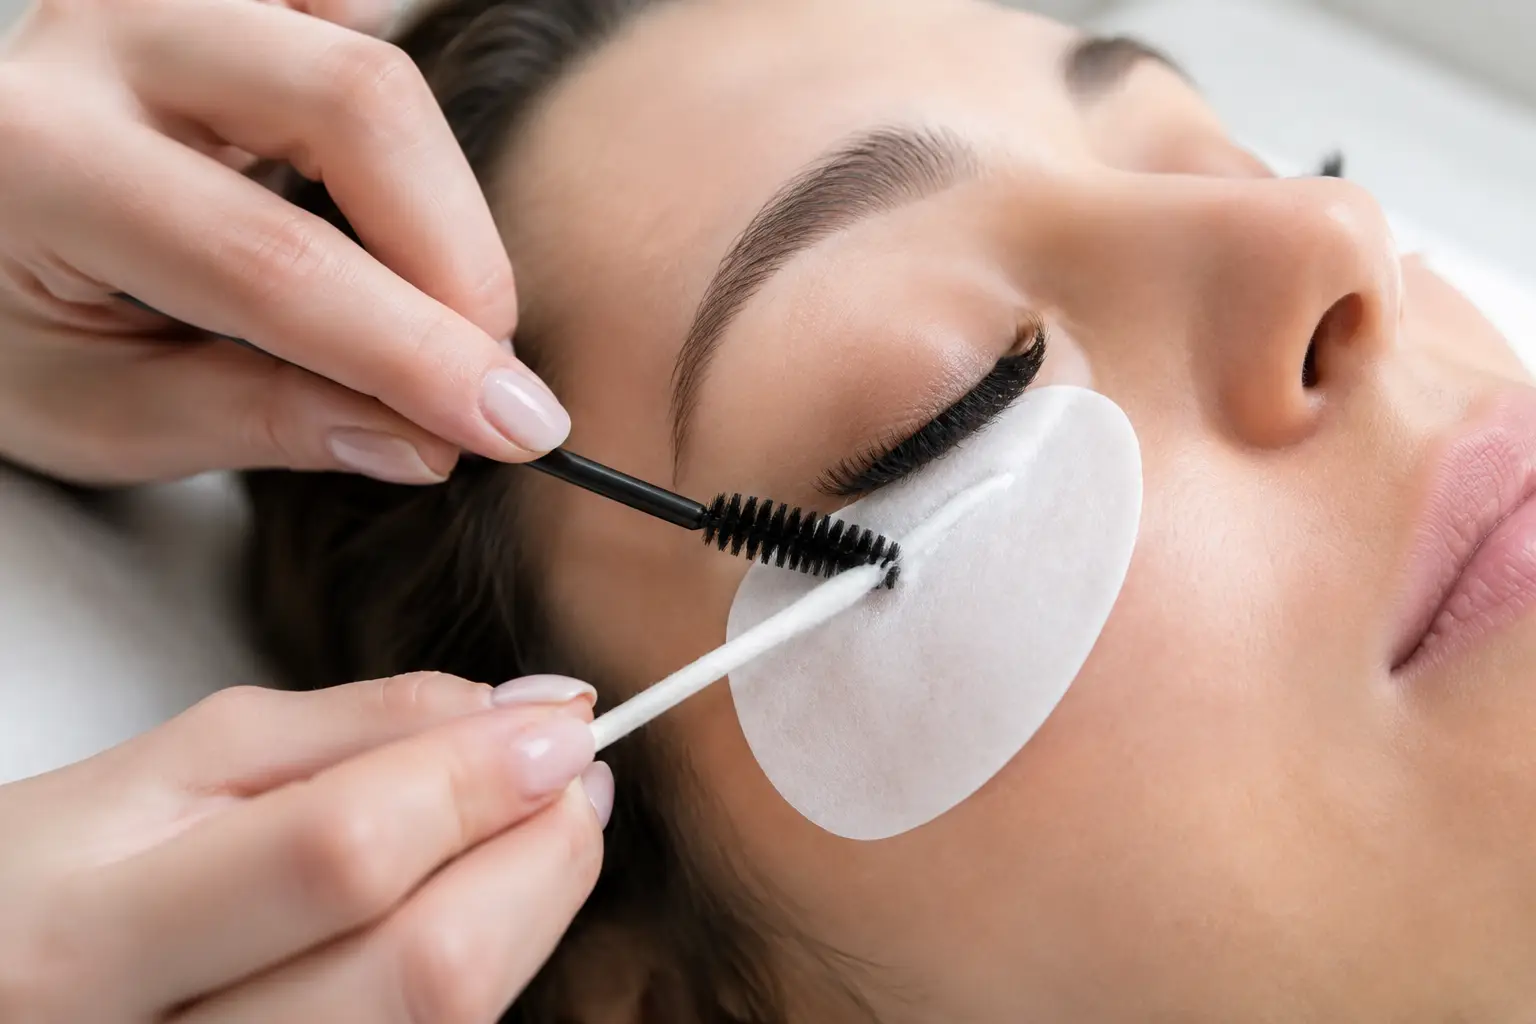
How to Clean Lash Extensions Without Losing Them

Florida humidity, sunscreen, workout sweat, and everyday makeup can build up at the lash line faster than you think. Knowing how to clean lash extensions correctly keeps your eyes feeling fresh, supports beautiful retention, and protects the polished, effortless look you chose in the first place. Clean lashes are not just a beauty detail. They are part of proper lash care.

The goal is simple: remove oil, debris, and bacteria without rubbing, tugging, or weakening the adhesive bonds. A gentle routine takes only a few minutes, yet it can make the difference between lashes that stay fluffy through your fill appointment and lashes that twist, shed early, or feel uncomfortable.

Why Clean Lash Extensions Matter

Extensions create a beautiful frame for the eyes, but the natural lash line still produces oils and collects daily buildup. Skipping cleansing can allow makeup residue, dead skin, sweat, and environmental debris to gather around the base of your extensions. That buildup may make lashes look clumpy or dull, and it can interfere with the clean, comfortable feel you want from a luxury lash service.

For clients in Clearwater and across Tampa Bay, heat and humidity add another layer to the equation. A beach day, a gym session, or a warm commute can leave perspiration and skincare residue around the eyes. Cleansing removes what does not belong there while helping your lash line stay fresh between fills.

There is a balance, though. Over-cleansing with harsh products or rubbing the lash line aggressively can create unnecessary shedding. Your extensions need gentle attention, not scrubbing. Think of the routine as skincare for your lash line: consistent, light-handed, and tailored to the products your artist recommends.

What to Use to Clean Lash Extensions

The best cleanser is one made specifically for lash extensions or a gentle, oil-free, extension-safe foaming cleanser. It should rinse cleanly and leave behind no oily film. Oil-based cleansers, cleansing balms, heavy eye creams, and some waterproof makeup removers can affect lash adhesive over time, especially when they are repeatedly worked into the lash line.

Keep your tools simple. You will need an extension-safe cleanser, clean water, a soft lash cleansing brush or a small fluffy makeup brush reserved only for this purpose, a lint-free towel or clean paper towel, and a clean spoolie. Cotton pads and cotton swabs can leave fibers caught in the extensions, so they are not the best choice for daily lash care.

If your artist has provided an aftercare kit, use it. Lash adhesives, styling choices, and your own skin type can influence the ideal routine. Someone who wears eye makeup most days may need a more thorough evening cleanse than someone who wears no makeup and has dry skin. Personalized aftercare always comes first.

How to Clean Lash Extensions Step by Step

Start with clean hands

Wash your hands before touching your face or lashes. This small step matters because fingers transfer skincare, natural oils, and bacteria directly to the eye area. Avoid applying hand lotion immediately before cleansing your lashes.

Apply cleanser gently

Wet the lash line with lukewarm water, not hot water. Dispense a small amount of lash cleanser onto your cleansing brush or directly onto your closed eyelid, depending on the product instructions. With your eye closed, use soft downward and outward motions along the lash line.

Do not scrub back and forth or press the extensions into the lid. Your goal is to cleanse the base where buildup collects, not to rough up the lashes themselves. Be especially gentle at the inner and outer corners, where extensions can become tangled if handled too firmly.

Rinse completely

Rinse the cleanser away with lukewarm water. A clean rinse is essential because leftover cleanser can leave a residue or cause irritation. Let the water flow softly over the eye area rather than blasting your lashes with a high-pressure shower stream.

If you are cleansing at the sink, cupping water over closed eyes works well. In the shower, keep the spray indirect and avoid standing with your face directly under the water.

Pat dry, then brush

Gently blot around the eyes with a lint-free towel or clean paper towel. Never rub your lashes dry. Once they are mostly dry, use a clean spoolie to brush through the extensions from the middle to the tips, using light upward strokes.

Brushing helps separate lashes and keeps your set looking soft and intentional. If you notice a lash that has twisted or crossed over another extension, resist the temptation to pull it free. A lash artist can safely assess and correct it at your next appointment.

How Often Should You Clean Lash Extensions?

Most clients benefit from cleansing lash extensions once a day, usually in the evening. This removes the day’s sweat, skincare, makeup, and airborne debris before you sleep. If you wear eye makeup, exercise heavily, swim, or spend a long day outdoors, cleanse as soon as it is practical afterward.

A morning rinse may also feel refreshing, particularly after a humid night or if you use rich nighttime skincare. Still, there is no need to overdo it with multiple deep cleanses each day unless your artist has advised it. Gentle consistency is more valuable than constant washing.

For newly applied extensions, follow your artist’s timing instructions. Modern adhesives and application methods vary, and your technician will tell you when it is appropriate to get the lash line wet and begin regular cleansing. If instructions differ from general advice you have seen online, trust the professional who performed your service.

Products and Habits That Can Shorten Retention

A beautiful lash set lasts best when daily products support it. You do not have to give up every skincare favorite, but you may need to adjust where and how you apply certain formulas. Keep creamy moisturizers, facial oils, sunscreen, and eye makeup removers away from the lash base whenever possible.

Be cautious with waterproof mascara and eyeliner. Waterproof formulas are designed to stay put, which means they often require oil-based removal or extra rubbing. If you want added definition, ask your lash artist which extension-safe liner or makeup options suit your set.

Avoid picking at a loose extension, sleeping face-down whenever possible, and using a mechanical eyelash curler. Heat tools near the eyes are also not a great match for extensions. These habits can bend, crack, or pull lashes before their natural shedding cycle is complete.

One more practical tip: wash your pillowcase regularly. Skincare, hair products, and natural oils transfer to fabric, then back to the face while you sleep. A clean silk or satin pillowcase can be a lovely option for reducing friction, but cleanliness matters more than the material.

When Your Lashes Need Professional Attention

Normal shedding is expected because natural lashes cycle every day. You may occasionally see an extension attached to a natural lash that has shed, and that is completely normal. What is not normal is persistent redness, swelling, burning, itching, pain, or thick crusting around the lash line.

If you experience discomfort, stop using new products around the eyes and contact your lash artist or a medical professional as appropriate. Do not try to remove the extensions yourself with oil, steam, tweezers, or at-home adhesive removers. Professional removal protects your natural lashes and your delicate eye area.

If your lashes look sparse, are growing out, or no longer feel balanced, schedule a fill rather than waiting until the set has fully shed. Regular fills keep your look refined and allow your artist to remove grown-out extensions, cleanse the lash line professionally, and customize the shape for your current style.

At The Permanent Makeup Studio, beautiful lashes are meant to feel as effortless as they look. Give them a few calm minutes of care each day, and your next fill can begin with a clean, comfortable canvas ready for fresh, confidence-boosting detail.
Lash Lift Versus Extensions: Which Fits You?

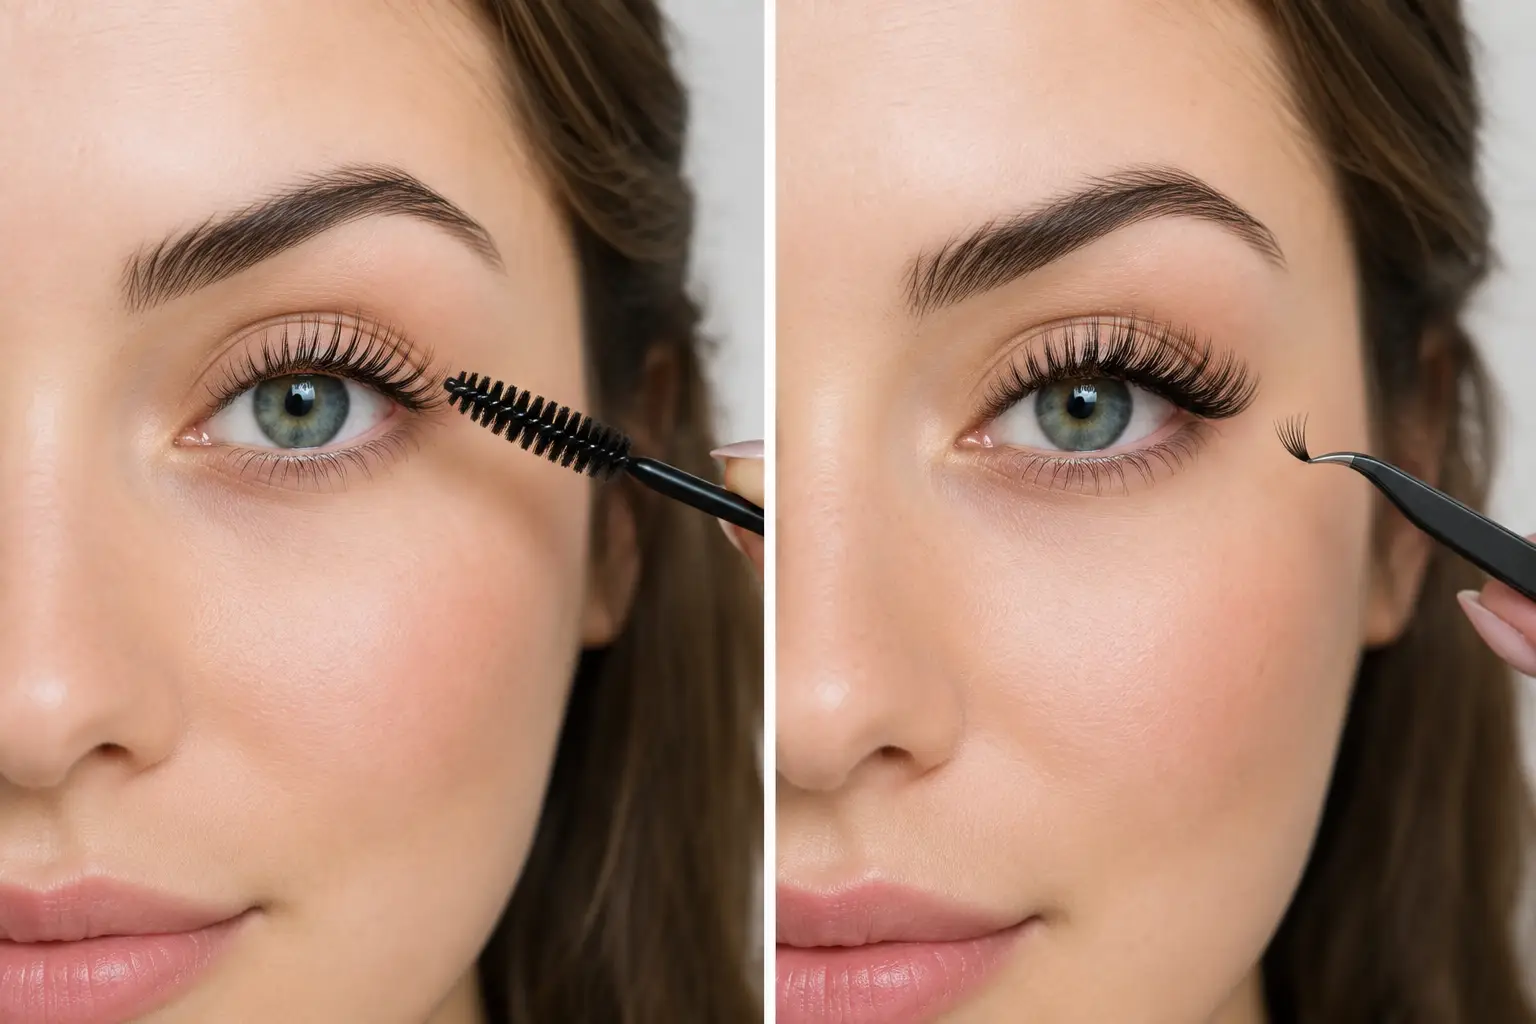
Your mascara is smudging after a humid Clearwater morning, or your lash curler has become one more thing to find before work. That is usually when the lash lift versus extensions decision starts to feel less like a beauty extra and more like a routine upgrade. Both services create a brighter, more polished eye area, but they deliver very different looks, maintenance schedules, and experiences.

A lash lift enhances what you naturally have. Lash extensions add customized length, fullness, and definition. The best choice comes down to your natural lashes, the amount of drama you want, and how much time you would like to spend maintaining your results.

Lash Lift Versus Extensions: The Main Difference

A lash lift is a semi-permanent curl treatment for your natural lashes. Your artist carefully lifts the lashes from the root, setting them into a flattering upward shape. Add a tint, and fair or naturally lighter lashes appear darker and more visible without mascara. The overall effect is fresh, open-eyed, and beautifully natural.

Lash extensions are individual synthetic lashes professionally applied to your own lashes. Rather than changing the curl of your natural lashes alone, extensions build a new lash look. Your artist can create a soft classic set, a textured hybrid style, or a fuller volume effect based on your eye shape, lifestyle, and desired level of glam.

Think of a lift as your lashes at their best. Extensions are a custom lash wardrobe that can range from understated to red-carpet ready.

What a Lash Lift Looks and Feels Like

A lash lift is ideal for someone who likes low-maintenance beauty but still wants to look awake before applying a stitch of makeup. The appointment is relaxing, and your artist works with the length and density you already have. If you have naturally long lashes that point straight down, the transformation can be especially noticeable.

The result is not the appearance of added lashes. A lift will not create thickness where there is very little natural lash density, and it will not deliver the dramatic fringe of a volume extension set. What it does beautifully is reveal more of your own lashes and make your eyes look naturally more open.

Most lash lifts last about six to eight weeks, depending on your natural lash cycle and aftercare. A tint often lasts several weeks, although lighter lashes may gradually become visible again as new lashes grow in. After the initial aftercare period, many clients appreciate being able to swim, work out, and get ready quickly without planning around lash fills.

What Lash Extensions Can Create

Extensions are for the client who wants noticeable definition every day. They are especially appealing if your natural lashes are sparse, short, light, or simply not the look you want to rely on. With the right styling, extensions can add soft fullness for daily wear, an elongated cat-eye effect, or a glamorous, fluffy finish for events and photos.

Customization is the luxury of extensions. A skilled artist considers your natural lash health, eye shape, lid space, and the strength of your natural lashes before selecting lengths, curls, and density. More is not always better. An extension set should feel comfortable, look balanced, and be designed to protect the natural lashes supporting it.

Because natural lashes shed continuously, extensions require regular fills. Many clients book fills every two to three weeks to replace extensions that have shed with their natural lashes and keep the set looking full. Your first full set takes longer than a lash lift, while fill appointments become a recurring part of your beauty schedule.

Compare Longevity, Maintenance, and Daily Routine

A lift has the easier maintenance schedule. Once the initial aftercare window has passed, there is no need to brush through adhesive bonds, book frequent fills, or adjust your skincare routine around a lash line. It is an excellent fit for frequent travelers, swimmers, busy parents, and anyone who prefers a polished but nearly effortless finish.

Extensions require more intention, but many clients find the payoff worth it. You will want to clean your lash line as directed, brush your lashes gently, avoid picking or pulling, and be thoughtful with oil-heavy products around the eyes. You may also need to change how you sleep or how you position your face during a facial. In return, you wake up with a complete eye look that can make mascara and eyeliner feel optional.

Florida heat, beach days, and workout classes do not automatically rule out either service. The key is following your artist’s aftercare instructions. With extensions, cleansing after sweat, sunscreen, and beach exposure is particularly helpful for keeping the lash line fresh. With a lift, keeping the lashes dry during the specified setting period helps protect the shape of the curl.

Which Service Gives You More Drama?

For subtle polish, a lift and tint wins. It looks like you were born with beautifully curled, dark lashes, making it a favorite for clients who do not want others to immediately recognize that they had a lash service. It also pairs naturally with soft brows, lip blush, and a clean, glowing complexion.

For visible fullness, extensions win. Even a classic set creates definition a lift cannot replicate on sparse lashes. Hybrid and volume styles take that effect further, giving you the freedom to choose a look that feels softly feminine, elevated, bold, or event-ready.

Your makeup habits matter here. If you love wearing winged liner and full-glam makeup, extensions can create a beautiful frame for the eyes, although your artist may recommend a style that leaves enough lid space for your preferred liner. If you wear little makeup and mainly want to stop relying on mascara, a lift may give you the refined, natural result you are after.

Lash Health Comes Before the Look

Neither service should feel painful, heavy, or irritating. A professional appointment begins with an honest conversation about your eye sensitivity, lash history, allergies, medications, and goals. Extensions must be applied with proper isolation and a weight appropriate for your natural lashes. A lash lift should be timed and shaped carefully to avoid overprocessing.

Let your artist know if you have an active eye infection, eye-area irritation, recent eye surgery, or a history of reactions to lash adhesives or treatments. You may need to postpone your appointment or receive additional guidance first. Clients who use prescription eye products or have very fragile lashes should also discuss this before choosing a service.

Avoid attempting at-home lifting kits or removing extensions by pulling them off. A luxury result is not only about how lashes look when you leave the salon. It is also about protecting the lashes you will have at your next appointment.

How to Choose Between a Lash Lift and Extensions

Choose a lash lift if you want a natural enhancement, have lashes with enough length to showcase, and prefer maintenance every several weeks instead of frequent fill appointments. It is also a smart first professional lash service if you are curious about a more polished daily look but do not know how dramatic you want to go.

Choose extensions if you want customized fullness, a stronger eye makeup effect, or a look that holds up from your first coffee to your evening plans. They are ideal when you are happy to maintain regular fills and follow a simple at-home lash care routine.

If you are still torn, consider your calendar. A lift is wonderful before a beach vacation or a stretch of travel when appointments may be difficult to schedule. Extensions are a beautiful choice before a wedding, milestone celebration, photo session, or any season when you want to feel put together with less daily makeup.

At The Permanent Makeup Studio, a personalized consultation can help match your desired style to your natural lashes and lifestyle. Bring a few inspiration photos, describe how you normally wear makeup, and be honest about the maintenance you can realistically keep up with. The right lash choice should make getting ready feel lighter, more confident, and entirely your own.

Does Lip Blush Hurt? What It Really Feels Like

A softly tinted, more defined lip can make getting ready feel beautifully simple. But before booking, most first-time clients ask the same honest question: does lip blush hurt? Lip blushing is not completely sensation-free, but for most clients, it is very manageable. With professional topical numbing, a skilled artist, and the right preparation, the experience is usually more comfortable than people expect.

The feeling also changes throughout the appointment. Your individual sensitivity, your artist’s technique, the condition of your lips, and even what you did the day before can all affect how lip blush feels. Knowing what is normal can replace nerves with confidence.

Does Lip Blush Hurt During the Procedure?

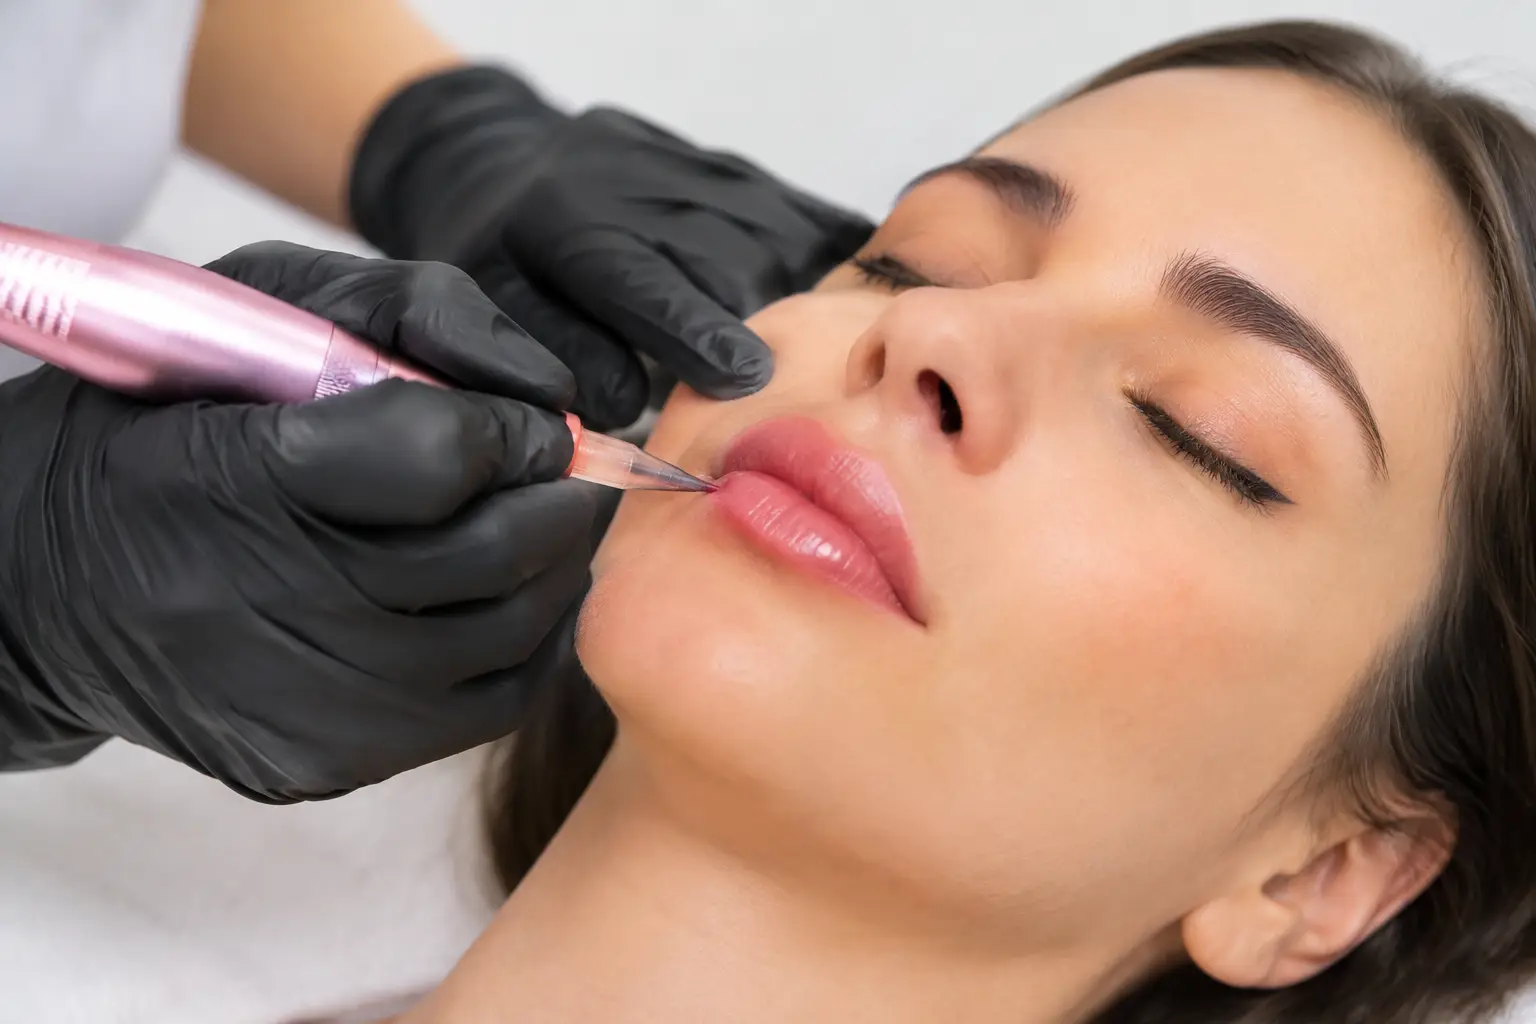
Lip blushing is a cosmetic tattoo procedure that places pigment into the lips using a specialized machine and fine needle configuration. Because the skin is being worked on, you will feel something. Most clients describe it as a light scratching, vibration, or repetitive prickling sensation rather than sharp pain.

The first pass can be the most noticeable because the artist is mapping the lip shape and beginning the pigment placement. A high-quality topical numbing cream is typically applied before the procedure begins. Once the skin is open, your artist may use a secondary numbing product during the service to help maintain comfort.

For many people, lip blush falls in the mild-to-moderate discomfort range. It is often compared to the sensation of getting brows threaded repeatedly, using an electric toothbrush against sensitive skin, or receiving tiny quick scratches. Some areas may feel more tender than others, especially the cupid’s bow, the inner lip line, and spots where your lips are naturally dry or chapped.

There is no single answer that applies to every client. If you are very sensitive to cosmetic treatments, have a low pain tolerance, or are having your lips worked on after a recent cold sore, irritation, or sun exposure, the appointment may feel more intense. A qualified artist will never treat discomfort as something to simply push through. Speak up so they can pause, assess, and keep you as comfortable as possible.

Why Some Lip Blush Appointments Feel More Sensitive

Your lips have many nerve endings, which is one reason they can feel more sensitive than other permanent makeup areas. That does not mean the procedure has to be painful. It simply means preparation and professional technique matter.

Dry, cracked, sunburned, or peeling lips can make pigment application less comfortable and can affect how evenly color heals. Florida sunshine is gorgeous, but a sunburn right before your appointment is a reason to reschedule. The same goes for active irritation, open skin, or a current cold sore outbreak.

Your body can also be more reactive at certain times. Some clients feel extra sensitive around their menstrual cycle. Stress, poor sleep, dehydration, and arriving hungry can lower your comfort threshold, too. A calm, rested body tends to have a better experience than one running on coffee and no breakfast.

The desired result can play a role as well. A natural wash of rosy color may require less saturation than a more vivid lipstick-style look. The shape, color correction needs, existing lip tone, and amount of pigment needed are all considered when your artist creates a personalized plan.

Cold sore history deserves special attention

If you have ever had cold sores, tell your artist during your consultation. Lip procedures can trigger an outbreak in people who are prone to them, even when there is no active sore at the time of the appointment. Your medical provider may recommend preventive antiviral medication before and after treatment.

Do not arrive with an active cold sore or healing outbreak. Lip blushing should be postponed until the area is fully healed and you have been cleared to move forward. This is about protecting your comfort, your results, and your health.

How to Make Lip Blush More Comfortable

A luxury experience starts before you sit in the treatment chair. Follow your studio’s pre-care instructions closely, because they are designed to support both your comfort and color retention.

In the days before your appointment, keep your lips hydrated with a simple, non-irritating lip balm and drink plenty of water. Gently exfoliating flaky skin only if your artist approves can help create a smoother canvas. Avoid aggressive scrubs or products that leave your lips raw.

On the day of your service, eat a balanced meal and arrive hydrated. Avoid alcohol for at least 24 hours beforehand, and limit caffeine if your artist instructs you to do so. Both can increase sensitivity, swelling, or bleeding for some clients. Avoid blood-thinning medications and supplements only under the guidance of your prescribing provider. Never stop prescribed medication without medical advice.

Bring headphones if calming music or a favorite podcast helps you relax. Slow breathing, unclenching your jaw, and letting your artist know when you need a brief break can make a meaningful difference. You are not expected to prove your toughness. A polished result comes from a careful, collaborative appointment.

What About Pain After Lip Blushing?

Most clients do not describe the healing period as painful. Immediately after the service, lips can feel warm, tight, tender, or mildly swollen. The sensation is often similar to having dry lips after a day in the sun, or the temporary fullness after a cosmetic lip treatment.

Swelling is usually most visible on the day of the procedure and often settles quickly. Your color will initially look brighter, warmer, or more intense than the healed result. This is expected. As your lips heal, the surface may feel dry and may lightly flake. Resist picking, rubbing, or peeling the skin, even if the temporary color shift feels dramatic.

Use only the aftercare products and instructions provided by your artist. In general, you will need to keep the area clean, avoid touching your lips with unwashed hands, and protect them from unnecessary heat, moisture, friction, and sun exposure while healing. Activities such as swimming, steam rooms, intense workouts, and long beach days may need to wait for the period your studio recommends.

If you experience severe pain, spreading redness, unusual discharge, fever, significant swelling that worsens, or any reaction that concerns you, contact a medical professional promptly. A reputable permanent makeup studio provides clear aftercare guidance, but medical concerns should always be evaluated by an appropriate healthcare provider.

The Artist Makes a Difference

Comfort is not just about numbing cream. It also comes from choosing a trained artist who works with a gentle hand, appropriate depth, clean equipment, quality pigment, and a personalized approach. Rushing a lip blush procedure can create an uncomfortable experience and compromise the softness and balance that make the service so flattering.

At The Permanent Makeup Studio, lip blushing is approached as an enhancement of your natural features, not a one-color-fits-all treatment. Your artist can discuss your preferred tone, the shape you want to emphasize, your prior cosmetic tattoo history, and any relevant health considerations before treatment begins. A complimentary consultation is the perfect place to ask directly about numbing, healing, and whether lip blush is the right choice for you.

Is Lip Blush Worth It If You Are Nervous?

For clients who love the idea of waking up with more even-looking lip color but worry about pain, the answer is often yes, provided they are a good candidate and choose a professional studio. The treatment takes some patience, including a healing period and a touch-up appointment, but the payoff can be a fresh, polished look that stays put through busy mornings, humid Tampa Bay days, and makeup-free moments.

You do not need to be fearless to enjoy lasting beauty. Come prepared, be transparent about your concerns, and let your artist tailor the experience around your comfort. A little temporary sensitivity can lead to a beautifully soft lip color that makes you feel put together long after the appointment ends.

Does Microblading Fade? What to Expect Over Time

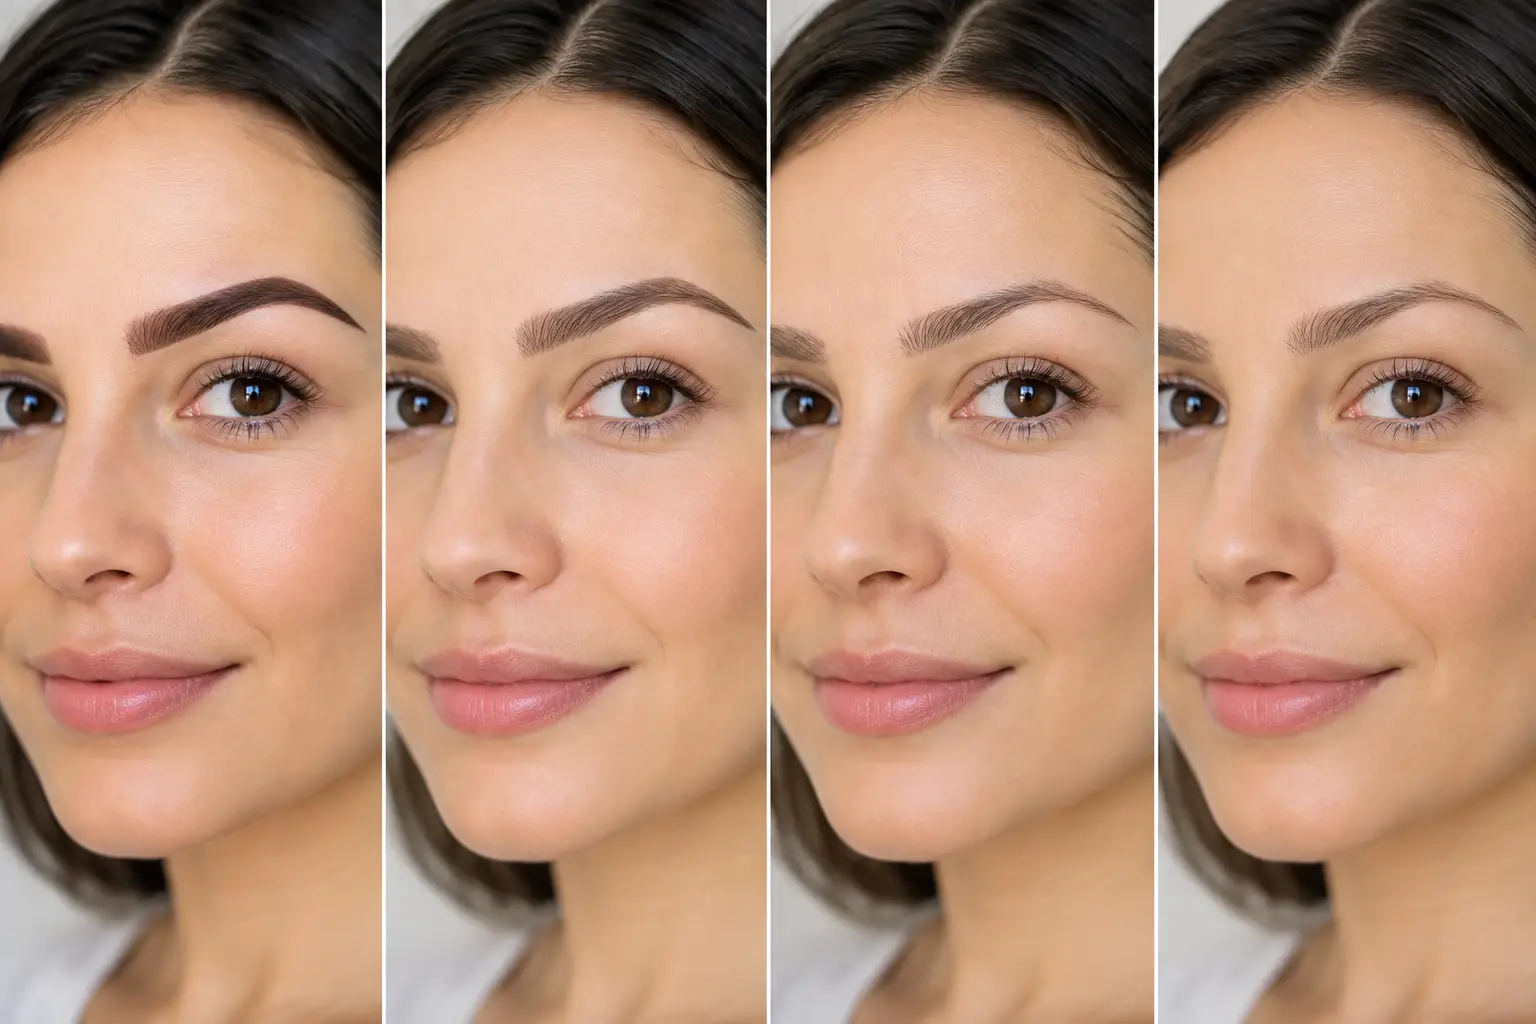
Freshly shaped brows can make the morning routine feel instantly more polished. But before booking, most clients want the honest answer to one question: does microblading fade? Yes. Microblading is designed to fade gradually over time, which is part of what makes it a semi-permanent treatment rather than a traditional body tattoo. With the right artist, skin preparation, and aftercare, that fade can be soft, even, and easy to refresh.

For clients who want defined, natural-looking brows without filling them in every day, understanding the fading process helps set the right expectations. Your results should evolve gracefully, not surprise you.

Does Microblading Fade Completely?

Microblading deposits pigment into the upper layers of the skin in fine, hair-like strokes. Because the pigment is placed more shallowly than conventional tattoo ink, the body naturally breaks it down and the skin sheds and renews over time. Most clients see noticeable fading within 12 to 24 months, although the timeline varies.

Some residual pigment can remain longer, particularly if the original work was done deeply or with a heavy hand. That is why choosing a skilled, properly trained artist matters. Beautiful permanent makeup is not about placing the darkest possible color. It is about selecting a flattering pigment, creating balanced strokes, and planning for how the brows will soften as time passes.

Microblading is not meant to look freshly tattooed forever. It is meant to give you the appearance of naturally fuller, beautifully structured brows with a low-maintenance finish.

Why Your Brows Fade at a Different Pace

No two sets of brows hold pigment exactly the same way. Skin type is one of the biggest factors. Normal to dry skin often retains crisp hair strokes longer, while oily skin may metabolize pigment faster and cause strokes to heal softer or slightly more powdery. This does not mean oily-skinned clients cannot enjoy a beautiful brow enhancement. It simply means a different technique, such as a soft powder or combination brow, may sometimes offer better long-term retention.

Lifestyle also plays a role. Here in Clearwater and across Tampa Bay, sunshine, heat, pool days, and active outdoor schedules are part of the beauty of living on the Gulf Coast. They can also speed up fading. UV exposure, saltwater, chlorine, frequent sweating, and exfoliating skincare all place extra demands on pigment retention.

Your immune system and individual metabolism matter, too. Some bodies process pigment more quickly than others. Hormonal changes, certain medications, and skincare treatments can affect how the brows heal and how long the color remains visible. This is why a complimentary consultation is valuable: it gives your artist a chance to discuss your skin, routines, goals, and the brow style most likely to suit you.

The Healing Fade Is Not the Final Result

The first few weeks after microblading can feel like a beauty roller coaster if you do not know what is normal. Immediately after your appointment, brows often look darker, warmer, and more defined than the healed result. This is expected.

As the skin heals, the color may appear to fade dramatically or even seem to disappear for a short period. A light layer of healing skin can temporarily obscure the pigment. Over the following weeks, the color settles back in and softens into its intended shade. The finished result is typically assessed around four to six weeks after the initial appointment.

That is the reason for a perfecting session. The first appointment establishes shape and pigment; the follow-up allows the artist to reinforce areas that healed lighter, refine the color, and make thoughtful adjustments. Skipping this appointment can leave the brows looking less complete and may shorten the overall life of the treatment.

How to Help Microblading Last Longer

Great retention begins before your artist ever makes the first stroke. Follow all pre-care instructions closely, including any guidance on avoiding alcohol, blood-thinning products, or certain skincare ingredients before your service. Be fully honest about medical conditions, medications, previous brow tattooing, and recent treatments. Safe, beautiful results depend on a personalized plan.

After your appointment, protect the healing skin exactly as instructed. The goal is to let the pigment settle without excess moisture, friction, or irritation. Avoid picking or scratching, even if flaking occurs. Pulling at scabs can remove pigment and create patchy healing.

For the long term, daily SPF around the brow area is one of the simplest ways to preserve your color. Keep strong exfoliants, retinol, chemical peels, and brightening products away from the brows when possible. If you receive facials, microneedling, laser treatments, or other professional skincare services, let your provider know you have microbladed brows so they can protect the area.

You do not need to give up a polished skincare routine to keep your brows beautiful. You simply need to treat the brow area as specialized skin. A little care protects a lot of artistry.

When Should You Get a Microblading Touch-Up?

A color refresh is commonly booked every 12 to 18 months. Some clients prefer to return closer to the one-year mark to maintain a consistently defined look, while others enjoy their brows for closer to two years before refreshing. If you spend a great deal of time in the sun, have very oily skin, use active skincare, or notice the shape becoming less visible, you may be ready sooner.

The ideal time for a touch-up is before the pigment has faded completely. Refreshing existing brows generally allows your artist to work with the established shape and keep the process more straightforward. Waiting until the color is nearly gone may mean a more involved appointment, especially if the original shape needs to be re-created.

A touch-up is not a sign that something went wrong. It is normal maintenance, much like refreshing your hair color, keeping up with lash fills, or booking brow lamination. Semi-permanent beauty stays most beautiful when it is cared for on a schedule that fits your skin and lifestyle.

Can You Prevent Microblading From Fading?

You can slow fading, but you cannot and should not stop it entirely. Promises of permanent, no-maintenance color should be approached carefully. Skin changes, facial features evolve, and beauty preferences shift. The semi-permanent nature of microblading gives you flexibility to adjust your brow color and style over the years rather than being locked into a look that no longer feels like you.

There is a trade-off to consider. Very bold brows may seem appealing right after an appointment, but a natural, carefully selected pigment usually heals more elegantly and ages more beautifully. The best brows complement your features in every setting, from a quick beach-day errand to a special event, without overpowering your face.

Choosing a Brow Service That Fits Your Skin

Microblading is lovely for many clients, especially those seeking fine, realistic hair strokes. It is not automatically the best answer for everyone. Mature skin, very oily skin, scarred brow areas, or clients with a previous brow tattoo may benefit from another approach. Powder brows create a soft makeup effect, while combination brows blend hair-like detail with gentle shading for added definition.

An experienced artist will not force every face into the same treatment. At The Permanent Makeup Studio, the focus is on personalized brow artistry that works with your natural brow growth, skin characteristics, and desired level of everyday glamor. A beautiful result should look intentional, refined, and distinctly yours.

If you are considering microblading, plan for the initial session, the healing period, and future color refreshes as part of the experience. When you choose artistry over shortcuts and follow your aftercare closely, fading does not take away from the result. It simply gives you the chance to keep your brows fresh, flattering, and confidently you.

Top Permanent Makeup Benefits for Everyday Glamour

A brow pencil that disappears by lunch, lipstick that transfers to every coffee cup, eyeliner that smudges after a workout – these are small frustrations, but they can make getting ready feel like a daily chore. The top permanent makeup benefits are about replacing that routine with personalized, polished definition that stays put through real life. For clients across Clearwater and Tampa Bay, that means spending less time in the mirror and more time feeling like themselves.

Permanent makeup is not about creating one look for everyone. It is a cosmetic tattooing service designed around your natural features, style preferences, skin tone, and lifestyle. From soft, fluffy brows to a healthy-looking lip blush or a subtle lash-line enhancement, the right treatment should look refined on an ordinary Tuesday, not only under event lighting.

Permanent Makeup Benefits That Fit Real Life

1. More time for the parts of your morning that matter

One of the most immediate benefits is a shorter getting-ready routine. Carefully shaped brows can frame the face before you reach for concealer. A lip blush can restore the appearance of balanced color without reapplying lipstick. Semi-permanent eyeliner can create the look of fuller lashes even on makeup-free days.

The goal is not to eliminate every beauty product you enjoy. It is to make your baseline look feel finished. You can still wear a dramatic lip, smoky eye, or full-glam brow when the occasion calls for it, but you are no longer starting from zero each morning.

That convenience matters for busy professionals, parents, frequent travelers, and anyone who would rather reserve extra time for coffee, a workout, or an unhurried school drop-off. It also makes post-gym errands and early beach mornings feel far less high-maintenance.

2. Definition that holds up in Florida heat and humidity

Tampa Bay weather is beautiful, but it is not always kind to conventional makeup. Humidity, sweat, swimming, rain, and sunscreen can all affect how long your products stay crisp. Permanent and semi-permanent cosmetic enhancement provides color and shape beneath the surface of the skin, so it does not wipe away the way a brow gel or liner pencil can.

This is especially appealing for active clients. Whether you are heading to Pilates, spending the afternoon on the water, or walking into a meeting after a humid commute, your brows, lips, or eyeliner can retain their intended definition. You still need to follow your artist’s healing instructions carefully, particularly around water exposure and sweating immediately after treatment, but healed results are made for movement.

3. A look designed for your face, not a passing trend

Beautiful permanent makeup should never feel stamped on. A skilled artist considers your bone structure, natural hair color, skin undertone, existing brow growth, lip shape, and the level of definition you actually want to wear every day. The result can be whisper-soft or more noticeably polished, but it should still belong to your face.

For eyebrows, that may mean hair-stroke microblading, soft powder brows, or a combination technique. Clients with oily skin, mature skin, sparse hair, or previous brow tattooing may be better suited to one approach over another. There is no single “best” brow method without seeing the skin and discussing the desired healed result.

The same principle applies to lips and eyeliner. A lip blush can create a fresh, even wash of color rather than the appearance of heavy lipstick. Lash-line eyeliner can make the lashes look darker and denser without creating a bold wing. Personalized artistry is what keeps long-lasting beauty from looking overdone.

Top Permanent Makeup Benefits Beyond Daily Makeup

4. Confidence when you are bare-faced

Many clients do not want to look dramatically made up from the moment they wake up. They simply want their features to look balanced and awake. This is where permanent makeup can feel especially transformative. A little color in the lips, a defined brow shape, or a delicate eyeliner enhancement can help you feel pulled together even on low-key days.

That confidence can be meaningful during vacations, medical recovery, early mornings, pool days, or moments when applying makeup is inconvenient. It can also support people whose natural brow hair has become sparse from overplucking, aging, hormonal changes, or certain health-related conditions. Permanent makeup is cosmetic, not medical treatment, but restoring the appearance of a feature can make a real difference in how someone feels when they look in the mirror.

Scalp micropigmentation offers a similar confidence-focused benefit for men and women managing the visual impact of thinning hair or scars. By placing detailed pigment impressions across the scalp, it can create the appearance of density, a closer-cropped hairline, or less noticeable scar tissue. The best plan depends on hair color, existing hair pattern, skin tone, and long-term hair goals.

5. Long-lasting value with room for refinement

Permanent makeup is an investment, and its value is not only about fewer products in your makeup bag. It is also about consistent results and the freedom to build a beauty routine around what you enjoy rather than what you feel required to fix every day.

Most treatments fade gradually over time rather than remaining identical forever. This is a positive for many clients because preferences, hair color, and skin can change. Touch-up appointments allow your artist to refresh color, refine shape, and maintain a flattering result. How long pigment lasts varies by treatment area, skin type, sun exposure, skincare routine, metabolism, and aftercare.

A transparent consultation helps set realistic expectations around the initial session, a possible perfection visit, and future maintenance. Luxury beauty should feel exciting, but it should also feel informed.

6. Less dependence on products that irritate or wear unevenly

Some people find that certain makeup products sting, flake, migrate, or settle into fine lines. While permanent makeup is not automatically appropriate for everyone with sensitive skin, it may reduce the need for daily application of products around the brows, eyes, or lips after the area has fully healed.

That distinction matters. The treatment itself involves a healing process and requires careful screening. Active skin irritation, sunburn, certain medications, pregnancy or nursing considerations, recent cosmetic procedures, and some medical conditions may require postponing treatment or receiving medical clearance. An experienced studio will discuss restrictions before the appointment instead of treating them as an afterthought.

What to Know Before You Commit

The word “permanent” can be misleading if it suggests a result that never changes. Cosmetic pigment is long-lasting, but it softens and fades. Healing also takes patience. Initial color may look stronger than the final healed shade, and the skin can go through a normal flaking or peeling phase. Picking, exfoliating, excessive sweating, sun exposure, and unapproved products can interfere with retention.

Choose permanent makeup because you want a dependable enhancement, not because you feel pressured to follow a trend. Bring reference photos, but be open to your artist explaining what will translate best for your unique features and skin. A style that looks stunning in a filtered photo may not be the most flattering or practical choice for your everyday life.

At The Permanent Makeup Studio, a consultation is the place to talk through your goals, review your health history and previous treatments, and create a plan that feels beautiful and realistic. Ask about pigment choices, healing timelines, aftercare, touch-ups, and the level of softness you can expect once the area settles.

The most beautiful result is rarely the loudest one. It is the brow, lip, lash line, scalp, or scar camouflage work that lets you move through your day with a little more ease – and recognize your own confidence in every reflection.

What Lip Blushing Reviews Really Tell You

A gorgeous lip blushing result should look like you on your best no-makeup day: more even in tone, softly defined, and polished enough to make mascara and a little gloss feel complete. That is why reading lip blushing reviews is about more than finding five stars. The most helpful feedback tells you how the color healed, how the artist listened, and whether the client felt cared for from consultation through touch-up.

What lip blushing reviews should reveal

Lip blushing is a semi-permanent cosmetic tattoo designed to enhance your natural lip color, balance uneven tone, and create a more defined-looking lip line. It is not meant to replace an opaque lipstick. A beautifully executed treatment can make lips appear fresher and more symmetrical while reducing the need to reapply color throughout a humid Florida day, a workout, or a long event.

The strongest reviews describe the full experience, not only the appointment-day photo. Look for details about the consultation, color selection, comfort measures, sanitation, communication, healing support, and the final healed result. A client who says, “I trusted my artist,” is encouraging. A client who explains that their artist adjusted the shade to suit their undertone, answered aftercare questions quickly, and delivered a soft healed finish gives you much more useful information.

Also pay attention to whether reviewers distinguish between immediate and healed color. Fresh lip blushing can look brighter, deeper, and more defined than the final result. As the lips heal, color softens and settles. Reviews that celebrate a result several weeks later are often especially valuable because they reflect the shade clients actually wear day to day.

Beautiful photos matter, but healed photos matter more

A portfolio full of fresh, glossy lips can be exciting, but it is only one chapter of the story. Fresh pigment, lighting, lip balm, and mild post-procedure swelling can make color appear more saturated than it will after healing. Ask whether the artist shows healed work across different skin tones, natural lip colors, and desired styles.

A refined lip blush should complement your features rather than compete with them. Some clients want a delicate rosy tint that restores color lost over time. Others want help correcting the look of a pale border, uneven tone, or subtle asymmetry. Both goals can be beautiful, but they call for different pigment choices and expectations.

When reading reviews, look for language such as “natural,” “soft,” “custom color,” and “healed beautifully.” Those phrases are meaningful when they are supported by clear client details and consistent images. At the same time, remember that “natural” is personal. Bring inspiration photos to your consultation, but be open to your artist recommending a version that works with your own lip tone and skin undertone.

Red flags worth noticing

One less-than-perfect review does not automatically mean a studio is the wrong choice. How a business responds to concerns and supports a client through the process matters. Still, pause if repeated reviews mention any of the following:

  • Feeling rushed through the consultation or pressure to choose a color quickly
  • Little or no guidance about the healing process, restrictions, or touch-up plan
  • Results that are consistently much darker, cooler, or more sharply outlined than clients requested
  • Concerns about cleanliness, inconsistent communication, or difficulty getting aftercare support

A luxury experience should feel calm, clean, personal, and transparent. You should know what the service includes, what healing may look like, and how to reach your provider with appropriate questions afterward.

Read for artistry, comfort, and follow-up care

Great lip blushing reviews tend to mention a blend of artistry and professionalism. The artistry is visible in the color and shape. The professionalism appears in the less glamorous details: consent forms, health screening, clean practices, clear restrictions, and realistic healing education.

Comfort is another common theme, but it deserves context. Everyone has a different sensitivity level, and lips can be a delicate area. Reviews may mention topical numbing, a gentle technique, or an artist who checked in often during the appointment. Those are positive signs, yet no review can promise that your own experience will feel exactly the same.

Aftercare is where a thoughtful studio continues to earn its reviews. Clients should understand that the lips can feel dry or tight and that color may change during the healing period. Following the aftercare instructions closely protects your investment and gives the pigment its best opportunity to heal evenly. Avoid judging the final shade too soon or comparing your day-three lips with someone else’s fully healed photo.

For clients with a history of cold sores, it is especially important to disclose that before booking. A qualified provider can explain the studio’s protocol and when to speak with your medical provider about prevention. Transparency protects both your comfort and your results.

The questions reviews cannot answer for you

Reviews can point you toward an experienced artist, but your consultation is where the decision becomes personal. Your natural lip color, skin tone, lifestyle, previous cosmetic tattooing, and desired level of definition all affect what is realistic. If you have very dark lip pigmentation, significant unevenness, mature skin, or prior lip tattoo work, your treatment plan may need additional nuance or more than one session.

Ask to see healed examples that resemble your starting point and your beauty goal. Discuss how the studio approaches neutralization or color correction when appropriate. Be honest about whether you want a barely-there tint or a noticeably enhanced everyday color. A confident artist will not promise the same result for every face. They will explain the trade-offs and create a plan tailored to you.

At The Permanent Makeup Studio, a complimentary consultation is the moment to talk through these details before committing to your appointment. You deserve to leave knowing what the service is designed to do, what it cannot guarantee, and what your next steps will be.

How long do lip blushing results last?

Longevity varies, which is another reason to read reviews with perspective. Many clients enjoy their lip blush for one to three years, with color gradually fading over time. Skin type, sun exposure, skincare ingredients, smoking, lifestyle, immune response, and the original pigment choice can all influence retention.

A touch-up is a normal part of maintaining a polished result, not a sign that something went wrong. Most treatments include a healing period before the artist can evaluate how your lips accepted the color and decide whether additional refinement is needed. Reviews that mention a patient, detail-focused touch-up experience can be just as reassuring as those focused on the first appointment.

Is lip blushing worth it?

For the right client, lip blushing can be one of the most effortless beauty investments: a little more color at the coffee shop, a little more definition on video calls, and less dependence on lipstick that transfers, fades, or melts in the Florida heat. It is worth it when your expectations match the treatment. Think enhanced, not completely transformed.

Choose reviews that make you feel informed rather than simply impressed. The right artist will make the decision feel personal, polished, and never rushed. When you are ready, let your consultation be the place where your favorite review becomes a beauty plan created for your lips, your lifestyle, and your confidence.

Scalp Micropigmentation Versus Hair Transplant

A widening part, a receding hairline, or a visible crown can change the way you feel when you catch your reflection in Florida sunshine. When comparing scalp micropigmentation versus hair transplant, the right choice is not about which treatment is “better” in every case. It is about the result you want, the hair you have now, your lifestyle, your budget, and how much downtime you are comfortable with.

Both options can be meaningful confidence restorers. One creates the appearance of fuller density through expertly placed pigment. The other relocates growing hair follicles to areas with thinning or loss. They solve different parts of the same concern, and in some cases, they can even work beautifully together.

Scalp Micropigmentation Versus Hair Transplant: The Core Difference

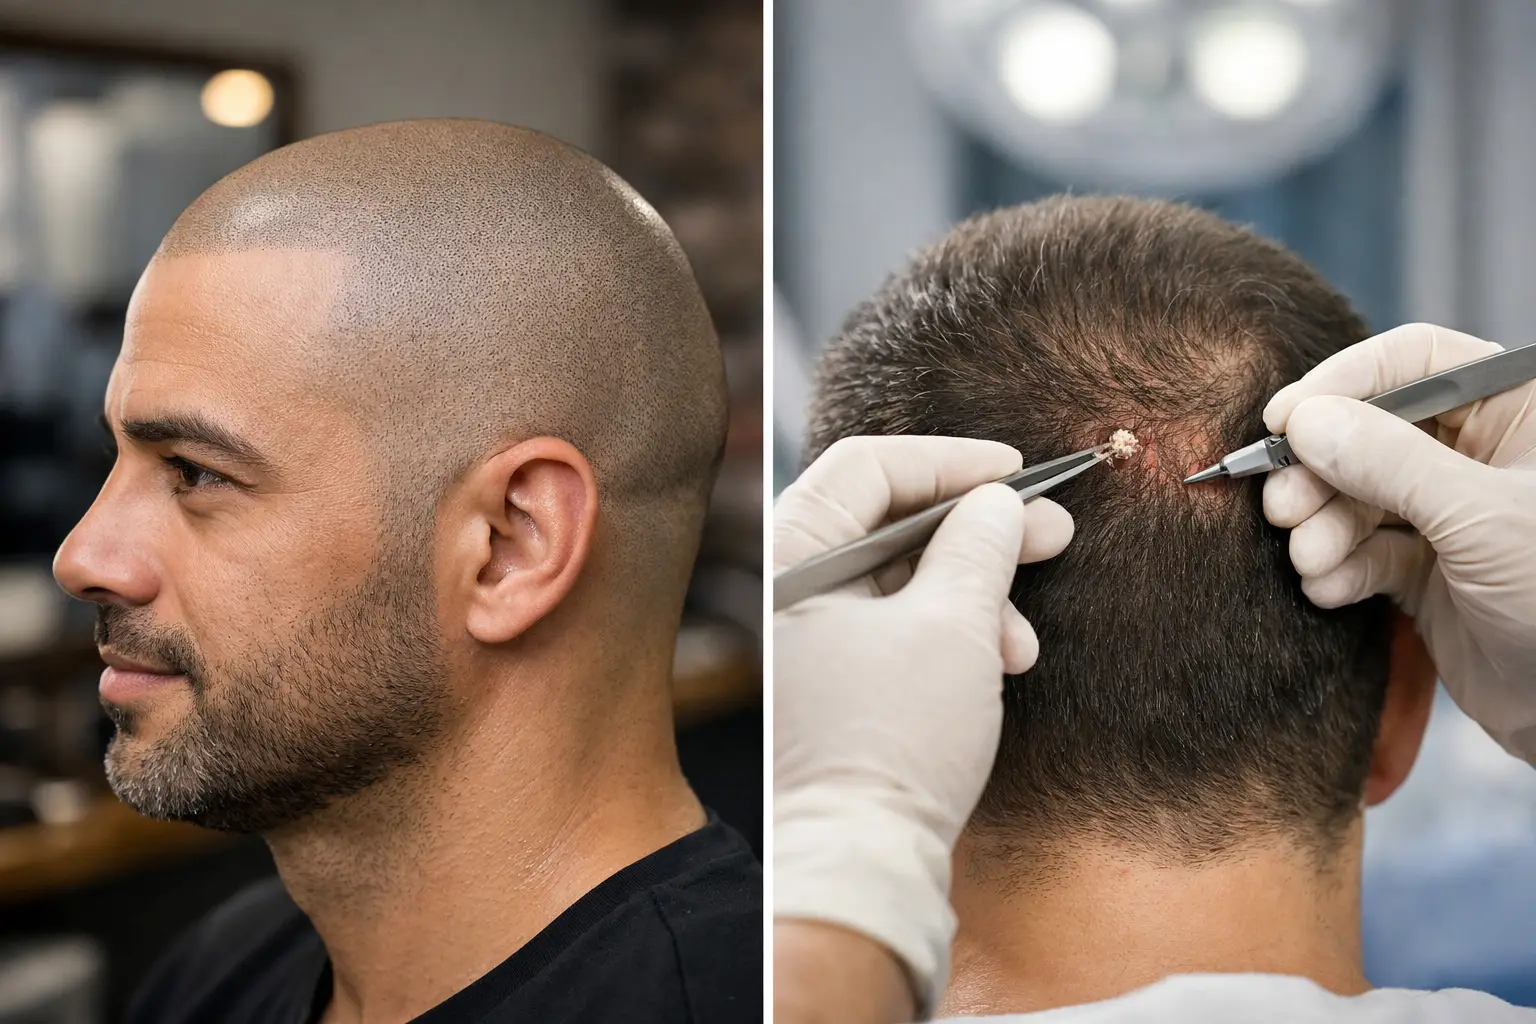
Scalp micropigmentation, often called SMP, is a cosmetic tattooing technique that places tiny, layered pigment impressions into the scalp. The impressions are designed to resemble natural hair follicles. For clients with short hair, it can create the look of a closely shaved, fuller hairline. For clients with longer hair or diffuse thinning, it can reduce the contrast between the scalp and existing hair, making hair appear denser.

A hair transplant is a surgical procedure. A qualified surgeon harvests healthy follicles, usually from the back or sides of the scalp, and implants them into areas of thinning. Those follicles may grow hair over time, allowing for cutting, styling, and coloring once healing is complete.

The distinction matters: SMP creates an exceptionally realistic visual effect, but it does not grow hair. A transplant can grow hair, but it depends on donor supply, surgical candidacy, healing, and the long-term pattern of your hair loss.

When Scalp Micropigmentation May Be the Better Fit

SMP is often an appealing choice for men and women who want a polished, low-maintenance answer to visible scalp contrast. It is especially versatile for receding hairlines, thinning crowns, diffuse hair loss, alopecia, and hair transplant scars.

For many clients, the biggest advantage is speed. SMP is typically completed over multiple sessions, with time between appointments for the pigment to settle and the artist to build natural-looking density. There is no incision, no graft harvesting, and no need to wait months for transplanted hair to grow.

It can also be a practical choice if your donor area is limited. A transplant relies on having enough healthy follicles available for transfer. SMP does not. Instead, the artist works with your skin tone, natural hair color, hairline pattern, and existing density to create a customized result that looks intentional rather than stamped on.

That artistry is essential. A hairline that is too dark, too low, too sharp, or too uniform can look unnatural. A thoughtful SMP treatment uses soft placement, gradual density, and a design suited to your age, features, and personal style. At a luxury studio, the goal is not simply to add dots. It is to create a refined result that feels like you.

SMP also fits busy schedules well. Aftercare is still important, especially in the first days after a session. Clients need to follow guidance around sweating, swimming, sun exposure, and washing so the pigment heals evenly. But the downtime is generally far lighter than surgical recovery.

When a Hair Transplant May Be Worth Considering

A hair transplant can be a strong option for someone who wants actual hair growth in an area of loss and has sufficient donor hair. It may suit clients with stable hair loss, realistic expectations, and the willingness to commit to a surgical process and a longer timeline.

The results are not immediate. Transplanted follicles commonly shed before new growth begins, and visible improvement often takes several months. Full maturation can take a year or more. That can be worthwhile for the right candidate, but it requires patience.

A transplant also comes with medical considerations. You will need a consultation with a qualified hair restoration surgeon, who can assess your scalp health, donor density, medical history, medications, and likelihood of continued hair loss. Surgery carries risks such as scarring, infection, swelling, uneven growth, and graft survival concerns. Choosing an experienced medical provider matters.

Cost is another factor. Hair transplants can be a significant investment because pricing often reflects the number of grafts, technique, surgeon expertise, and geographic area. Some people also require more than one procedure over time as hair loss progresses.

Comparing Results, Maintenance, and Lifestyle

The visual result you want should guide the decision. If you love a cropped style or want the appearance of a crisp, fuller hairline without surgery, SMP can be remarkably convincing. It is also a beautiful option for women with thinning along the part or crown because it can make existing hair look more abundant without changing its texture or styling routine.

If you want to run your fingers through new growing hair, wear longer styles in previously bare areas, or have enough donor hair to support your goals, a transplant may be more aligned with your vision. Still, transplanted hair does not stop the rest of your natural hair from thinning. Ongoing hair-loss management may be recommended by your medical provider.

SMP requires maintenance, but not daily effort. Pigment can gradually soften over the years, particularly with consistent sun exposure, skin changes, and individual lifestyle factors. Periodic touch-ups help preserve the richness and realism of the result. Sunscreen and proper scalp care can make a difference in pigment longevity.

A transplant does not require pigment touch-ups, but it can involve medical follow-up and future planning if hair loss continues around the transplanted area. The transplanted follicles may be permanent, while the surrounding native hair may still be vulnerable to thinning.

Can You Combine SMP and a Hair Transplant?

Yes. Combining the two is often an elegant strategy for the right person. SMP can add the appearance of density between transplanted hairs, soften the look of a transplant scar, or create a fuller visual result when donor hair cannot cover every area as densely as desired.

Timing is important. If you are considering surgery, speak with your surgeon first about the appropriate order and healing schedule. SMP should never interfere with surgical planning, scalp recovery, or medical advice. Once the scalp is fully healed and cleared for treatment, pigment can be customized around the transplanted growth pattern.

Questions to Ask Before You Decide

Start with the result you want to see in the mirror. Do you want the appearance of density, a shaved-hair look, scar camouflage, or growing hair that can be styled longer? Then consider your timeline, tolerance for surgery, budget, and willingness to maintain the result over time.

Ask your SMP artist how they approach hairline design, color matching, session spacing, healing, and touch-ups. Ask a transplant surgeon about donor supply, expected graft count, projected density, recovery, possible future procedures, and whether your hair loss appears stable.

Photos are helpful, but your treatment should never be copied from someone else’s scalp. Skin tone, hair texture, facial structure, loss pattern, and age all affect what will look natural. A personalized consultation gives you room to ask direct questions and make a confident decision without pressure.

Whether you choose scalp micropigmentation, a hair transplant, or a thoughtful combination of both, the most beautiful result is one that fits your life and lets you spend less time worrying about your hair.

Lip Blushing Preparation Steps Before Your Visit

A beautifully blushed lip starts before pigment ever touches the skin. The right lip blushing preparation steps help your artist work on calm, hydrated lips, support even pigment retention, and set realistic expectations for the healing period. A little planning can make a meaningful difference in how comfortable your appointment feels and how polished your final color appears.

Lip blushing is designed to enhance your natural lip tone, define the border softly, and create the look of healthy, balanced color without daily lipstick. It is not a substitute for injectable lip filler or a dramatic opaque lipstick effect. Your customized result depends on your natural lip color, skin tone, lifestyle, healing response, and how closely you follow pre- and post-care instructions.

Start With a Personalized Consultation

Your consultation is where luxury service meets smart decision-making. An experienced permanent makeup artist will discuss the shade family you love, the level of definition you want, your medical history, prior cosmetic tattoo experience, and any lip concerns such as uneven tone, old pigment, scarring, or frequent cold sores.

Bring inspiration photos if they help communicate your style, but stay open to professional guidance. A color that looks perfect on another person may heal differently on you. Your artist can recommend tones that complement your natural lip base and create a refined result that still looks like you, just more polished.

This is also the time to disclose previous lip tattooing, lip filler, allergies, prescription medications, and skin conditions. If you have had lip filler recently, ask your injector and permanent makeup artist when it is appropriate to schedule lip blushing. Treatment timing depends on your individual situation, so do not assume every beauty appointment can be booked back-to-back.

Lip Blushing Preparation Steps for the Week Before

Healthy, hydrated lips are easier to work with than dry, peeling, or irritated lips. Begin preparing about one week before your appointment, particularly if you are prone to chapping from Florida sun, air conditioning, or frequent exfoliation.

Use a simple, fragrance-free lip balm consistently throughout the day and before bed. Drink plenty of water, too. Hydration supports the condition of your skin, while balm helps protect the delicate surface of the lips. Avoid aggressively scrubbing your lips or trying a new plumping product right before your service. Burning, redness, sensitivity, and peeling are not the look you want to bring to a cosmetic tattoo appointment.

A gentle lip exfoliation once or twice during the week can be helpful if your lips are flaky. Keep it light. The goal is to lift loose, dry skin, not create rawness. Afterward, apply balm and let your lips recover.

For the best appointment conditions, avoid the following during the days leading up to your service:

  • Sunbathing, tanning beds, and sunburn on or around the lips
  • Harsh lip scrubs, chemical exfoliants, retinoids, and plumping treatments near the mouth
  • Waxing, laser treatments, or other irritating facial services around the lip area
  • New skincare or cosmetics that could trigger a reaction

If your lips become cracked, sunburned, unusually dry, or irritated, contact the studio before your appointment. Rescheduling is sometimes the best choice for your comfort and your healed result. It is better to wait for healthy skin than to compromise a service you want to enjoy for months.

Cold Sore History Requires Extra Planning

Lip blushing can trigger a cold sore outbreak in clients who have a history of cold sores or oral herpes, even if they have not had one recently. This is a standard consideration with procedures that work on the lips, and it deserves a direct conversation rather than last-minute guessing.

Tell your artist during your consultation if you have ever had a cold sore. You may need preventive antiviral medication prescribed by your physician before and after the appointment. Follow your medical provider’s instructions precisely. Do not arrive with an active cold sore, tingling, or an outbreak in progress. Your service will need to be postponed until the area is fully healed.

What to Avoid 48 Hours Before Lip Blushing

The final two days are about minimizing bleeding, sensitivity, and dehydration. Alcohol and excess caffeine can increase sensitivity or bleeding for some clients, which may make the procedure less comfortable and affect how the skin accepts pigment. Avoid alcohol for at least 24 to 48 hours before your visit, and limit caffeine on the day of your appointment unless your artist has given you different instructions.

You should also avoid medications or supplements that can thin the blood unless they are medically necessary and approved by your prescribing provider. Never stop a prescribed medication on your own for a cosmetic appointment. Instead, speak with your doctor and disclose all medications during your consultation.

Skip intense workouts immediately before your service if possible. Heavy sweating, flushed skin, and dehydration are not ideal when you are about to have your lips tattooed. A calm, well-rested appointment day will serve you better than rushing in after a high-intensity class.

The Morning of Your Appointment

Arrive with clean, comfortable lips. Do not wear lipstick, lip liner, gloss, lip stain, or lip plumper. If you have balm on, your artist may ask you to remove it before the procedure begins. Keep the rest of your makeup light and feel free to wear your usual complexion makeup if that helps you feel confident, as long as the lip area is clean.

Eat a balanced meal before you arrive. Lip blushing appointments can take several hours, and showing up hungry or dehydrated can make anyone feel uneasy. Bring water and a small snack if your studio recommends it. Comfortable clothing is also a good idea, especially if you tend to get cold while sitting for an extended service.

Plan for lips that look brighter, deeper, and more defined immediately after the appointment. This first color is not your healed shade. Swelling is usually mild for many clients, but every person responds differently. Avoid scheduling your session immediately before a wedding, photoshoot, beach vacation, or major event. Give yourself room to heal without pressure.

Prepare Your Aftercare Space Before You Leave Home

One of the most overlooked lip blushing preparation steps is getting your home routine ready in advance. When you return from your appointment, you should not need to make a last-minute store run or search for the instructions you meant to save.

Set aside your artist-recommended aftercare product, clean drinking water, a straw if advised, and gentle foods for the first day or two. Spicy foods, very hot drinks, and messy meals can be uncomfortable on freshly treated lips. Choose easy options and be prepared to follow the specific aftercare guidance provided by your artist.

Healing often includes temporary dryness, flaking, and a period where the color appears lighter than expected. Resist the urge to pick, peel, scrub, or test new products. Your lips need time to complete the healing process and reveal their settled color. A touch-up appointment may be recommended because healed pigment retention varies from person to person.

When to Reschedule Instead of Push Through

A luxury beauty experience should never require you to ignore your health or comfort. Reschedule and check in with the studio if you have an active cold sore, a sunburn, severe chapping, a skin infection, fever, or a new allergic reaction around the mouth. The same applies if you are feeling unwell or have started a medication that may affect the procedure.

Pregnancy, breastfeeding, certain health conditions, and some medical treatments may affect eligibility or require provider clearance. Clear communication protects you, your artist, and your result. Professional care begins with knowing when the right appointment date is not today.

At The Permanent Makeup Studio, lip blushing is approached as a personalized enhancement, not a one-size-fits-all service. Showing up prepared lets you settle into the experience, enjoy the artistry, and give your customized color its best opportunity to heal beautifully.

Your appointment is time set aside for you – a chance to trade rushed mirror checks and fading lipstick for a soft, lasting boost of confidence. Prepare thoughtfully, follow your artist’s instructions closely, and let your natural features take center stage.

Microblading Versus Ombre Brows: Which Fits You?

A brow pencil can look perfect at 8 a.m. and disappear after a Clearwater workout, beach day, or humid commute. That is why the choice between microblading versus ombre brows is about more than a trend. Both treatments create polished, long-lasting definition, but they produce very different finishes and suit different skin types, lifestyles, and beauty goals.

The right answer is not automatically the most dramatic option or the most natural-looking one on social media. It is the brow technique that works with your existing hair, your skin, and the amount of softness or makeup-style definition you want to see in the mirror every day.

Microblading Versus Ombre Brows: The Main Difference

Microblading creates the appearance of individual eyebrow hairs. A trained artist uses a manual hand tool with ultra-fine needles to place pigment in hairlike strokes, typically through sparse areas, gaps, or sections where the natural brow needs more shape. The finished look can be airy, feathery, and remarkably natural when it is designed with restraint.

Ombre brows, also called powder brows or ombre powder brows, create a softly shaded effect. Instead of mimicking each individual hair, pigment is layered in tiny pixels to build a misty, makeup-inspired finish. The front of the brow is usually lighter and more diffused, while the arch and tail carry more definition. Think of the polished effect of a softly filled brow pencil, without needing to apply one each morning.

Neither method should look harsh when it is performed thoughtfully. The difference is in the texture. Microblading looks like added hair. Ombre brows look like a soft veil of brow makeup.

Choose Microblading for a Feathered, Hairlike Look

Microblading is often a beautiful fit for clients with normal to dry skin, visible natural brow hair, and a preference for minimal makeup. It can add balance to uneven brows, fill in old over-tweezing, or create strategic density without making the brows look heavily filled.

This technique is especially appealing if your goal is for someone to look closely and think, “Those are great brows,” rather than immediately notice permanent makeup. A skilled artist follows the natural direction of your hair growth while considering facial symmetry, bone structure, and the shape that feels most like you.

There are trade-offs. Because microblading strokes are fine and crisp, they may not retain as sharply on very oily skin. Active oil production can cause strokes to heal softer, expand, or fade sooner than expected. Florida heat, frequent sweating, and a skincare routine with exfoliating ingredients can also influence longevity.

Microblading is not always the best choice for very mature, thin, or highly textured skin, either. Fine strokes need stable skin to heal clearly. In some cases, a softly shaded brow will age and retain more predictably than a collection of hair strokes.

Choose Ombre Brows for Soft Definition That Lasts

Ombre brows are ideal for clients who enjoy a more consistently groomed look. They can be as delicate as a light wash of color or as defined as a fresh brow tint and pencil combination. Your artist controls the saturation, so “powder brow” does not have to mean bold or blocky.

For oily skin, ombre brows are often the more dependable option. The pixelated shading technique tends to heal more evenly than individual microblading strokes on skin that produces more oil. It is also a strong choice for clients who wear brow makeup most days, have little natural brow hair, or want fuller-looking brows that still appear soft at the front.

Ombre brows can work beautifully across a wide range of ages and skin types because the technique does not rely on making each stroke look like a separate hair. The result can be subtly dimensional, elegant, and easier to maintain visually as the pigment fades over time.

If you love a clean brow after the gym, swimming, or a long workday, this finish offers the kind of effortless polish that makes the rest of your makeup routine feel optional. It will not replace sunscreen or make your face immune to humidity, but it can keep your brows looking shaped when conventional brow products would normally wear away.

Your Skin Type Matters More Than a Pinterest Photo

A reference photo is helpful for communicating your preferred style, but it cannot determine the best procedure on its own. The same technique heals differently from one person to the next. Skin type, pore size, existing pigment, medications, sun exposure, and aftercare all matter.

Dry or balanced skin may be well suited to microblading, assuming the skin is healthy and the desired design calls for hair strokes. Oily skin often benefits from ombre brows because soft shading generally holds its shape more consistently. Combination skin can go either way, depending on where oil is concentrated and how much definition you want.

Clients with previous brow tattooing need an especially honest assessment. Faded pigment may be correctable, but old work can affect the color, shape, and technique that is safe to perform. Covering an existing brow tattoo is not simply a matter of adding new strokes on top. Sometimes removal, lightening, or a different brow plan is the more beautiful long-term decision.

Think About Your Everyday Beauty Style

Ask yourself how you want your brows to look when you are not wearing any other makeup. If you rarely wear foundation, eyeliner, or lipstick and want your brows to feel like your own, microblading may be the natural match. If you regularly fill your brows, enjoy polished photos, or like a more structured arch, ombre brows may better reflect your routine.

The choice can also be less either-or than it sounds. Combination brows blend hairlike strokes with soft shading, often placing strokes at the front and adding powdery depth through the body and tail. This can be a flattering option for clients who want the realism of hair strokes with more visible fullness.

The most luxurious result is rarely the trendiest shape. It is a customized brow that enhances your eyes, supports your features, and still feels comfortable on a casual Sunday morning.

Healing Can Make Both Styles Look Darker at First

Microblading and ombre brows are both multi-step services. The initial appointment establishes the shape and color, while a follow-up touch-up refines the healed result. During the first stage of healing, brows can appear darker, warmer, sharper, or more intense than the final color. As the skin heals, the pigment softens and settles.

Following aftercare directions is part of protecting your investment. Your artist will provide specific instructions based on your treatment, but healing commonly requires you to avoid getting the area unnecessarily wet, picking or scratching, heavy sweating, swimming, direct sun exposure, and skincare products that could interfere with pigment retention.

Plan your appointment with your calendar in mind. Avoid scheduling immediately before a beach vacation, major pool weekend, or event where you want to wear full makeup right away. A little planning gives your brows the calm, clean healing environment they deserve.

How Long Do Microblading and Ombre Brows Last?

Both are considered semi-permanent cosmetic tattoo treatments, not permanent promises. Most clients need periodic color refreshes, but the timing varies. Skin type, pigment selection, sun exposure, metabolism, skincare, and lifestyle all play a role.

Microblading may fade sooner for clients with oily skin or those who use active skincare ingredients around the brow area. Ombre brows often provide longer-lasting visible definition, particularly when healed on oilier skin, though they still need maintenance to stay fresh and balanced.

A professional consultation is the best place to discuss realistic retention, touch-up timing, and the style that will serve you best. At The Permanent Makeup Studio, brow design is approached as personalized artistry, not a one-shape-fits-all service.

The Best Brow Is the One You Will Love Living In

Choose microblading when delicate, hairlike realism is your priority and your skin is a good candidate for crisp strokes. Choose ombre brows when you want soft makeup-style fullness, dependable definition, or a technique that may better suit oily or textured skin. Consider combination brows if you are drawn to both.

Your brows frame every expression you make. Give yourself permission to choose a result that feels polished, personal, and easy to wake up with – then let an experienced artist help you turn that vision into beauty that lasts.

Permanent Makeup Safety Guide for First-Timers

A beautiful brow, softly blushed lip, or defined lash line should make your morning easier – not leave you guessing about your health. This permanent makeup safety guide is designed for clients who want luxury, lasting results and the peace of mind that comes from making an informed choice before pigment ever touches the skin.

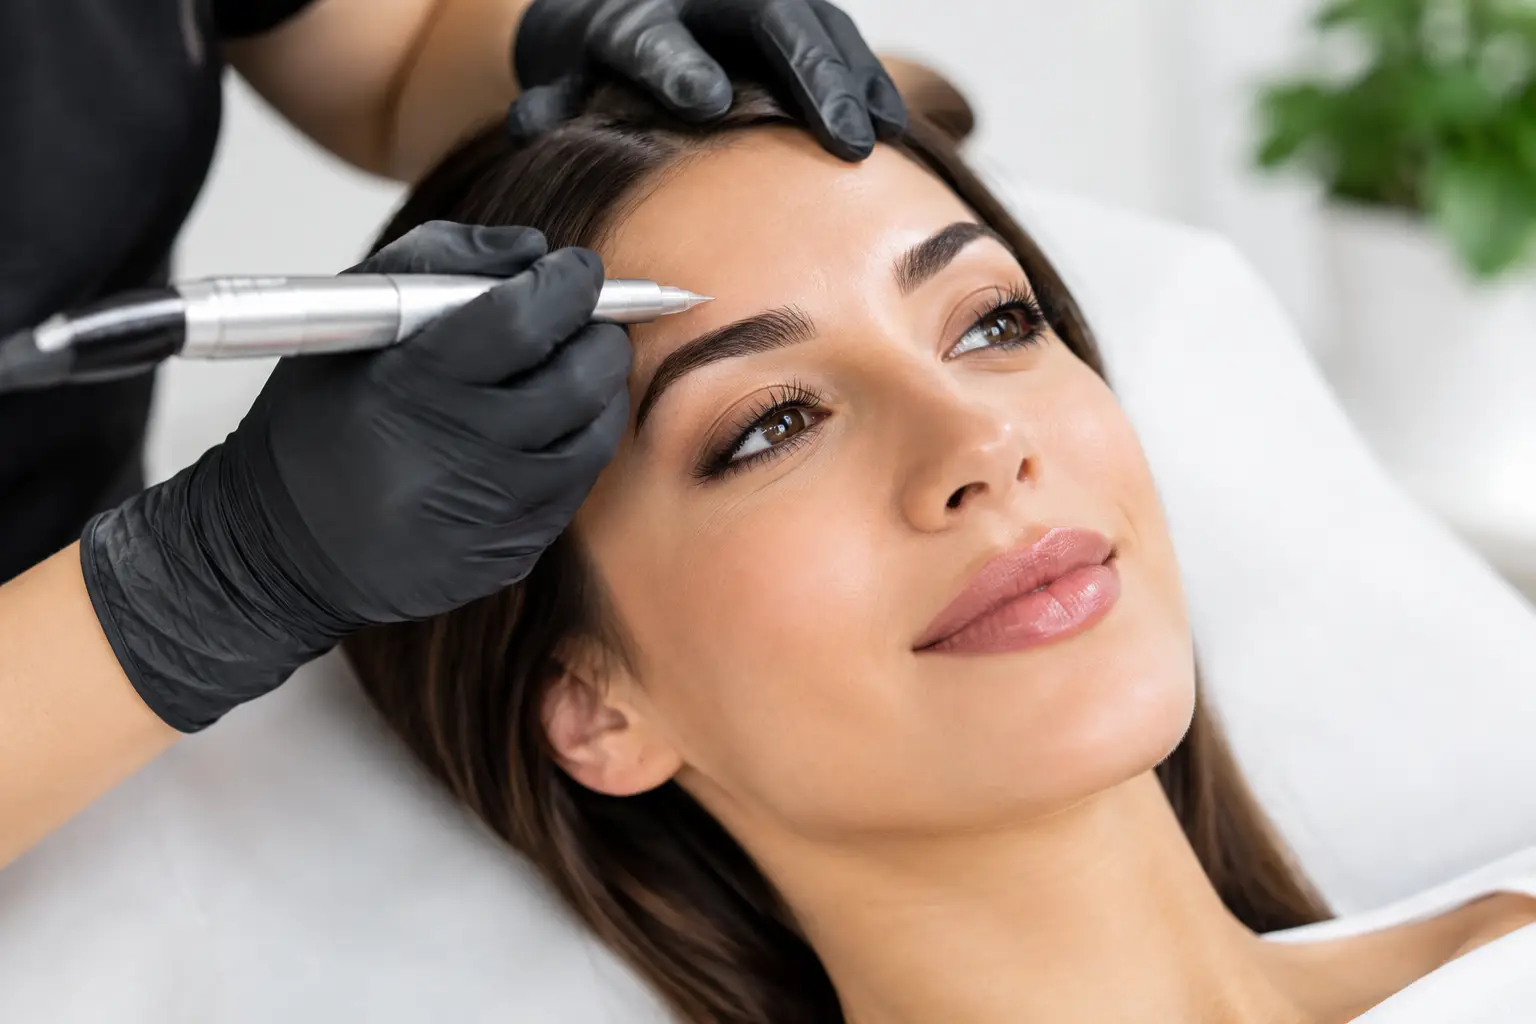
Permanent makeup is a cosmetic tattoo procedure. That means artistry matters, but sanitation, skin assessment, informed consent, and aftercare matter just as much. The right treatment can look beautifully effortless. The right preparation helps protect both your results and your well-being.

Permanent Makeup Safety Starts Before Your Appointment

Safety is not something that begins when you sit in the treatment chair. It begins with choosing a qualified artist and having an honest consultation. A skilled permanent makeup professional should welcome questions, explain the process in plain language, and assess whether the service is appropriate for you right now.

Ask how the artist approaches sanitation, what type of pigments and needles are used, and what to expect during healing. You should understand the design process, the likely number of sessions, the possibility of a touch-up, and the fact that healed color can look softer or cooler than it does immediately after an appointment.

Permanent makeup is not one-size-fits-all. Your skin type, lifestyle, medications, previous cosmetic tattooing, and desired look all affect the treatment plan. Oily skin, for example, may retain hairstroke brows differently than dry skin. Lip blushing may heal unevenly if lips are prone to dryness or cold sores. A thoughtful artist adjusts the approach instead of promising identical results for every face.

Look for a Clean, Professional Treatment Environment

A luxury salon experience should also be a visibly clean one. Treatment areas should be organized, disinfected between clients, and set up with single-use supplies where appropriate. Needles and needle cartridges must be new, sterile, and opened for your appointment. Gloves should be worn and changed whenever contamination could occur.

Do not feel shy about observing the setup or asking questions. Professional artists expect clients to care about safety. You should never feel pressured to proceed if the environment seems unclean, rushed, or unclear.

A reputable provider will also use consent forms and health-history questions. Those forms are not a formality. They help identify factors that can affect healing, pigment retention, bleeding, or infection risk. Be truthful, even if a question feels unrelated to beauty. Your artist can only make safe recommendations with accurate information.

Know When to Postpone Permanent Makeup

Sometimes the most beautiful choice is to wait. Permanent makeup should be postponed when your body or skin needs time to recover, or when a medical consideration needs clearance from your healthcare provider.

Tell your artist if you are pregnant or breastfeeding, taking blood-thinning medication, using prescription acne treatments, managing diabetes, prone to keloid scarring, immunocompromised, or undergoing treatment for a medical condition. Certain situations may require a physician’s approval, a modified plan, or a later appointment date.

You should also reschedule if you have an active skin irritation, sunburn, rash, open wound, infection, or breakout in the treatment area. For eyebrow procedures, that includes irritated skin from waxing, threading, peels, retinoids, or recent laser treatments. For lips, active cold sores are a clear reason to wait. Clients with a history of cold sores should discuss preventive antiviral medication with their medical provider before lip blushing.

Recent Botox, fillers, chemical peels, microneedling, or laser services can also affect timing. The ideal waiting period depends on the treatment and the area being tattooed. Share your full beauty schedule during your consultation rather than trying to fit everything into one week before a vacation or special event.

Prepare Your Skin for a Better Healing Experience

The days before your appointment set the stage for your results. Follow your artist’s pre-care directions exactly, because recommendations can differ for brows, lips, eyeliner, scar camouflage, and scalp micropigmentation.

In general, avoid alcohol, excess caffeine, and non-prescribed blood-thinning products before a procedure if your artist advises it. These can increase bleeding or sensitivity, which may make pigment placement more difficult. Avoid tanning and protect the treatment area from Florida sun exposure. Sunburned or heavily tanned skin is not ideal for cosmetic tattooing.

Arrive hydrated, well rested, and having eaten a normal meal unless you have been given different instructions. Wear comfortable clothing, and do not plan a high-sweat workout immediately afterward. If you wear contact lenses and are receiving eyeliner, bring glasses for your trip home.

If you have had permanent makeup before, disclose it before booking. Existing pigment can change what is possible. Covering old work without first evaluating its shape, saturation, and undertone can create a result that is harder to correct later. A consultation protects your investment and gives your artist time to build a personalized plan.

During Your Service, Comfort and Consent Matter

Your artist should map and discuss the design before beginning. This is your opportunity to speak up about shape, symmetry, softness, and color direction. Facial features are naturally asymmetrical, so the goal is balanced enhancement rather than a stamped-on look.

Topical numbing may be used according to appropriate protocols, but permanent makeup is still a skin procedure. You may feel pressure, scratching, vibration, or tenderness. Let your artist know if you are uncomfortable, dizzy, or concerned at any point. You are allowed to pause, ask a question, or change your mind before the procedure begins.

Be cautious of anyone who guarantees pain-free treatment, instant final color, or results that never require maintenance. Fresh pigment often appears more intense than the healed result. Swelling, redness, tenderness, flaking, and temporary unevenness can be part of normal healing, depending on the area treated. A professional explains these realities before your appointment, not after.

Aftercare Is Part of the Service

The appointment may take a few hours. Healing takes longer. Your aftercare instructions are not optional extras – they are part of protecting the work you chose.

For the first days after treatment, keep the area clean and follow the specific cleansing and ointment directions provided by your artist. Avoid touching the area with unwashed hands, picking flakes, applying makeup directly over healing skin, swimming, saunas, steam rooms, and intense workouts until you are cleared to resume them. Heat, moisture, friction, and bacteria can interfere with healing and pigment retention.

Sun protection becomes especially valuable after the skin has fully healed. UV exposure can contribute to color fading over time, particularly in sunny Clearwater and across Tampa Bay. Once your artist confirms the area is healed, use the recommended sun protection and maintain a gentle skincare routine around the treated area.

Do not judge the final color too early. Brows, lips, and eyeliner may look darker, warmer, or more dramatic at first, then soften as the skin heals. A follow-up appointment is often where the color and shape are refined. This is normal and should be discussed as part of your treatment plan, not presented as a surprise.

Know What Requires Medical Attention

Normal healing does not include symptoms that worsen significantly instead of improving. Contact a medical professional promptly if you develop severe or spreading redness, increasing warmth, pronounced swelling, pus-like discharge, fever, red streaks, or escalating pain. If you experience signs of an allergic reaction, such as difficulty breathing, facial swelling beyond the treatment area, or widespread hives, seek emergency care.

Your artist should be informed about any concern related to the procedure, but an artist is not a substitute for medical care. Fast action is always wiser than waiting to see whether a serious symptom passes on its own.

Choose Results That Feel Like You

The safest permanent makeup experience is also the most collaborative one. It respects your health history, your natural features, your schedule, and your comfort level. It favors thoughtful enhancement over rushed decisions and realistic expectations over dramatic promises.

At The Permanent Makeup Studio, a complimentary consultation can give you the space to ask questions, review your options, and choose a service plan that feels right for your lifestyle. Beauty that lasts should still feel personal – polished enough for every day, and carefully planned enough to wear with confidence.