Book your free consultation Today

Permanent Makeup Cost: What You Can Expect

Your morning routine should feel like a choice, not a requirement. Beautifully shaped brows, a soft flush of lip color, or defined eyes can stay with you through Clearwater humidity, workouts, beach days, and packed schedules. Permanent makeup cost is the practical question behind that freedom, and the answer depends on more than the treatment listed on a menu.

This is a beauty investment with artistry, sanitation, custom pigment selection, healing guidance, and future maintenance behind it. Knowing what a quote includes makes it easier to choose an artist and a result you will feel confident wearing every day.

What Permanent Makeup Cost Covers

Permanent makeup is not a one-size-fits-all service. Your artist is creating a personalized enhancement for your facial features, skin tone, lifestyle, and desired level of definition. That process takes time before pigment is ever placed.

An initial appointment commonly includes a consultation, facial assessment, shape or placement mapping, color selection, the procedure itself, and aftercare instructions. For brows, mapping may be the difference between a soft, balanced enhancement and a shape that does not feel like you. For lip blushing, the artist considers your natural lip tone, asymmetry, and the healed color you want to see rather than only the shade chosen on procedure day.

A high-quality service also reflects professional-grade pigments, single-use supplies, sanitation protocols, licensing and training, and the skill to work thoughtfully with different skin types. These are not glamorous line items, but they matter deeply when a treatment is designed to last.

The word permanent can be confusing. Cosmetic tattooing is long-lasting, but most services gradually soften and fade over time. The goal is usually a polished, natural-looking result that evolves gracefully, not a harsh makeup look that stays frozen in place.

Permanent Makeup Cost by Treatment

Pricing varies by artist, technique, treatment complexity, and local market. In the Clearwater and Tampa Bay area, these general ranges can help you start planning. A complimentary consultation is the best way to receive a personalized quote based on your goals and skin.

Brows: Microblading and Powder Brows

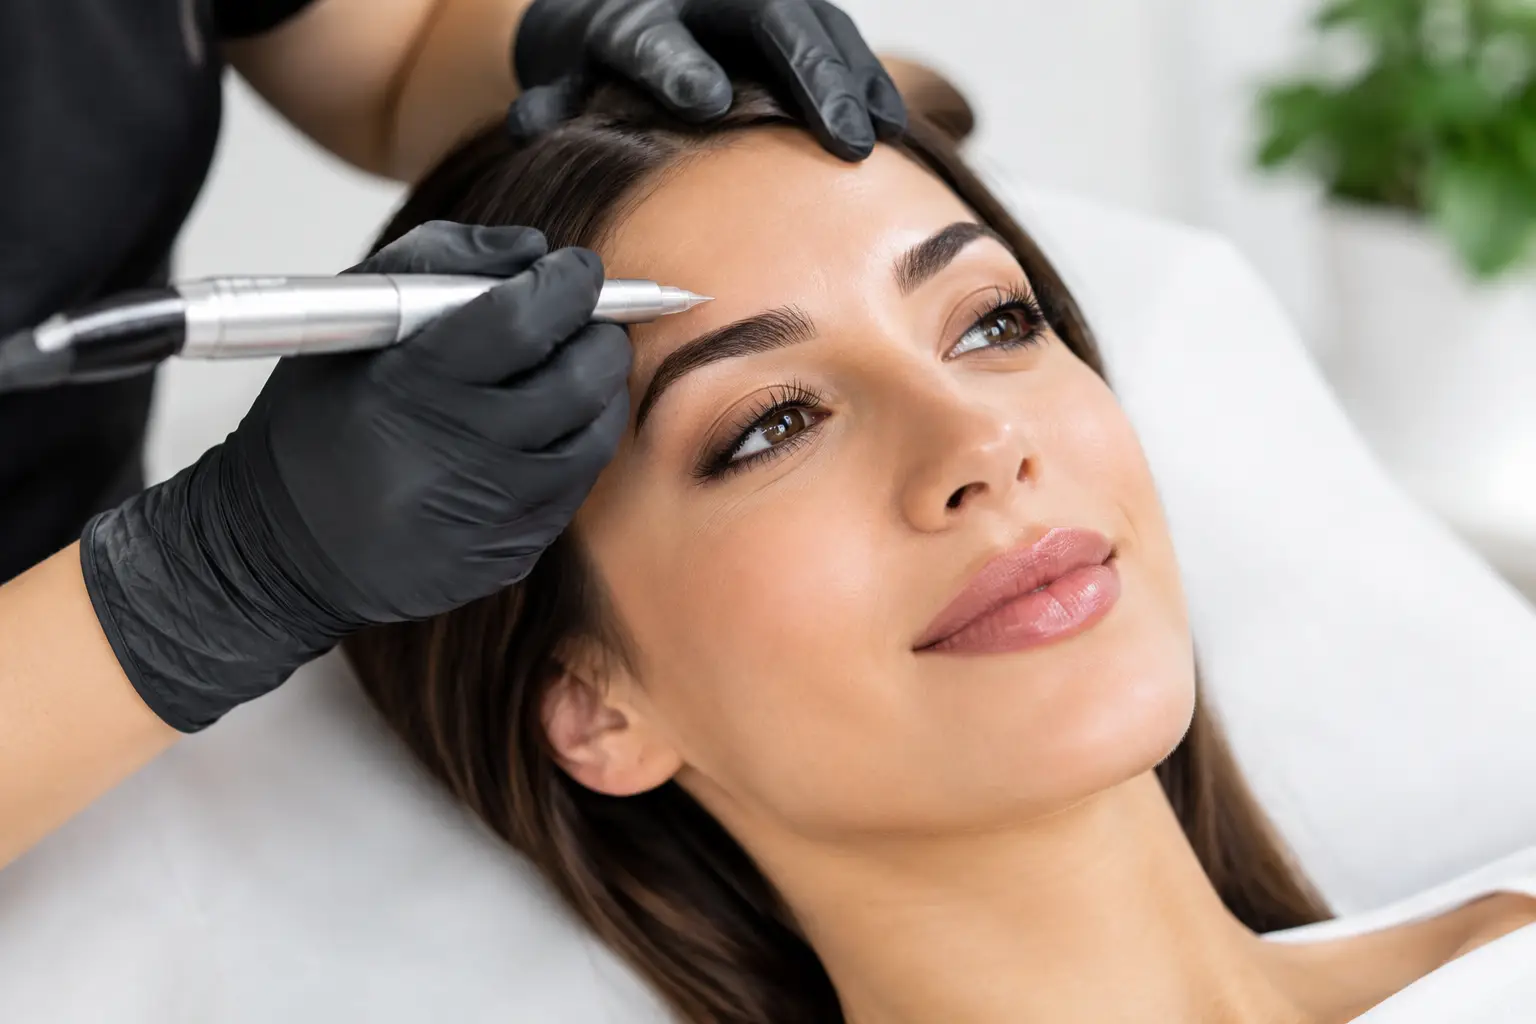
Permanent eyebrow services often range from about $400 to $800 or more for an initial session. Microblading uses fine hair-like strokes and can be especially appealing for clients with sparse brows who want a soft, realistic effect. However, it is not ideal for every skin type. Oily skin, mature skin, and clients who want more makeup-ready definition may be better candidates for powder brows or a combination brow.

That recommendation can affect the price, but it should also protect your result. The right technique is more valuable than choosing a lower-priced option that may not heal or retain well for your skin.

Lip Blushing and Semi-Permanent Eyeliner

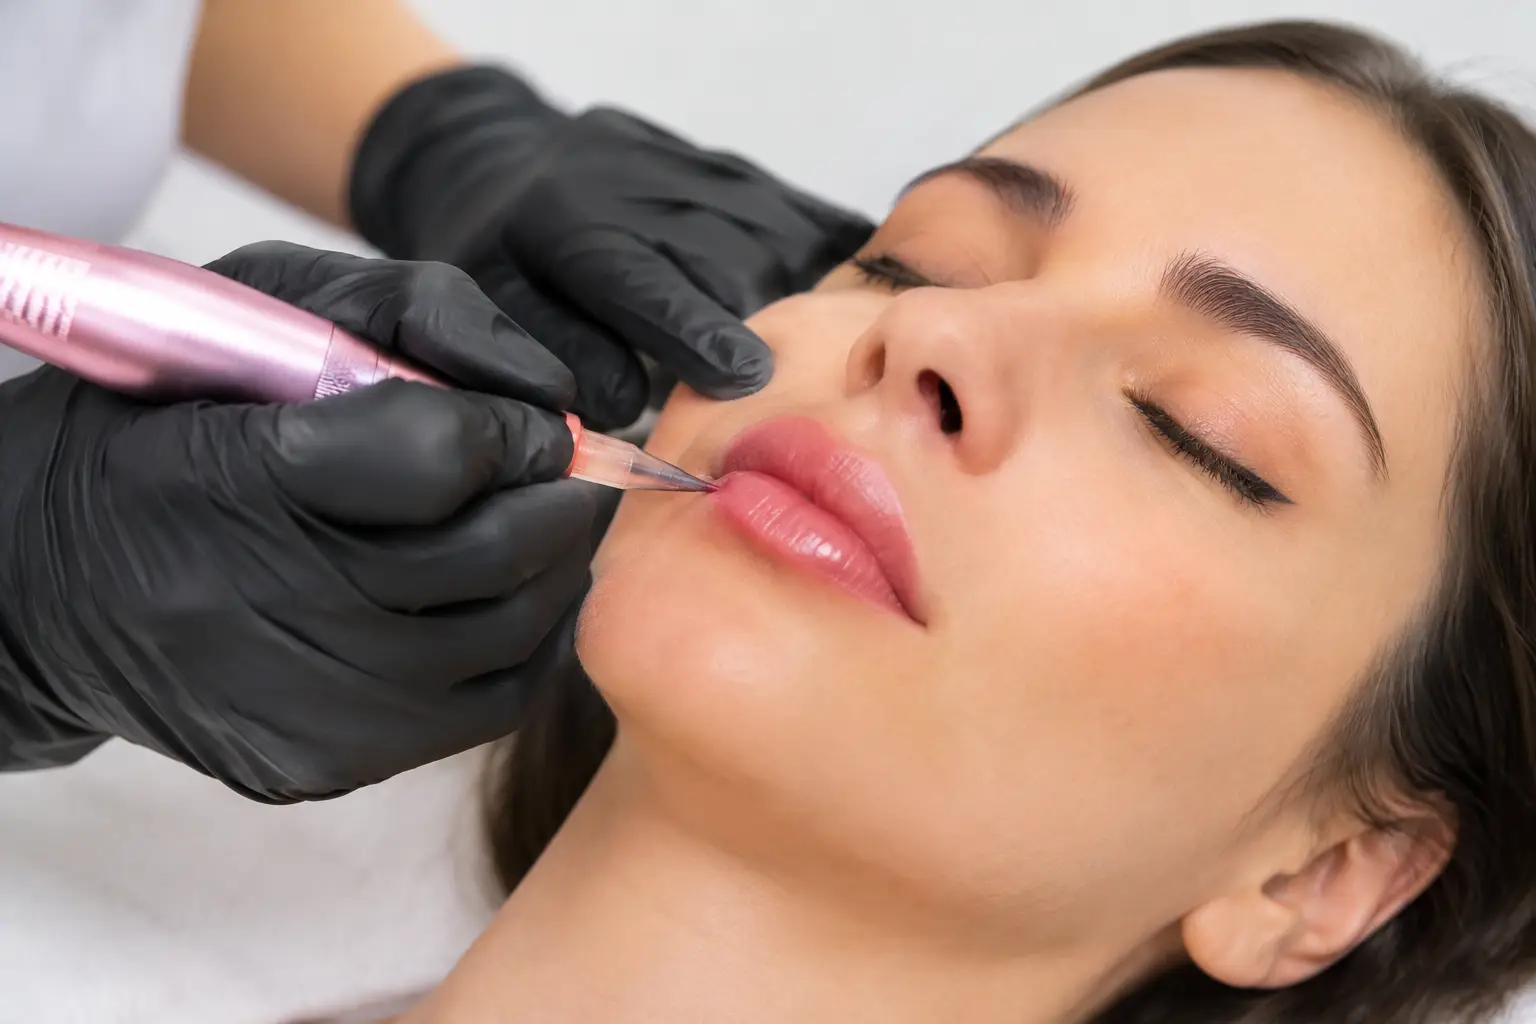
Lip blushing commonly falls around $500 to $900 or more. This treatment can restore a more even-looking lip tone, add soft definition, and create the appearance of a naturally tinted lip without daily liner or lipstick. More involved color correction for lips with uneven pigmentation may require additional time or sessions.

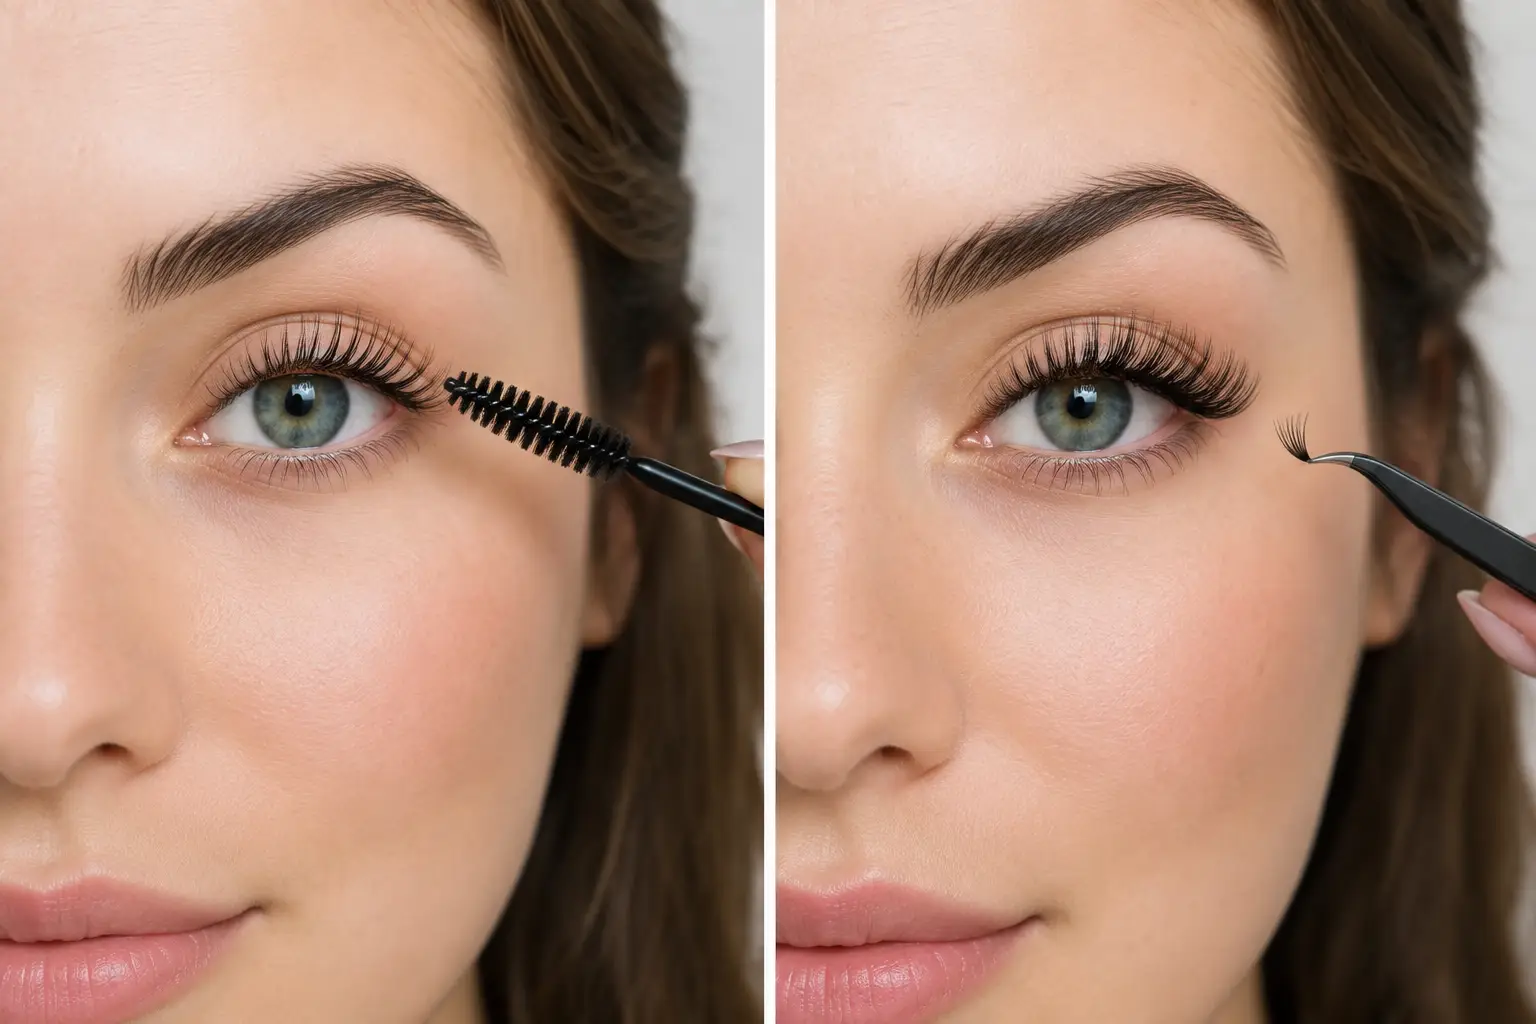
Semi-permanent eyeliner often ranges from roughly $400 to $800 or more. A delicate lash enhancement is typically less involved than a thicker liner style, while a winged look or a corrective procedure may require more detailed artistry. If you wear lash extensions, ask how timing and aftercare will work with your eyeliner appointment so both services stay looking their best.

Scalp Micropigmentation and Scar Camouflage

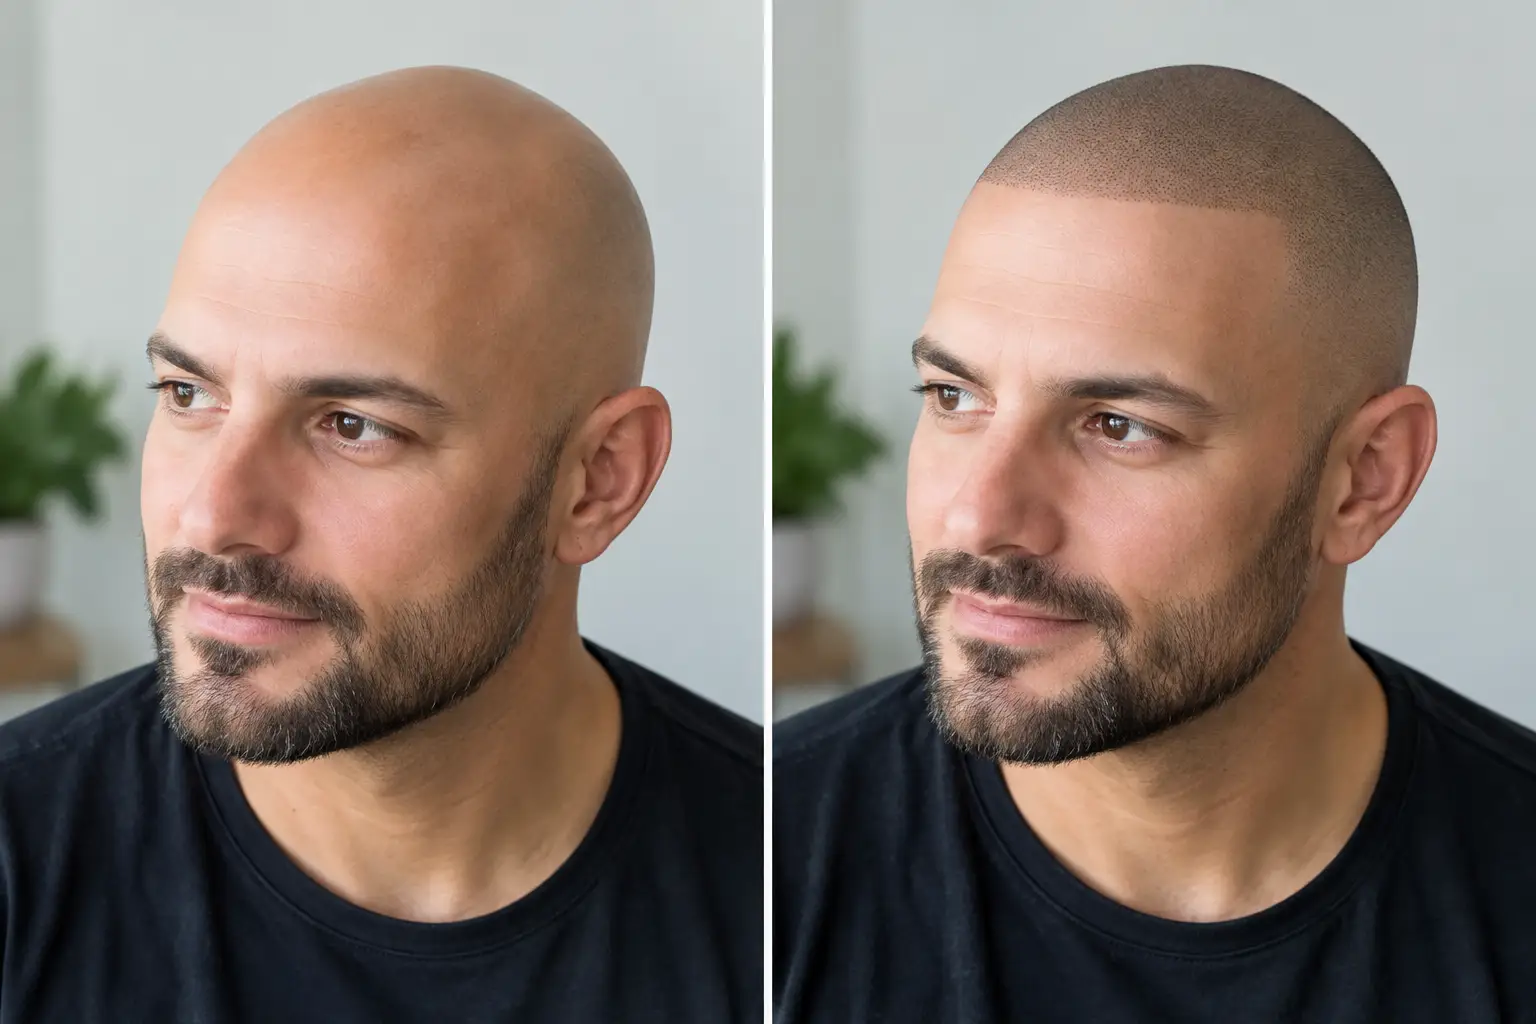
Scalp micropigmentation is priced differently because treatment areas and session plans can vary widely. A small density enhancement may begin in the high hundreds, while a fuller hairline restoration or extensive coverage can reach several thousand dollars. The service is highly customized, with pigment placement designed to mimic the look of natural hair follicles and create the appearance of fuller hair.

Scar camouflage tattooing is also quoted case by case. Scar age, size, texture, location, skin tone, and the number of sessions needed all influence the investment. A responsible artist will assess whether the scar is fully healed and appropriate for treatment before promising a result.

Why One Quote Can Be Higher Than Another

The lowest advertised price is rarely the whole story. First, confirm whether a perfecting session is included. Most permanent makeup services need a follow-up appointment after the initial healing period, often around six to ten weeks later, to refine shape, color, and retention. Some studios build this into their initial pricing; others price it separately.

Experience matters, too. An artist with advanced training, a strong healed-results portfolio, and a careful consultation process is not simply charging for appointment time. You are paying for judgment: knowing when to add pigment, when to keep an effect soft, and when to recommend a different technique altogether.

Your starting point also affects the work. Previous permanent makeup, old pigment that has shifted color, uneven lip tone, brow asymmetry, or a scar with complex texture can require corrective planning. Be transparent at your consultation, especially if you have had work done elsewhere. Covering old work is not always possible in one appointment, and an ethical artist will explain that upfront.

How to Compare Permanent Makeup Prices Wisely

When you compare permanent makeup cost, compare the complete experience rather than a single number. Ask whether the quote includes the initial procedure and a perfecting session, what aftercare support is provided, and how the studio handles future color boosts.

Also look closely at healed work. Fresh photos can look beautifully saturated, but healed results show an artist’s real ability to create softness, symmetry, and appropriate color retention. The best work should complement your features without announcing itself from across the room.

Before booking, make sure you understand these practical details:

  • Whether your touch-up is included and when it must be completed
  • What deposits, cancellation policies, and financing options apply
  • Whether prior tattooed makeup requires approval before your appointment
  • The healing restrictions around sun exposure, sweating, swimming, skincare, and makeup

A lower initial price can become more expensive if touch-ups, corrections, or unexpected maintenance are not clearly explained. Transparent pricing gives you room to plan confidently.

Plan for Healing and Future Touch-Ups

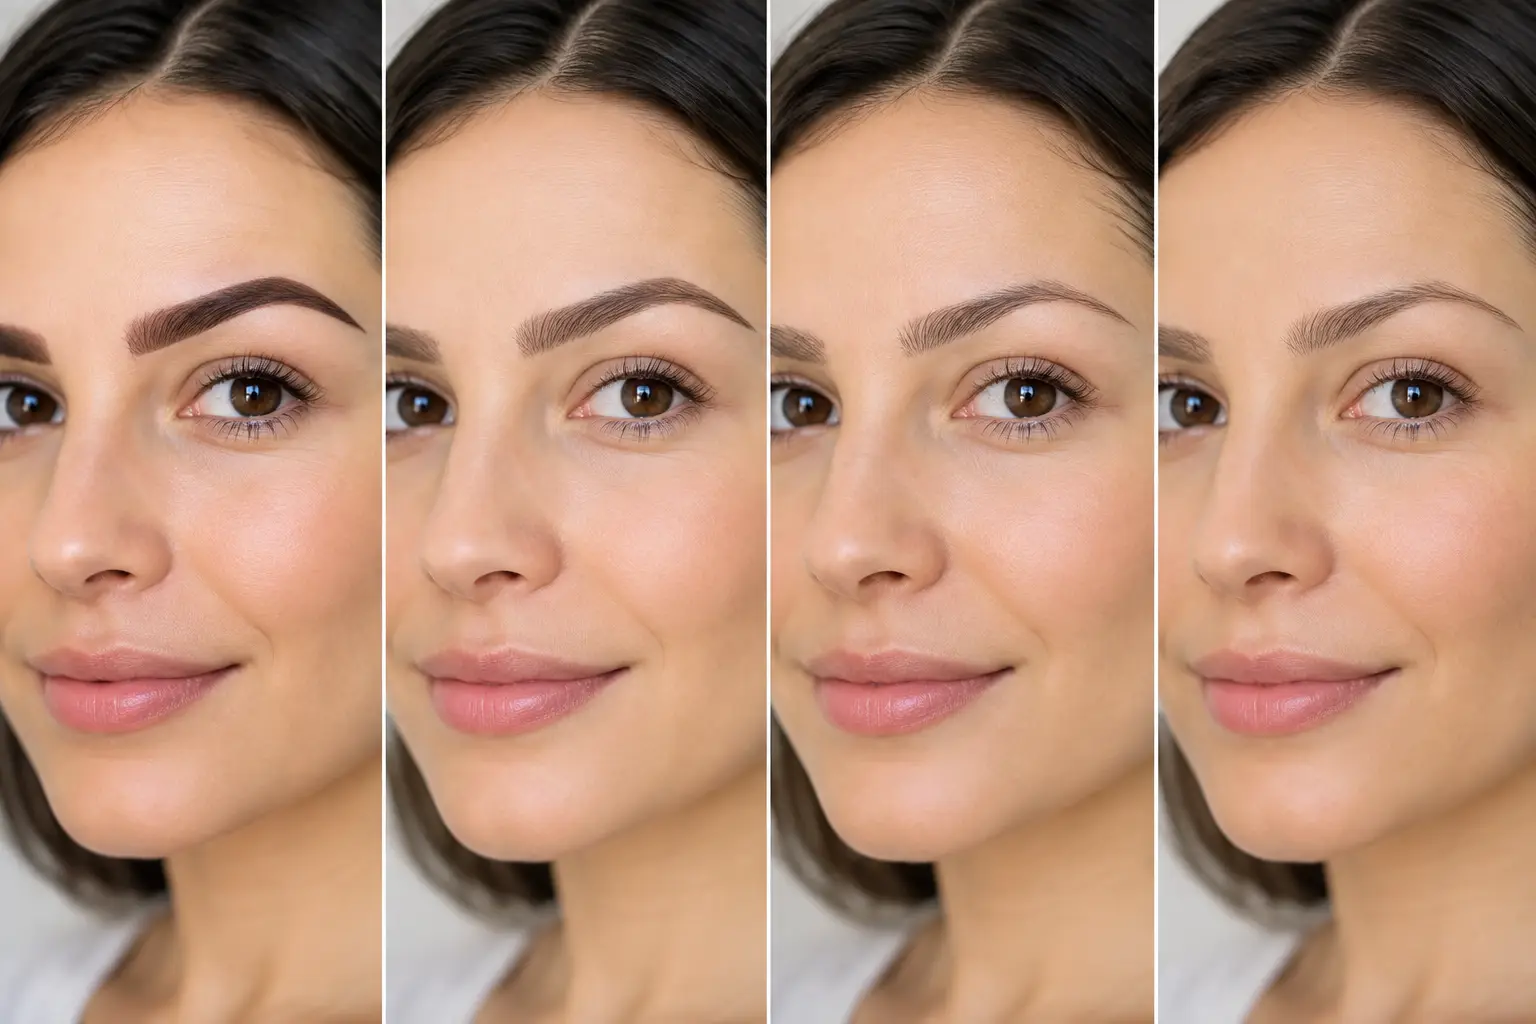
Your investment includes giving the result time to heal. Permanent makeup usually appears darker or more defined immediately after treatment, then softens as the skin recovers. This is expected. Resist the urge to judge the final color too early or add makeup over the treated area before your artist says it is safe.

Florida clients should be especially thoughtful about sun, pools, sweat, and beach days during healing. Schedule your appointment with upcoming vacations, weddings, and major events in mind. If you want permanent makeup for a special occasion, give yourself enough runway for the initial service, healing, and any recommended perfecting session.

Most clients eventually choose a color boost to keep their brows, lips, or eyeliner looking fresh. Timing depends on the service, pigment retention, sun exposure, skincare routine, and personal preference. A soft enhancement may be intentionally maintained before it fades too far, while others prefer to wait longer for a subtler, more lived-in look.

At The Permanent Makeup Studio, the goal is never to sell you a treatment that does not suit your features or lifestyle. It is to create luxury, lasting beauty that still feels unmistakably like you. Choose the artist whose work you trust, ask clear questions about your complete treatment plan, and let your final decision be guided by confidence rather than a bargain alone.

When to Book a Permanent Makeup Touch Up

Your brows still frame your face beautifully, but the front strokes look softer than they did last year. Or your lip blush has settled into a delicate tint and you miss that fresh, polished color. A permanent makeup touch up is how those results stay intentional rather than slowly fading into the background. It is not about changing your face every few months. It is about preserving the customized shape, tone, and definition that make getting ready feel effortless.

For clients across Clearwater and Tampa Bay, maintenance matters even more. Florida sunshine, pool days, skincare routines, workouts, and natural skin renewal all influence how pigment wears. The right timing keeps your enhancement looking refined, balanced, and true to your personal style.

What a Permanent Makeup Touch Up Is Designed to Do

A touch-up adds pigment where it has lightened, restores evenness, and refreshes the details that make a treatment look polished. Depending on the service, that may mean rebuilding soft microblading strokes, adding depth to powder brows, bringing warmth back to lip blush, or sharpening a subtle eyeliner enhancement.

There are two very different appointments clients sometimes call a touch-up. The first is the perfection session after an initial procedure. This is usually booked after the skin has healed and the pigment has settled, often around six to eight weeks later. It allows your artist to see how your skin retained color and make thoughtful adjustments to density, symmetry, or saturation.

The second is a maintenance refresh. This happens months or years after your original treatment, once the result has faded enough to benefit from new pigment. A maintenance appointment is typically less about correcting healing and more about keeping your favorite look present and beautiful.

Neither appointment should be treated as an afterthought. Permanent and semi-permanent makeup is customized artistry, and your skin’s response guides the plan. A lighter, natural brow may need a different approach than a defined ombré brow. A sheer lip blush will not fade exactly like a richer rose or berry tone.

When to Schedule a Permanent Makeup Touch Up

Most permanent makeup clients benefit from maintenance somewhere between 12 and 24 months, but there is no universal calendar date. Some brows remain beautifully visible for longer, while others soften sooner because of skin type, lifestyle, sun exposure, or the original technique. Lip blush and eyeliner have their own timelines as well.

Rather than booking only because a year has passed, look closely at the result in natural daylight. You may be ready for a refresh when the shape is still visible but the color feels pale, patchy, or less defined than you prefer. Booking before pigment disappears completely often gives your artist a clearer foundation to work with.

A timely refresh can also be more conservative. When there is still enough of the original design to follow, your artist can focus on restoring color and balance instead of rebuilding the look from scratch. That helps protect the soft, luxurious effect clients love about professionally designed permanent makeup.

Your skin and lifestyle affect fading

Oily skin can metabolize pigment more quickly, particularly with hair-stroke brow techniques. Frequent exfoliation, retinol, chemical peels, facials, and active skincare products can fade pigment faster when used near treated areas. Sun exposure is another major factor, especially for lips and brows in the Florida heat.

Swimming, sweating, and an active routine do not mean permanent makeup is not right for you. They simply mean thoughtful maintenance may become part of your beauty routine. The same is true for clients who prefer a very soft, natural result. Lighter pigment choices can look incredibly elegant, but they may appear to fade sooner than deeper, more saturated shades.

Hormonal changes, medications, immune response, and skin health can influence retention too. That is why a personalized consultation matters more than a one-size-fits-all promise about how long pigment will last.

Signs It Is Time for a Refresh

A good touch-up should feel proactive, not urgent. Consider scheduling a consultation if you notice four or more of these changes:

  • Your brows have lost color through the tails, arches, or front shading.
  • Your lip blush looks uneven or has faded to a tone that no longer flatters your complexion.
  • Your eyeliner enhancement is lighter on one eye or less visible along the lash line.
  • You are filling in areas with makeup most days to recreate your original result.
  • The shape still suits you, but the overall effect no longer has the definition you want.

If the pigment has changed significantly in color, blurred beyond its original shape, or faded almost completely, your artist may recommend a different service plan. Sometimes a color correction, removal consultation, or new full procedure is the more beautiful and responsible choice. A refresh is not always the answer, and honest guidance protects your results.

What Happens at Your Touch-Up Appointment

Your appointment begins with a close look at your existing pigment, skin condition, and goals. Bring photos from shortly after your original treatment if you have them, especially if you loved a particular level of color or definition. Your artist will assess whether the current shape still complements your features and discuss any changes you would like to make.

From there, the treatment is designed around what your skin needs now. Brows may receive carefully placed strokes, soft shading, or both. Lip blush may be refreshed with a tone that restores vibrancy without looking like traditional lipstick. Eyeliner can be deepened at the lash line for a subtle, wake-up-ready finish.

Expect the refreshed color to look stronger immediately after the appointment. This is temporary. As the area heals, the pigment softens and settles into the skin. Follow your aftercare instructions closely, including restrictions on moisture, sweating, sun, swimming, and skincare around the treated area. Healing well is part of achieving lasting beauty.

Do Not Touch Up Too Soon

It can be tempting to book as soon as you notice fading, especially before a vacation, wedding, or holiday event. But treated skin needs time to heal fully before receiving more pigment. Adding color too early can affect retention and make it harder to evaluate the true healed result.

For a new procedure, wait for the healing timeline recommended by your artist before returning for your perfection session. For established permanent makeup, schedule your maintenance appointment with enough time before a major event for the initial intensity, flaking, and healing process to pass. A last-minute refresh is rarely the most relaxing route to a polished result.

If you have recently had Botox, fillers, a peel, microneedling, laser treatments, or a significant skincare change, share that information during your consultation. Your artist can help determine safe spacing based on the treatment area and your individual plan.

Make Your Results Last Between Appointments

Long-lasting color starts with thoughtful aftercare, then continues with simple daily habits. Once fully healed, wear sunscreen around your brows and use SPF on your lips. A hat and sunglasses offer extra protection during beach days, boating, and outdoor events. Keep strong acids, retinoids, and exfoliating products away from treated pigment whenever possible.

Choose professional treatments carefully. Let facialists, skincare providers, and laser technicians know you have permanent makeup so they can avoid directly treating the pigmented area. If you are considering a chemical peel, resurfacing service, or brow-area skincare treatment, ask about timing first.

Most of all, resist the urge to layer cosmetic tattooing over an old design without an assessment. More pigment is not automatically better. The most flattering results come from proper color selection, healthy skin, clean technique, and an artist who knows when to add softness instead of saturation.

Keep Your Signature Look Beautiful

A permanent makeup touch up is an investment in the ease and confidence your original treatment gave you. Whether you want softly defined brows for busy mornings, a naturally flushed lip color, or eyeliner that stays put through a Gulf Coast day, maintenance keeps that detail looking deliberate.

At The Permanent Makeup Studio, a consultation can help you decide whether your current pigment is ready for a refresh and what approach will best honor your features. Give yourself time to heal, follow your artist’s plan, and let your next touch-up keep your everyday beauty looking as effortless as it feels.

Permanent Makeup for Mature Skin That Flatters

A brow pencil can suddenly feel less reliable when skin becomes drier, softer, or less even in texture. Lipstick may feather into fine lines, and eyeliner that once went on in one quick sweep can transfer or disappear by lunchtime. Permanent makeup for mature skin is not about recreating the makeup choices of twenty years ago. It is about thoughtfully restoring definition, balance, and a polished look that still feels like you.

The most beautiful results tend to be subtle. A skilled permanent makeup artist works with the skin you have now, your natural coloring, and the amount of daily makeup you actually want to wear. The goal is lasting ease: waking up with refined brows, a healthier-looking lip tone, or softly defined eyes that hold up through Florida humidity, busy mornings, and special occasions.

Why Mature Skin Needs a Different Approach

Mature skin can be thinner, drier, more delicate, and less elastic than it was earlier in life. It may also have sun exposure, enlarged pores, fine lines, uneven pigment, or changes in facial volume. None of this rules out permanent makeup. It simply means technique matters more than ever.

Pigment does not always behave the same way on mature skin. Fine hairstrokes can spread or soften during healing if the skin is very textured or fragile. A color that looks perfect immediately after a procedure may heal more gently, and retention can vary from one area of the face to another. A thoughtful artist considers these realities before choosing a method, needle configuration, pigment color, and level of saturation.

This is why a consultation is more than a formality. It is the time to discuss your skin history, existing makeup tattoo, medications, medical conditions, lifestyle, desired maintenance, and the degree of definition you love. Honest guidance is a luxury. Occasionally, the most flattering recommendation is a softer technique than the one you originally had in mind.

The Best Permanent Makeup Options for Mature Skin

Soft, shaded brows often outperform crisp hairstrokes

For many clients, powder brows, ombré brows, or a soft combination brow create a more elegant result than microblading alone. These methods build a delicate veil of color behind the natural brow hairs, rather than relying exclusively on individual tattooed strokes.

A powder effect does not have to look heavy or blocky. When customized well, it can resemble softly filled-in brow makeup, with a lighter front and gentle definition through the arch and tail. It is especially useful when natural brow hair has become sparse, gray, uneven, or patchy.

Microblading may still be an option for some mature clients with healthy, resilient skin and enough natural hair to support the look. However, heavily textured, thin, oily, or sun-damaged skin may not retain crisp hairstrokes predictably. A seasoned artist should explain the trade-off instead of promising every client the same technique.

Lip blushing can bring back soft, healthy-looking color

As natural lip pigment fades, lips can lose contrast against the skin. Lip blushing adds a sheer, customized wash of color that can make the mouth appear more defined and refreshed without the look of a traditional lipstick tattoo.

For mature lips, color selection is key. A rosy nude, soft berry, peachy pink, or warm neutral can be far more flattering than an overly dark or intensely cool shade. The best color complements the natural lip tone and skin undertone while leaving room for you to wear gloss, lipstick, or nothing at all.

Fine lines around the mouth deserve careful planning. Lip blushing can enhance the vermilion border, but it should not be used to chase every line outside the natural lip shape. Staying true to the lip anatomy keeps the result refined and reduces the risk of a harsh outline. If lips are very dry, a consistent lip-conditioning routine before the appointment can help support a smoother treatment experience.

Lash line enhancement can define the eyes without heaviness

A soft eyeliner tattoo or lash line enhancement can make lashes appear fuller and eyes look more awake. For mature eyes, less is often more. A thin line placed close to the lashes offers definition without the weight of a thick wing or a dramatic black band.

Eye shape, lid texture, hooding, and skin movement all affect what will look best. A wing that looks striking with the eyes closed may not sit the same way when the eyes are open. Instead, a tailored lash enhancement or softly shaded liner can create a beautiful everyday result while respecting the natural structure of the eye.

Clients who use lash extensions or lash lifts may love this pairing because the eyes remain polished even on minimal-makeup days. Your artist can advise on timing, including when to pause lash services before and after an eyeliner procedure.

Color Should Enhance, Not Compete

Permanent makeup fades gradually, which is one reason conservative color choices age so beautifully. For brows, very dark pigment can appear severe against silver, blonde, or softened hair color. For lips, an intense shade may feel limiting once it heals and settles into everyday life. For eyeliner, deep brown or soft black can be more versatile than a bold, graphic line.

The right pigment is never chosen from a trend alone. It is selected based on your skin tone, undertone, hair color, natural features, and makeup preferences. If you enjoy a stronger evening look, permanent makeup can provide the foundation while you add pencil, shadow, liner, or lipstick when you want extra glamour.

It is also wise to think ahead. A result that looks beautifully understated on day one may be precisely what you appreciate most a year later. Mature beauty is not about disappearing. It is about choosing definition that continues to feel sophisticated as your style evolves.

Preparing for Your Appointment

Good preparation supports a smoother procedure and more predictable healing. Arrive well hydrated, with clean skin, and prepared to share a complete health history. Avoid making major skin changes right before your appointment, such as aggressive exfoliation, resurfacing treatments, or a new active skincare product that causes irritation.

If you use retinoids, blood-thinning medication, or have a history of cold sores, discuss this in advance. Do not stop prescribed medication without guidance from your prescribing provider. Certain medical conditions, skin disorders, active infections, recent cosmetic treatments, and pregnancy or nursing may require postponement or medical clearance.

Sun exposure matters, particularly on the Gulf Coast. Skin that is tanned, sunburned, peeling, or irritated is not ready for permanent makeup. Give your skin time to settle, and protect it consistently with sun protection afterward to help preserve color.

Healing Is Part of the Service

Permanent makeup is a process, not a one-day finish. Immediately after treatment, color usually appears stronger and more defined than the healed result. Over the following days, the area may feel tender, dry, or tight, and light flaking is normal. The color can seem to fade dramatically before it returns as the skin completes its healing cycle.

Aftercare instructions should be followed exactly. Generally, this means keeping the treated area clean, avoiding picking or scrubbing, and staying away from swimming, steam rooms, heavy sweating, direct sun, and makeup on the treated area during the recommended healing period. Healing skin deserves patience, not experimentation.

A perfecting session is often part of achieving the finished look. It allows the artist to assess retention, refine shape or color where appropriate, and make adjustments after the skin has fully healed. Mature skin may heal beautifully, but it can also require a lighter hand and realistic expectations about touch-ups over time.

Choosing an Artist You Can Trust

Look for an artist who speaks clearly about both artistry and safety. Before-and-after photos should show healed, natural-looking work on a range of skin types and ages, not only freshly completed procedures. You should feel comfortable asking why a particular technique is being recommended, how your color will heal, what touch-up timing may look like, and whether your skin is a good candidate.

At The Permanent Makeup Studio, the experience begins with personal attention to the features you want to celebrate. Whether you are considering soft brows, lip blushing, or understated eyeliner, the right plan should feel customized, never rushed or one-size-fits-all.

The most flattering permanent makeup does not announce itself from across the room. It lets people notice that you look rested, polished, and completely at ease. Choose the treatment that gives you that feeling when you catch your reflection on an ordinary Tuesday morning.

Powder Brows vs Microblading: Which Fits You?

A Clearwater morning can include humidity, a workout, a school run, and a full day of meetings before you have time to think about your brow pencil. That is why powder brows vs microblading is more than a beauty trend question. It is about choosing the brow treatment that gives you the right kind of definition, suits your skin, and keeps your everyday look polished with less effort.

Both services are forms of semi-permanent eyebrow enhancement performed with pigment. Both are customized to your face, natural brow hair, desired color, and lifestyle. The difference is in the technique and the finished effect: microblading recreates hair-like strokes, while powder brows create a soft, shaded makeup finish.

Powder Brows vs Microblading: The Main Difference

Microblading uses a manual hand tool with tiny needles to place fine, hair-like strokes in the skin. When healed well on an appropriate candidate, those strokes can blend with natural brow hair and create the look of a fuller, more defined brow.

Powder brows, also called ombré powder brows, are created by layering small pixels of pigment with a cosmetic tattoo machine. The healed result is soft and airy at the front of the brow, with more definition through the arch and tail. Think of the effect of a beautifully applied brow powder or pencil, not a harsh block of color.

Neither option should look one-size-fits-all. A skilled artist adjusts the shape, saturation, warmth or coolness of the pigment, and intensity of the result to complement your complexion and features. Your ideal brow may be barely there and fluffy, softly sculpted for everyday wear, or more polished for a makeup-ready appearance.

Choose Microblading for a Hair-Stroke Look

Microblading can be a beautiful fit for clients with dry to normal skin, relatively small areas of brow sparseness, and a preference for natural-looking hair strokes. It is especially appealing if you have brow hair but want to refine the shape, fill gaps, or create a more balanced frame for your face.

The signature benefit is detail. Fine strokes can give the impression of individual hairs where natural hair is missing. If your beauty routine is minimal and you want people to notice your eyes rather than immediately notice your brows, microblading may be the direction you prefer.

However, the word “natural” should not be confused with “maintenance-free forever.” Microblading is still a semi-permanent treatment that fades over time and typically needs a color refresh. The quality of healed strokes also depends heavily on skin type, aftercare, sun exposure, and the body’s individual pigment retention.

For very oily skin, large pores, or heavily textured skin, crisp hair strokes may blur, fade more quickly, or heal less predictably. In those cases, a powder brow technique often gives a more consistent long-term result.

Choose Powder Brows for Soft Makeup Definition

Powder brows are a favorite for clients who love the look of lightly filled-in brows every day. They can be as soft and natural as a tinted brow gel or more defined for a glamorous, makeup-forward finish. Because the pigment is placed in a shaded pattern rather than individual strokes, the look tends to age gracefully as it fades.

This technique is often well suited to oily, mature, textured, or combination skin. It can also be an excellent choice if your brows are very sparse, if you regularly fill them in with pencil or powder, or if you want dependable definition that holds up beautifully through Florida humidity, beach days, and busy schedules.

Powder brows do not have to look solid or overly dark. The initial color will appear stronger immediately after the appointment, then soften during healing. Once healed, a customized powder brow should have dimension, a gentle gradient, and a finish that feels polished rather than heavy.

If you are drawn to the idea of waking up with a brow shape that already looks finished, powder brows may be your best match.

Which Brow Treatment Lasts Longer?

Longevity varies from person to person, but powder brows often retain their shape and color more consistently than microblading, particularly on oilier skin. Many clients plan for a touch-up or color refresh around every one to three years, depending on their skin, sun habits, skincare routine, and preferred level of definition.

Microblading may fade sooner for clients with oily skin or those who use active skincare ingredients near the brow area. Retinol, exfoliating acids, chemical peels, and certain facial treatments can all affect pigment longevity. Frequent sun exposure can also fade any form of cosmetic tattooing.

A touch-up is not a sign that something went wrong. Semi-permanent brows are designed to soften over time, allowing your color and style to evolve as your features, preferences, and natural brow hair change.

Healing: What to Expect From Each Service

Both treatments require a healing period, and the first few days are not the final result. Brows usually look darker, sharper, or more intense immediately after the appointment. As the skin heals, the pigment can appear to lighten significantly before the true healed color settles in.

With microblading, clients may notice light flaking as the fine strokes heal. With powder brows, the skin may feel slightly dry or tight, followed by gentle flaking or a soft shedding phase. Avoid picking, scratching, or trying to speed up the process. Let the skin heal naturally so the pigment can settle as intended.

Your artist will provide specific aftercare instructions, but clients are generally asked to keep the brow area clean and dry as directed, avoid sweating heavily at first, and stay away from swimming, steam rooms, tanning, and direct sun exposure during the initial healing period. Makeup, skincare actives, and exfoliants should also be kept away from the treated area until you are cleared to resume them.

Plan your appointment with important events in mind. If you have a wedding, vacation, professional photo shoot, or special celebration coming up, give yourself ample time for healing and any recommended perfecting appointment.

Your Skin and Lifestyle Matter More Than a Trend

The best brow treatment is not always the one you saw in a social media video. It is the one that will heal beautifully on your skin and make sense for your routine.

If you wear full makeup often, enjoy a sculpted brow, and want a technique that performs well with humidity and oil production, powder brows can offer that refined, lasting effect. If you have drier skin, natural brow hair to blend with, and want delicate hair-stroke enhancement, microblading may give you the subtle fullness you are looking for.

Some clients are also ideal candidates for a combination brow. This approach uses hair-like strokes near the front of the brow and soft shading through the body and tail. It can create the best of both worlds: a natural start with more density and structure where it counts.

A consultation is the right place to discuss your existing brow shape, skin type, past cosmetic tattooing, medications, skincare routine, and desired finish. Bring photos you like, but stay open to professional guidance. The goal is not to copy someone else’s brows. It is to create a shape and color that look effortless on you.

When to Wait Before Booking

Permanent makeup is a thoughtful beauty investment, so timing matters. You may need to postpone treatment if you are pregnant or nursing, actively using certain medications, experiencing a skin irritation or infection near the brow area, healing from recent facial procedures, or prone to issues that require medical clearance.

Be transparent during your consultation and complete all consent information carefully. An experienced artist will review restrictions, discuss realistic expectations, and prioritize a safe, beautiful result over rushing you into an appointment.

At The Permanent Makeup Studio, brow artistry is designed around your features, your skin, and the confidence you want to carry into every day. Whether you choose soft powder brows, fine microblading strokes, or a combination technique, the right result should feel like you on your best day – polished, balanced, and ready before your first cup of coffee.

Permanent Makeup Financing Options That Fit You

A beautiful set of powder brows, softly blushed lips, or confidence-restoring scalp micropigmentation can change far more than a morning routine. Still, deciding on a treatment should feel exciting, not financially stressful. Permanent makeup financing options can give you more flexibility to choose the service and timing that feel right for you, without compromising on the quality, artistry, or aftercare behind your results.

At The Permanent Makeup Studio, luxury beauty is personal. Your treatment plan should be, too. Whether you are preparing for a wedding, simplifying your everyday makeup, addressing hair thinning, or finally booking the brows you have wanted for years, understanding your payment choices helps you move forward with clarity.

Why financing can make permanent makeup more accessible

Permanent and semi-permanent cosmetic services are an investment in long-lasting polish. Unlike a single makeup purchase, treatments such as lip blushing, permanent eyeliner, microblading, and scalp micropigmentation involve personalized design, professional pigments, sanitation standards, careful technique, and a healing process that deserves proper support.

That investment is also different for every client. One person may be booking brow enhancement and a future color boost. Another may be planning a larger scalp micropigmentation treatment or pairing a permanent makeup appointment with lashes for a special occasion. Financing can spread eligible costs into more manageable payments rather than requiring the full amount at one time.

The right decision is not automatically the lowest monthly payment. It is the option that fits comfortably within your budget while allowing you to book a qualified artist, follow the recommended treatment plan, and protect your peace of mind.

Permanent makeup financing options to consider

For clients who prefer to pay over time, Cherry financing may be available at the studio. This type of point-of-sale financing is designed for elective beauty and wellness services, allowing approved clients to review payment-plan options at the time of purchase. Approval, available terms, payment amounts, and any applicable interest are determined by the financing provider and your individual application.

The benefit is straightforward: you can see whether a payment plan works for your budget before moving ahead. Rather than guessing what an appointment may feel like financially, you can review the details and make an informed choice.

Financing is not the only path. Some clients prefer to pay in full when booking or at their appointment, especially when they have planned ahead for a particular service. Others use a dedicated beauty budget, save gradually before their consultation, or reserve financing for a more comprehensive treatment. There is no universally best option. The best choice is the one you can comfortably maintain through your appointment, healing period, and any recommended touch-up schedule.

Know what your treatment price includes

Before comparing payment options, make sure you understand the treatment itself. Permanent makeup pricing can reflect the complexity of the service, the area being treated, the time required, the artist’s expertise, and whether a follow-up session is included or recommended.

For example, a brow service may require a perfecting session after initial healing so the color and shape can be refined. Lip blushing may need additional work to build the desired softness or saturation. Scalp micropigmentation is often planned in multiple sessions because creating the appearance of natural density takes layered, customized work.

Ask for clear pricing during your complimentary consultation. You should know what is included in the initial service, what future touch-ups may cost, and when maintenance is likely to be needed. Financing a treatment is easier to evaluate when you are looking at the full picture, not only the first appointment.

Questions to ask before choosing a payment plan

A financing plan should feel as polished and transparent as the service you are booking. Take a moment to review the details before agreeing to anything. Ask what your estimated monthly payment will be, how many payments you will make, whether interest may apply, and whether there are late-payment fees or early-payoff options.

Also ask whether the plan covers your complete treatment plan or only the initial appointment. If you are booking brows, lips, eyeliner, or scalp micropigmentation, clarify how a future touch-up or added session would be handled. This is particularly useful if you know you want a more defined final result or are scheduling around an event date.

Read the financing agreement carefully and keep a copy of your terms. Your provider can explain the application process, but the financing company sets the approval decision and account terms. If anything is unclear, pause and ask before signing. A few extra minutes of review can prevent surprises later.

Avoid financing based on a promotion alone

A studio promotion can be a lovely reason to schedule a service you have already been considering, but it should not push you into a treatment or payment plan that is not right for you. Choose permanent makeup because you understand the look, the healing requirements, and the maintenance involved – not because you feel rushed by a limited-time offer.

The same applies to treatment selection. A brow style that photographs beautifully on someone else may not be the most flattering fit for your face, skin type, natural hair pattern, or lifestyle. Your consultation is the time to discuss these details openly. Thoughtful design creates the most timeless results.

Plan for the full beauty timeline, not just appointment day

Financing can make booking simpler, but it does not change the importance of preparation and aftercare. Permanent makeup is a process. Color often appears stronger immediately after a treatment, then softens as the skin heals. You may need to avoid certain products, workouts, sun exposure, swimming, and makeup in the treated area for a period of time, depending on your service and your artist’s instructions.

If you are planning around a vacation, wedding, photoshoot, or major event, schedule early enough to allow for healing and any recommended follow-up. Do not wait until the week before an event to book lip blushing, eyeliner, or brows expecting a fully healed result overnight.

It is also smart to set aside room in your budget for the parts of the experience that support your results. This may include aftercare products, future color refreshes, or maintaining complementary services such as lash fills, brow tinting, and skin treatments. Long-lasting beauty is low-maintenance compared with daily makeup, but it is not no-maintenance.

When financing may not be the right fit

Payment plans are helpful when they make an intentional purchase more manageable. They may not be the best choice if the monthly payment would strain your budget, if you are unsure about the service, or if you have not had time to review the healing requirements and consent information.

It is completely okay to wait. A consultation can help you choose your ideal treatment, understand the expected investment, and decide whether paying in full, saving first, or applying for financing feels most comfortable. Great permanent makeup should never be an impulse decision made under pressure.

For first-time clients, this slower approach can be especially reassuring. You can bring inspiration photos, discuss your preferences, ask about pigment selection and shape, and learn what your individual healing journey may look like. Confidence comes from knowing what to expect before you sit in the chair.

Choose beauty that feels good before and after your appointment

The goal of permanent makeup financing is not simply to divide a price into smaller numbers. It is to create breathing room for a service that helps you feel polished, prepared, and like yourself – whether that means effortless brows for humid Florida mornings, a naturally tinted lip, defined eyes, or a fuller-looking hairline.

Book when the treatment, timing, and payment plan all feel aligned. The most beautiful results begin with a decision you can feel confident about long after you leave the salon.

Permanent Eyeliner Healing Timeline Day by Day

Your permanent eyeliner healing timeline starts the moment you leave your appointment, and the first few days can look more dramatic than the beautifully refined result you selected. Fresh pigment often appears darker, sharper, and more defined than it will once healed. That is expected. A little patience and precise aftercare help protect your investment and allow your eyeliner to settle into the soft, polished enhancement you wanted.

Permanent eyeliner is a form of cosmetic tattooing, although many clients choose a softer, semi-permanent style such as a delicate lash enhancement or a subtle wing. Every skin type, pigment shade, and eyeliner design heals differently. Your artist’s customized instructions should always take priority, especially if you have sensitive eyes, a history of allergies, or a condition that affects healing.

The Permanent Eyeliner Healing Timeline

Day 1: Fresh, defined, and possibly puffy

Immediately after your service, the liner may look bold and more saturated than anticipated. Mild redness, tenderness, watering eyes, and swelling are common, particularly along the upper lash line. Some clients experience only slight puffiness; others notice that their eyes look more swollen the following morning.

Treat this like a quiet recovery day for your eyes. Use a clean, cool compress near the area if your artist approves it, but do not press directly on the eyeliner. Keep your hands away from your eyes, avoid touching the treated skin, and sleep with your head slightly elevated if swelling tends to bother you.

Do not judge the final color today. Fresh eyeliner is not healed eyeliner.

Days 2-3: Swelling eases and darkness remains

For most clients, visible swelling begins to settle within 24 to 72 hours. The pigment can still look very dark, and the line may appear thicker because the surrounding tissue is healing. This stage is temporary, even if you chose a thin lash line enhancement.

Your lashes should stay free of mascara, strip lashes, lash serums, and eye makeup. Contact lenses are typically best avoided for the period recommended by your artist, since inserting and removing them can introduce bacteria or cause accidental rubbing. Glasses are an easy, elegant alternative while your eyes rest.

This is also the point when lifestyle habits matter. Clearwater and Tampa Bay heat may make you want to cool off at the beach or pool, but avoid swimming, hot tubs, saunas, steam rooms, and heavy sweating while your eyeliner is healing. Chlorine, saltwater, heat, and moisture can interfere with the pigment as the skin recovers.

Days 4-7: Flaking begins – let it happen naturally

The liner may begin to feel dry or lightly itchy as it starts to flake. Small, dark particles of pigment can lift away, and the eyeliner may look patchy for a few days. It is tempting to rub at the lash line or remove a flake that seems ready to come off. Please do not. Picking can pull pigment out before it has settled and may create uneven retention.

Keep the area clean exactly as instructed and use only the aftercare product your artist has recommended, if one is included in your plan. More product is not better. Heavy ointments, oils, and unapproved skincare can over-moisturize the area or disrupt the healing process.

Avoid eye creams, retinol, exfoliating acids, facial scrubs, and active skincare near the eyes. When you wash your face, work carefully around the treated area and pat the rest of your skin dry with a clean towel. Do not let shower spray hit your eyes directly.

Days 7-14: The “where did my eyeliner go?” phase

After the flaking period, the color may appear much lighter, cooler, or less even than it did on day one. This is often called the ghosting phase. The new skin over the pigment is still healing, so the liner can look faint or seem to have disappeared in certain areas.

This part of the permanent eyeliner healing timeline can test your patience, especially if you are used to a defined daily eye look. Resist the urge to add pencil liner directly over the healing skin or assume something has gone wrong. Pigment generally becomes more visible again as the skin continues to regenerate.

You may return to your approved makeup routine only when your artist says it is safe. Replace old mascara and eye makeup when possible. Eye products are used close to a healing area, so clean tools and fresh formulas are a smart part of protecting your results.

Weeks 3-4: Color begins to return and settle

By the third or fourth week, the eyeliner usually starts to look more like itself. The color reappears, the edges soften, and the line becomes more natural against your lashes. It may still be lighter than your intended finished shade, which is why a follow-up appointment is often part of a complete permanent makeup plan.

At this stage, look for overall healing rather than perfection. Small areas can retain pigment differently due to skin type, oiliness, immune response, skincare habits, and how closely aftercare restrictions were followed. An experienced artist evaluates the healed result before deciding whether added definition, color, or symmetry refinement is needed.

Weeks 6-8: Ready for your perfection session

Most permanent eyeliner services are assessed for a touch-up around six to eight weeks after the initial appointment. By then, the skin has had time to complete its primary healing process and reveal true pigment retention. Your artist can safely refine any lighter areas, adjust the balance between the eyes, or deepen the color if that suits your original design.

A touch-up is not a sign that the first procedure failed. It is a thoughtful part of cosmetic tattooing. Eyelid skin is delicate, and building color in a controlled way supports a more beautiful, lasting result than trying to make the liner overly dark in one appointment.

What Can Affect Your Healing Time?

Healing is personal. Oily skin may retain pigment differently than dry skin, while mature or sensitive skin can need extra gentleness and time. A dramatic wing, thicker liner, or shaded effect may have a slightly more noticeable recovery period than a fine lash enhancement.

Your routine matters, too. Sun exposure, intense workouts, swimming, rubbing your eyes, sleeping face-down, and using active skincare too soon can all affect healing. Some medications, medical conditions, and immune-related factors may also change how the skin holds pigment. Share your health history honestly during your consultation so your artist can give you appropriate guidance.

If you have lash extensions, plan your appointments carefully. Lash adhesive, removal products, and the need to cleanse around the lashes can complicate aftercare. Many artists recommend scheduling extensions after the eyeliner is sufficiently healed, rather than trying to manage both services at once.

What Is Normal and What Deserves a Call?

Mild swelling, tenderness, redness, dryness, flaking, temporary unevenness, and a lighter-looking color are all common parts of healing. Your eyes can also feel tired or watery during the first day or two.

Contact your artist promptly if you have a question about aftercare or an unexpected change. Seek medical attention for signs such as worsening pain, severe swelling, spreading redness, heat in the area, thick discharge, fever, or any symptoms that concern you. A cosmetic tattoo should enhance your confidence, never leave you guessing about your wellbeing.

Protect the Result You Chose

Permanent eyeliner is designed to make your everyday routine feel lighter – whether you love a bare-faced glow, a refined lash line for humid Florida days, or a polished base for a full glam look. The healing window is brief, but it is where your result takes shape.

Give your eyes the same care you gave the decision to invest in them. Follow your artist’s instructions, book your follow-up when recommended, and let the color settle at its own pace. A few makeup-free days can lead to the effortless definition you will enjoy long after the healing phase is over.

Microneedling for Acne Scars: Real Results

Acne may be temporary, but the texture it leaves behind can make skin feel like it is holding onto an old chapter. Microneedling for acne scars is a skin-renewing treatment designed to support smoother-looking texture, soften the appearance of indented scars, and help you feel more confident bare-faced, in photos, and under your favorite makeup.

At The Permanent Makeup Studio, microneedling is approached as a personalized beauty treatment, not a one-size-fits-all appointment. Your skin, scar pattern, lifestyle, and goals all matter when building a plan that feels realistic and supports beautiful results.

Why Acne Scars Can Be So Stubborn

Not all acne scars are created equal. Some leave behind temporary discoloration, while others change the skin’s texture. Microneedling is generally intended for textural concerns, particularly depressed scars that sit below the surrounding skin.

When a breakout causes inflammation deep within the skin, it can affect the collagen and tissue beneath the surface. As the area heals, the body may not replace that support evenly. The result can be rolling scars, boxcar scars, or smaller pitted scars that catch light and make the complexion look less smooth.

Topical skincare can be wonderful for hydration, glow, and discoloration, but it cannot always reach the structural changes associated with deeper acne scarring. That is where a professional treatment that encourages the skin’s natural renewal process may be helpful.

What Microneedling Can and Cannot Treat

Microneedling may improve the appearance of mild to moderate atrophic acne scars, uneven texture, enlarged-looking pores, and fine lines. Results vary based on scar type, depth, skin health, age, and consistency with a recommended treatment plan.

It is not a quick fix for every concern. Raised scars, active acne, very deep ice-pick scars, and significant discoloration may need a different approach or a combination of professional treatments. A consultation is the best place to discuss whether microneedling aligns with your skin goals.

How Microneedling for Acne Scars Works

Microneedling uses a professional device with very fine, sterile needles to create controlled microchannels in the skin. These tiny openings trigger the body’s natural repair response and encourage the production of collagen and elastin, the proteins that help skin look firmer, smoother, and more supported.

Over time, new collagen can help improve the look of indented scars from beneath the surface. Rather than covering texture with makeup every morning, the goal is to help the skin gradually look more even on its own.

The treatment also creates an opportunity for appropriate professional serums to be applied to freshly treated skin. Your provider will select products and treatment settings based on your skin’s needs, sensitivity, and the areas being addressed.

Microneedling is a gradual process. Collagen remodeling does not happen overnight, and that is part of why a thoughtful plan matters. Many clients see a brighter, refreshed look after the skin settles, while texture improvements continue to develop in the weeks following treatment.

What Your Appointment Feels Like

A luxury skin appointment should feel informed, comfortable, and centered around you. Your provider will begin by discussing your concerns, reviewing your skin history, and preparing the treatment area. A topical numbing cream may be used to help make the experience more comfortable.

During treatment, most clients describe a light prickling or vibrating sensation. Certain areas, such as the forehead, upper lip, or bony areas of the face, may feel more sensitive. Treatment depth is adjusted with care based on the area and the condition being treated.

The appointment itself is typically straightforward, but your provider should never rush through it. Proper cleansing, sterile technique, informed consent, and clear aftercare are all part of a professional microneedling experience.

Immediately afterward, skin commonly looks pink to red, similar to a mild sunburn. You may also feel warmth, tightness, or mild sensitivity. This is expected for many clients and usually fades over the next several days, though healing time can vary.

When Will You See Results?

The honest answer is that it depends. Some clients notice a healthy glow once initial redness settles, but collagen needs time to rebuild. Most meaningful texture changes appear gradually over several weeks, with continued improvement possible as the skin completes its renewal cycle.

For acne scars, a series of treatments is often recommended rather than a single appointment. The number of sessions depends on the depth and type of scarring, as well as your desired level of improvement. Appointments are generally spaced apart to give the skin time to recover and respond.

It is also important to set an elegant, realistic expectation: microneedling can improve the appearance of acne scars, but it does not promise perfectly poreless skin. Skin is skin. The goal is smoother-looking texture, a more refined complexion, and the confidence that comes from seeing progress in the mirror.

Who Should Wait Before Booking?

Microneedling is not appropriate for everyone at every moment. If you have active inflamed acne, an open wound, a skin infection, a sunburn, or a current flare of certain skin conditions, your appointment may need to be postponed.

Be open with your provider about prescription skincare, recent cosmetic procedures, allergies, medical conditions, pregnancy, a history of cold sores, and any medication that affects healing. You may be asked to pause certain active skincare ingredients before treatment. This is not about adding unnecessary rules. It is about protecting your skin and creating the best conditions for recovery.

If you are prone to post-inflammatory hyperpigmentation, a customized approach is especially important. Florida sunshine is beautiful, but recent sun exposure and inconsistent sunscreen use can complicate healing and increase the chance of unwanted discoloration.

Aftercare That Protects Your Glow

Your post-treatment routine has a real impact on how your skin heals. For the first day, keep skin clean and avoid touching it unnecessarily. Use only the gentle products recommended by your provider, and do not apply makeup until you have been cleared to do so.

For several days, avoid heat, heavy sweating, swimming pools, hot tubs, saunas, tanning, and direct sun exposure. Skip exfoliants, retinoids, acids, scrubs, and other active products until your skin has recovered. Even if light flaking appears, resist the urge to pick or scrub.

Daily broad-spectrum sunscreen is essential after microneedling, especially in Clearwater and across the Tampa Bay area. A polished skincare routine is not about having more products on the counter. It is about using the right products consistently and giving your skin the protection it needs.

A Beautiful Plan Starts With Honest Skin Goals

Microneedling for acne scars is ideal for clients who want a professional, gradual approach to skin texture without relying on filters or heavy foundation. The best treatment plan is one that respects your skin’s history, your schedule, and the level of improvement you hope to see.

If acne scars have been affecting how you show up in photos, at work, or on makeup-free days, give yourself permission to ask questions and explore your options. Beautiful skin does not need to look edited. It should look healthy, cared for, and unmistakably yours.

Brow Lamination Aftercare Instructions That Work

A fresh brow lamination gives you that polished, brushed-up look without filling in every sparse area each morning. But the first day matters. Following the right brow lamination aftercare instructions helps the brow hairs set in their new direction, keeps them conditioned, and protects the smooth, lifted finish you came in for.

At The Permanent Makeup Studio, we want your brows to look beautiful well beyond your appointment. Here is what to do, what to skip, and how to keep your results looking soft rather than stiff.

The first 24 hours: Let your brows set

For the first 24 hours after brow lamination, keep your brows completely dry. That means no washing your face around the brow area, steamy showers, swimming, sweat-heavy workouts, saunas, or hot yoga. Moisture and steam can interrupt the setting process before the hairs have had time to settle.

Try not to touch, rub, brush aggressively, or sleep face-down on your brows during this window. It can be tempting to keep checking the shape in the mirror, especially when you love the instant lift, but your brows need a little space to hold their new direction.

If you accidentally get them wet, gently blot the area with a clean tissue. Do not scrub or try to restyle them repeatedly. One small splash does not automatically ruin your treatment, but soaking them too soon can reduce the longevity of the lift.

What to avoid for 24 to 48 hours

Brow lamination works by softening the hair structure, guiding hairs into a flattering shape, then setting them. Your brows may look sleek immediately after treatment, but they are still more vulnerable to dryness and disruption in the first couple of days.

Avoid applying brow makeup, concealer, foundation, self-tanner, facial oils, retinol, exfoliating acids, or strong skincare directly on or close to the brows for at least 24 hours. If your regular routine includes glycolic acid, salicylic acid, tretinoin, or benzoyl peroxide, give the brow area extra room. These products can be drying and may affect the condition of the hairs.

Also postpone facials, chemical peels, microneedling, waxing, threading, and facial massage around the brow area for 48 hours unless your artist gives you different guidance. Heat, friction, and active ingredients are not ideal while your brows are freshly treated.

For Florida clients, the biggest aftercare challenge is often humidity and outdoor plans. A beach day, pool party, long walk in the heat, or intense workout can wait until the next day. Giving your brows one quiet day can make a visible difference in how polished they look afterward.

How to cleanse your face after brow lamination

Once the first 24 hours have passed, you can return to cleansing your face. Use a gentle cleanser and lukewarm water, then pat dry with a clean towel. Avoid scrubbing the brow area with a washcloth, cleansing brush, or exfoliating pad.

Oil-based cleansers and heavy balms are not always off-limits, but they can leave residue that weighs brow hairs down. If your brows tend to become oily, a light, gentle cleanser is usually the better choice. The goal is clean, comfortable skin without overworking the hairs.

When removing eye makeup, take care around the brow line. Press and lift rather than rubbing back and forth. This is especially helpful if you wear full glam makeup for events, work, or weekends out in Tampa Bay.

Can you shower after brow lamination?

Yes, after 24 hours. Keep the water comfortably warm rather than very hot, and avoid directing strong shower pressure straight at your brows. Steam is most concerning during the initial setting period, so save the long, hot shower for another day.

Condition your brows without overdoing it

After lamination, brow hairs benefit from hydration. Your artist may recommend a brow conditioning serum or nourishing treatment to support softness and shine. Begin only when instructed, usually after the initial 24-hour dry period.

Use a small amount. More product does not create better brows. Too much oil or conditioner can make hairs look separated, heavy, or greasy instead of airy and lifted. Apply it lightly with a clean spoolie, brushing in the direction your artist styled.

Not every brow needs the same amount of conditioning. Naturally coarse, dry, curly, or color-treated brow hairs may appreciate regular hydration. Fine or naturally oily brows may need less. If your brows begin to look flat, reduce the amount of product and focus on gentle brushing instead.

Styling laminated brows at home

One of the best parts of brow lamination is how little makeup it requires. In the morning, brush your brows upward and slightly outward using a clean spoolie. Follow the natural arch your artist created rather than forcing every hair straight up. A soft, feathery shape usually looks more luxurious and natural than an overly vertical brow.

You may use a clear brow gel after the first 24 hours if you want extra hold, but choose a flexible formula and remove it gently at night. If you use pencil or powder, fill only where you need definition. Lamination gives the appearance of fuller brows, so a lighter hand often creates the most refined result.

Do not trim your brows at home right after lamination. The lifted position can make longer hairs look more noticeable than they did before. Wait until you can assess your natural regrowth, or let your brow artist handle shaping at your next appointment.

How long does brow lamination last?

Most brow laminations last about six to eight weeks, though results vary with your hair growth cycle, skin type, home care, and hair texture. Coarse brows may relax a little sooner, while fine hairs may hold their lifted appearance longer.

Daily habits matter too. Frequent swimming, strong skincare, exfoliation around the brow line, and heavy rubbing can shorten the life of your results. That does not mean you need to avoid your normal routine for weeks. It simply means gentle care helps your investment last.

Timing is also personal. Rebooking too early can overprocess the brow hairs, especially if they are naturally dry or fragile. Your artist can recommend the right maintenance schedule based on how your brows respond and the look you want to maintain.

Signs your brows need a little extra care

A slight change in texture during the first few days can be normal, particularly if your brow hairs are naturally coarse. However, your brows should not feel brittle, overly frizzy, or uncomfortable. If they look dry, use the conditioning product recommended by your artist and avoid adding more chemical treatments at home.

Reach out to your artist if you notice prolonged redness, itching, swelling, burning, peeling skin, or significant hair breakage. Mild, short-lived skin sensitivity can happen, but persistent irritation deserves professional guidance. Do not apply random creams, acids, or essential oils to the area in an attempt to fix it.

Brow lamination aftercare instructions for tinted brows

If your appointment included a brow tint, the same first-day rules apply, with extra attention to cleansing and exfoliation. Avoid strong cleansers and rubbing the area, as both can fade tint faster. Sun exposure, chlorine, and oil-based products may also soften the color over time.

Tint typically fades before the lamination does, so it is normal for your brows to remain lifted even as the color becomes more subtle. A tint refresh can restore definition without changing the beautiful shape of your laminated brows.

Before your next appointment

Arrive with brows free of heavy makeup whenever possible, and tell your artist about any new skincare, prescriptions, or reactions you experienced after your last visit. If you started using retinoids, acne treatments, or exfoliating products, that information helps your artist customize your service safely.

Your brows should make getting ready feel easier, not create another complicated routine. Treat them gently for the first day, keep your skincare thoughtful around the area, and let the lift do what it was designed to do: give you effortless, confidence-boosting definition from your first coffee to your last photo of the day.

Lash Lift and Tint for Effortless Everyday Eyes

Mascara can look beautiful, but it is not always practical for Gulf Coast mornings, gym sessions, pool days, or a packed calendar. A lash lift and tint gives your own lashes a polished, eye-opening curl and richer color, so you can wake up looking more refreshed without reaching for an eyelash curler or multiple coats of mascara.

This is not about changing your features or creating a look that feels too dramatic for everyday life. It is a customized beauty service designed to enhance what you already have. The right lift makes natural lashes appear longer and more visible, while the tint gives light or faded lashes the definition that mascara normally provides.

What Is a Lash Lift and Tint?

A lash lift is a professional treatment that reshapes your natural lashes from the base upward. Rather than adding fibers to each lash, your artist uses a gentle lifting system and a curved silicone shield to set your lashes into a flattering curl. The result is a more open, awake-looking eye area that still looks entirely like you.

A tint is then applied to darken the lashes, commonly in a deep black or soft black tone chosen to complement your coloring and desired finish. It can make the lighter tips of natural lashes easier to see, which is why many clients feel their lashes look fuller after the service.

Together, the treatment offers an elegant middle ground between bare lashes and lash extensions. You keep the ease of your natural lashes, but with a more finished appearance that stays in place through humidity, errands, workdays, and special plans.

Lash Lift and Tint vs. Lash Extensions

Both services can create beautiful eyes, but they serve different beauty routines. Lash extensions involve attaching individual extensions to your natural lashes for added density, length, and a more customizable level of drama. They are a wonderful choice when you want a fuller lash line or a glam, camera-ready effect, and they require regular fills as your natural lashes shed.

A lash lift and tint works only with the lashes you naturally have. There is no added length and no added volume, so the result depends on your current lash length, density, and growth pattern. If your lashes are naturally long but point straight down or are very light, a lift and tint can be especially transformative. If your lashes are short, sparse, or you want a bold strip-lash look every day, extensions may be the better fit.

Many clients choose a lift because it feels beautifully low maintenance. There is no need for fill appointments every few weeks, and once the initial 24-hour care window has passed, you can usually return to your usual skincare, workouts, and daily routine. You will still need to book future lifts as your lashes naturally cycle and grow out.

What to Expect at Your Appointment

Your appointment begins with a conversation about your goals. Do you want a soft, natural curl for everyday polish, or do you want the most noticeable lift your lashes can comfortably hold? Your artist will consider your lash length, direction, eyelid shape, and the condition of your natural lashes before selecting the appropriate shield size and treatment timing.

With your eyes closed, your lower lashes are protected and your upper lashes are carefully placed over the selected shield. The lifting and setting solutions are applied with precision, followed by the tint. The service is relaxing for many clients, and there should be no pulling, pinching, or rushing.

A professional lash artist does more than create a curl. They protect the health of your natural lashes by using the correct timing for your lash type and by avoiding an overly dramatic curl that may not suit your lashes or eye shape. Luxury results should look refined, not overprocessed.

How Long Does a Lash Lift and Tint Last?

Most lash lift results last about six to eight weeks, although timing varies because every client has a different natural lash cycle. The tint often looks richest during the first few weeks, then gradually softens as lashes shed and new lashes grow in.

Your lifestyle can influence how long the effect appears to last. Frequent exposure to sun, chlorine, saltwater, oil-based products, and heavy eye makeup removal may make the tint fade sooner. That does not mean you need to avoid beach days or your favorite skincare forever. It simply means gentle cleansing and thoughtful aftercare help preserve a fresh, polished look.

For many clients, scheduling a maintenance appointment every six to eight weeks keeps their lashes consistently lifted and defined. Your artist can recommend a timeline based on how your lashes grow and how subtle or visible you want your results to be.

Aftercare That Protects Your Results

The first day is when your lashes need the most attention. Keep them dry and avoid steam, swimming, saunas, hot yoga, and sweaty workouts for 24 hours. Skip mascara, eye makeup, lash serums, and oily products around the eyes during that time as well. This gives the lift and tint time to settle properly.

After the first 24 hours, treat your lashes gently. Cleanse around the eye area without aggressive rubbing, and avoid waterproof mascara when possible because removal can be harsh on freshly lifted lashes. If you wear mascara, choose a formula that removes easily and use a soft touch.

A clean spoolie can help you brush lashes into place in the morning. Some clients also enjoy a conditioning lash serum, but it is best to ask your artist which formulas work well with your treatment and when to begin using one. Professional aftercare is not complicated, but it does make a difference in how healthy and polished your lashes look between appointments.

Who Should Wait Before Booking?

A lash lift and tint is a popular service, but the right timing matters. If you have an active eye infection, irritation, sunburn near the eyes, recent eye surgery, or a known sensitivity to lash treatment products, postpone your appointment and speak with an appropriate medical professional if needed.

Pregnancy, hormonal changes, medications, and certain skin or eye conditions can also affect how a lift takes or how long it lasts. Results are never one-size-fits-all. Be open with your artist about allergies, recent procedures, lash growth products, and any concerns so your treatment can be tailored with care.

If you are new to lash services or have especially sensitive eyes, a patch test may be a smart choice. It is a simple extra step that supports a more confident appointment experience.

Getting the Most Beautiful, Natural Result

Come to your appointment with clean lashes and no eye makeup, mascara, or strip-lash adhesive. Avoid curling your lashes right before your visit, and let your artist know if you recently used waterproof mascara or a strong eye makeup remover. These details help the treatment process work as intended.

The most flattering lash lift is not always the tightest curl. A gentle, balanced lift can make the eyes look brighter and more lifted while keeping the lash line soft and sophisticated. Your artist should guide the design, but your preferences matter. Bring up whether you normally wear glasses, love a minimal makeup look, or want extra definition for an upcoming vacation, wedding, or event.

At The Permanent Makeup Studio, lash services are approached as part of your full beauty picture. A lifted, tinted lash can pair beautifully with shaped brows, a fresh spray tan, or the confidence of knowing your everyday look is already polished before you leave home.

When your schedule is full and Florida humidity is doing the most, small beauty details can carry a lot of confidence. Choose a lash look that feels comfortable, suits your natural features, and lets your eyes make an impression without asking for extra time every morning.

Scar Camouflage Tattoo Treatment Explained

A scar can hold more attention than you want it to – especially when it sits somewhere visible in a swimsuit, sleeveless dress, workout set, or everyday mirror glance. Scar camouflage tattoo treatment is a specialized form of paramedical pigmentation designed to soften the contrast between a healed scar and the surrounding skin. It does not erase a scar or change its texture, but thoughtful color work can make it far less noticeable and help you feel more at ease in your skin.

What scar camouflage tattoo treatment can do

Scar camouflage uses custom-blended pigment to visually match the skin around a scar. An artist implants that pigment carefully into the scar tissue, layering color over one or more sessions to reduce the difference in tone. The goal is refinement, not a one-size-fits-all cover-up. Every scar has its own color, shape, depth, and response to pigment.

This treatment is often considered for scars from surgery, injuries, burns, breast procedures, tummy tucks, C-sections, body contouring, or other fully healed procedures. It may also help some stretch marks when the surrounding skin and tissue are appropriate for treatment. For many clients, the benefit is practical as well as emotional: less time covering an area with makeup, less hesitation at the beach, and more freedom to wear what feels like you.

The realistic expectation matters. Pigment can reduce visual contrast, but it cannot flatten raised tissue, fill an indentation, remove a scar line, or restore skin to its exact pre-scar appearance. A beautifully performed treatment aims for a softer, more blended result that looks natural at a normal conversational distance.

Is your scar ready for camouflage?

Timing is one of the most important parts of a successful result. Scars should be fully healed, stable, and typically at least 12 months old before they are evaluated for camouflage. Some scars need longer, especially after major surgery, a burn, or a procedure with prolonged healing. Fresh scars are still changing in color and structure, which makes pigment selection unpredictable.

A suitable scar is usually flat or mostly flat, no longer red or inflamed, and similar in temperature and sensitivity to the surrounding skin. It should not be actively itchy, painful, open, or changing. Mature scars often appear pale, white, or lighter than nearby skin, though some may retain darker discoloration.

Raised, thick, or keloid scars require extra caution and may not be candidates for tattooing. The same is true for scars with an active skin condition, infection, unexplained irritation, or a history of poor healing. If there is any question about medical readiness, your physician or surgeon should be part of the conversation before booking.

A consultation should be personal, not rushed

A quality consultation is where the artistry begins. Your artist should assess the scar’s age, texture, color, placement, and size, along with your natural skin tone and undertone. They should also ask about your health history, medications, prior tattooing, sun exposure, and any history of hypertrophic or keloid scarring.

This is also the right time to discuss expectations. A pale scar on medium or deep skin, for example, may need a different strategy than a light scar on fair skin. Areas that tan frequently can be more challenging because your natural skin color changes throughout the year. A conservative plan, patch test when appropriate, and planned follow-up session are signs of a careful treatment approach.

Why color matching is the true art

Choosing a pigment that looks close in the bottle is not enough. Skin has warmth, coolness, translucency, and subtle shifts that vary across the body. The artist must account for the scar’s lack of melanin, the surrounding skin’s undertone, and the way pigment may heal after the skin recovers.

Scar tissue can retain pigment differently from healthy skin. One section may hold color beautifully while another needs additional layering. This is why a single session can be enough for a small, responsive area, while larger or more complex scars may need two or more appointments. It is not a flaw in the process – it is the nature of working with altered tissue.

Season also plays a role in color planning. If you are very tan during a Florida summer but much lighter in winter, a match created at your deepest tan may not look as blended year-round. Many clients get the most versatile result by matching their more natural, untanned skin tone. Your artist can help you decide which match best suits your lifestyle.

What happens during the appointment

Your appointment begins with a review of your treatment plan and the area being worked on. The skin is cleansed and prepared, and a custom pigment blend is created. Depending on the scar and your sensitivity, a topical numbing option may be discussed. Most clients describe the sensation as manageable, though scar tissue can feel different from one area to another.

The pigment is placed with controlled, light passes rather than heavy saturation. This protects the integrity of the tissue and allows the artist to watch how the skin responds. The appointment length depends on the size and complexity of the area. A small surgical scar may be relatively quick, while a larger area may require a longer session or a series of appointments.

Immediately afterward, the color may appear stronger or warmer than the final healed result. Mild redness, tenderness, or swelling can occur. That initial appearance is not the finished color. As the skin heals, pigment settles and the area becomes more natural-looking.

Healing and aftercare protect your investment

Aftercare is not an optional extra. The way you care for the area affects comfort, healing, and pigment retention. Your artist will provide instructions tailored to the treatment area and your skin, but the general focus is simple: keep the area clean, avoid friction, and let the skin heal without picking or exfoliating.

For the first stage of healing, you may need to avoid soaking in pools, hot tubs, baths, and the ocean. Skip saunas, intense sweating, and direct sun exposure until you are cleared. Tight clothing, harsh body products, scrubs, retinoids, and self-tanner can also interfere with recovery. If the area flakes or peels, resist the urge to help it along. Let it shed naturally.

Once healed, daily sun protection is especially valuable. UV exposure can change the appearance of both your natural skin and the pigment over time, making a previously close match look less balanced. A high-quality SPF and thoughtful sun habits help preserve your result.

How long does scar camouflage last?

Scar camouflage is often described as long-lasting, but it is not completely maintenance-free. Pigment may soften over time due to sun exposure, skincare products, skin turnover, lifestyle, and the unique behavior of scar tissue. A touch-up can refresh the blend when needed.

How long a result lasts depends on the area treated and how your skin retains pigment. No ethical artist should promise that every scar will hold color identically or that camouflage will be invisible in every lighting situation. The better promise is a personalized treatment plan, honest guidance, and artistry focused on making the scar less of the first thing you see.

When camouflage may not be the first step

If a scar is deeply indented, raised, tight, red, or uneven in texture, you may benefit from a different approach before pigmentation. Medical scar management, microneedling, laser treatments, silicone therapy, steroid injections, or a surgeon’s recommendation may be more appropriate depending on the concern. Camouflage works best when it is chosen for the right reason: correcting color contrast on healthy, stable tissue.

It is also wise to postpone treatment if you are pregnant or nursing, currently healing from surgery, taking medications that affect healing, or experiencing an active skin flare-up. Full disclosure during your consultation helps protect both your safety and your outcome.

A scar is part of your story, but it does not have to define how you feel when you get dressed, step into the sun, or see yourself up close. At The Permanent Makeup Studio, scar camouflage is approached with the same care, customization, and confidence-building artistry as every luxury beauty service – because feeling comfortable in your skin is always worth a thoughtful plan.